

I put this post together because I want your backyard to feel alive and practical. Fresh vegetables, herbs, and flowers should be easy to reach and easy on the eyes. When a space is laid out well, gardening feels calmer, not overwhelming. A good plan turns guesswork into a simple map you can follow.
If you’re a busy homeowner, a beginner gardener, or someone who loves a pretty, productive yard, this one is for you. If you care about water-wise choices, soil health, and easy harvests, you’ll find ideas that fit your life. You’ll see layouts that work in small spaces and larger yards alike.
Think of 30 layout designs you can mix and match. From raised beds and square-foot grids to curved borders and herb spirals, these ideas cover many styles and climates. I talk about sun and shade, how to place paths for easy reach, and how to group plants to save water and boost yields. You’ll also see tips for adding mulch, drip irrigation, and simple trellises.
What you’ll get goes beyond looks. You’ll learn how to choose a layout that matches your space, climate, and how you use your garden. You’ll gain a practical plan you can start this weekend. Think steps like measure your area, mark sun spots, pick a bed type, and draft a rough map before buying soil or wood. You’ll find ideas that reduce maintenance and improve soil health.
Of course not every design fits every yard. Some layouts may need more water in hot summers or more trellis work for climbing plants. That’s okay—these designs are a toolbox, not a rulebook. You can start with one simple layout and expand as you learn what plants thrive in your soil and sun.
Ready to transform your backyard? Grab a cup of tea, measure your space, and picture your first harvest. This collection gives you real, doable options that look great, keep things organized, and help you grow more of what you love. Let’s find the perfect vegetable garden layout for your space and start turning your yard into a garden you’re proud of.
Contents
- 1. Raised Bed Paradise
- 2. Vertical Vegetable Garden
- 3. Circular Garden Design
- 4. Kitchen Garden with Herbs
- 5. Square Foot Gardening
- 6. Spiral Garden Design
- 7. Companion Planting Layout
- 8. Edible Landscaping
- 9. Container Gardening
- 10. Community Garden Layout
- 11. Pollinator Garden
- 12. Zen Vegetable Garden
- 13. Cottage Garden Blend
- 14. Fruit Orchard Garden
- 15. Wildlife Friendly Garden
- 16. Tiered Garden Layout
- 17. Four-Season Garden Layout
- 18. Shade Garden Layout
- 19. Minimalist Garden Design
- 20. Rustic Farmhouse Garden
- 21. Urban Garden Design
- 22. Hydroponic Garden Layout
- 23. Artistic Garden Design
- 24. Naturalistic Garden Design
- 25. Fantasy Garden Design
- 26. Therapeutic Garden Design
- 27. Water-Wise Garden Layout
- 28. Community Education Garden
- 29. Therapeutic Community Garden
- 30. Seasonal Harvest Garden
1. Raised Bed Paradise
Are you frustrated with soil that won’t drain, beds you can’t reach, and plants that seem to stall no matter what you do? Raised beds can change all that. They create clear, easy-to-care-for spaces and help you grow more with less effort.
Raised beds are frames filled with good soil. They can be built from wood, stone, brick, or even repurposed materials. They drain better than a flat bed and warm up earlier in spring, giving you a longer growing season. That means healthier roots and tastier vegetables.
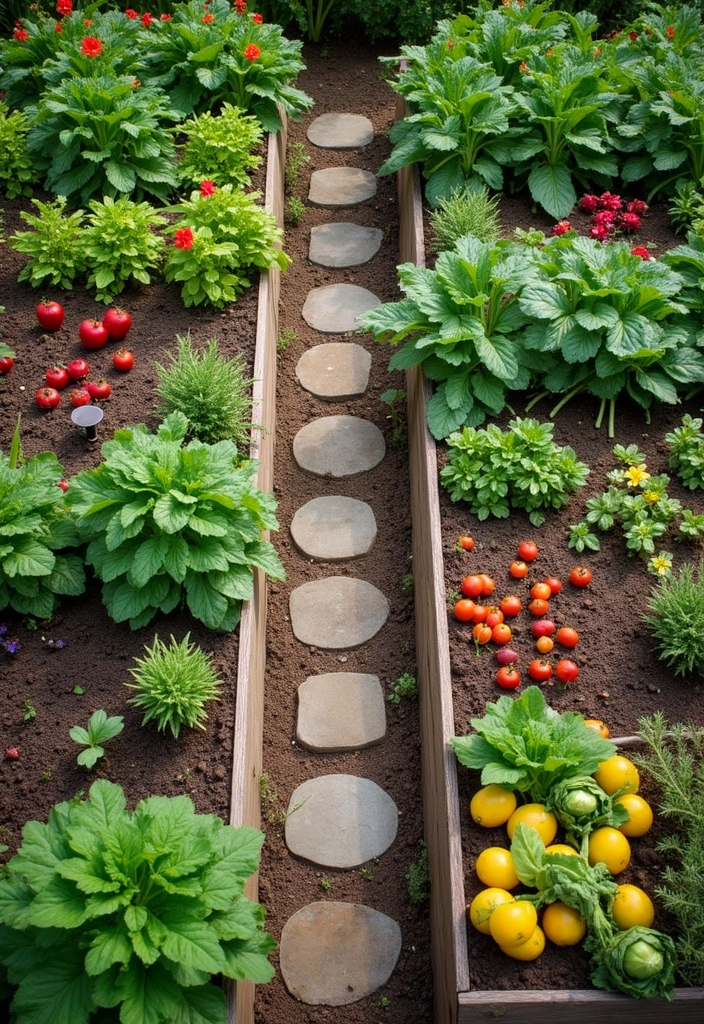
To design a welcoming garden, group several beds together and add paths between them. Use gravel, mulch, or flat stepping stones so your feet stay clean and the soil stays undisturbed. Keep the paths wide enough for a wheelbarrow or a small cart.
Think about sun and wind. Place tall crops on the north side and shorter ones on the south. For example, position tomatoes or peppers up high and lettuce, radishes, or carrots lower down. This setup helps every plant get enough light without shading its neighbors.
A border of flowers or herbs around the edges adds color and function. Choose plants that attract pollinators or repel pests, like marigolds, sages, or basil. They can improve yields while making your bed look tidy.
Raised beds fit any yard. You can scale them up for a large backyard or shrink them for a compact patio garden. You can also adjust the height to suit your back and knees, so you don’t have to bend as much.
– Benefits of raised beds: Better soil control, easier access, and less back strain.
– Design tip: Use wood, stone, or composite materials for a clean, lasting look.
– Planting idea: Mix vegetables with companion flowers to deter pests naturally.
Getting started is simple. Pick a rough size, then build a frame to your space. Fill with a soil mix of good topsoil, compost, and a pinch of sand for drainage. Mulch between plants to cut weeds and keep moisture steady. A light drip irrigation line can water evenly without wetting leaves. With a little planning, raised beds become an easy, reliable way to grow more food in any yard.
1. Raised Bed Paradise
Editor’s Choice

Land Guard Galvanized Raised Garden Bed Kit, Galvanized Planter Garden B…

Back to the Roots 25.7qt (1 Cubic ft) Organic Premium Mulch

Rain Bird DRIPKITBAG Drip Irrigation Repair and Expansion Kit
2. Vertical Vegetable Garden

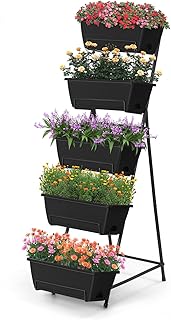
Voice your need for more growing space, and I’ll show you a clean fix. A vertical vegetable garden uses walls, fences, and tall shelves to grow up, not out. It’s ideal for small backyards or sunny patios. You get more harvest without crowding the ground.
How to set it up is simple. Mount planters on a wall, lean a sturdy trellis, or stack durable shelves. Make sure each level has a way for water to drain and air to move. Use lightweight, sturdy containers so you can reach every plant without straining your back.
Key plants for vertical gardens:
– Choose compact cucumber varieties that climb a trellis and stay easy to manage.
– Grow determinate or bush tomatoes on a strong vertical support.
– Plant peas or pole beans on a tall frame for quick, tasty picks.
– Add herbs in wall pots for quick, fresh flavor at your fingertips.
Strong sun and smart layout matter. Place your vertical garden where it can receive about 6–8 hours of sun daily. Space your pots so leaves don’t shade each other too much. Use good drainage material and light potting mix. Keep the base dry and the tops moist for a healthy balance.
Caring for a vertical garden:
– Check plants for pests regularly and swish away any bugs with water or a gentle spray.
– Keep an eye on sunlight gaps. If a plant looks pale, tilt the planter or adjust its spot.
– Water in the morning, not the heat of midday, to reduce evaporation.
Layout ideas that boost both beauty and yield. Layer your planting boxes so you can harvest from different heights. Use wall-mounted planters at eye level for easy snipping. Put pots in colors you love to make a vibrant green wall.
Design and sustainability tips:
– Build with recycled materials or pallets to tell an eco-friendly story.
– Add fairy lights or small solar lamps to make the space feel magical after dark.
– Mix in decorative pots that coordinate with your house color and garden theme.
This approach gives you a practical, space-saving garden that’s fun to grow and easy to maintain. You’ll see fresh herbs within reach, and climbing veggies climbing toward a greener yard. Start small, upgrade gradually, and watch the vertical garden transform your outdoor space.
2. Vertical Vegetable Garden
Editor’s Choice
5 Tier Vertical Raised Garden Bed Planter Box, Vertical Raised Bed with …

Garden Obelisk Trellis for Climbing Plants Outdoor 6 Ft Rose Bush Round …

Back to the Roots 100% Organic Indoor Potting Mix (6 Quart), Promotes He…
3. Circular Garden Design
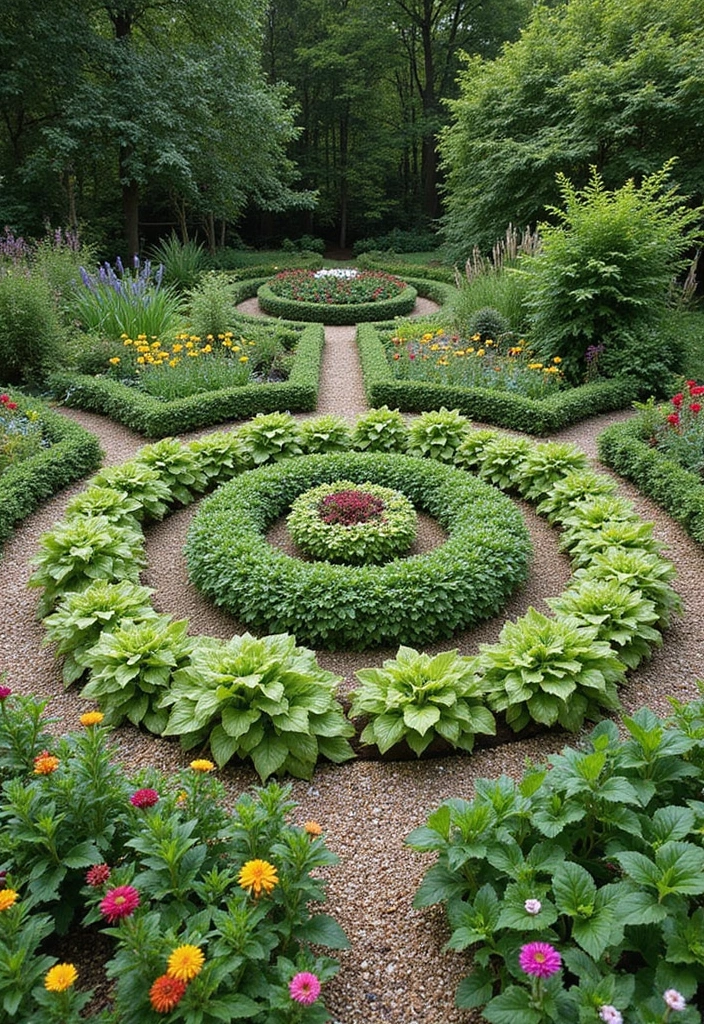
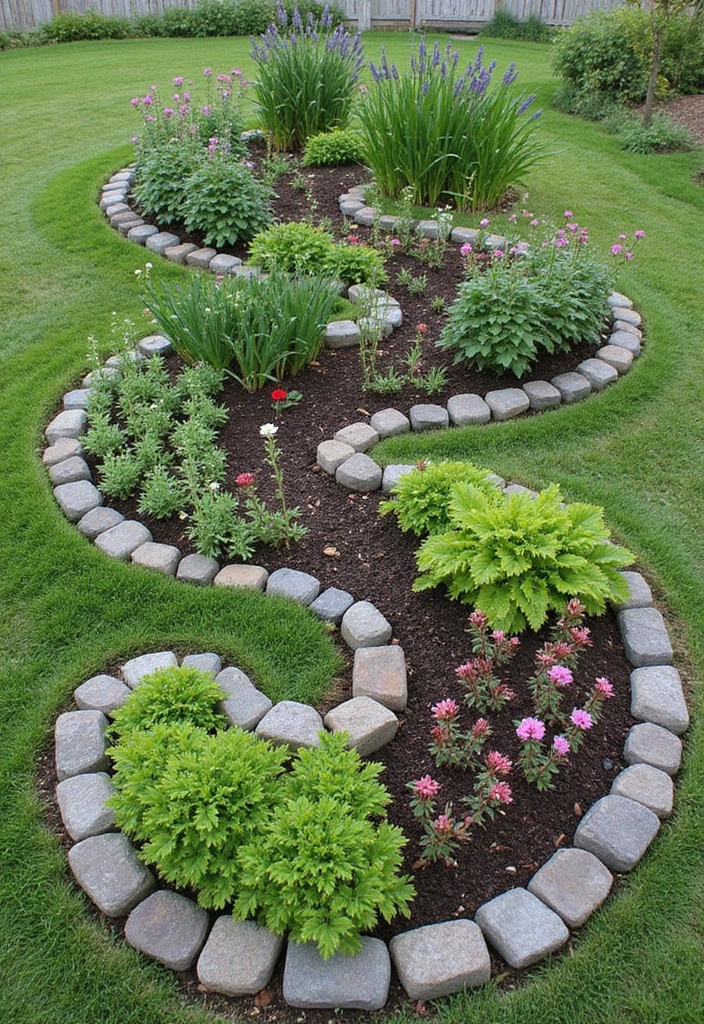
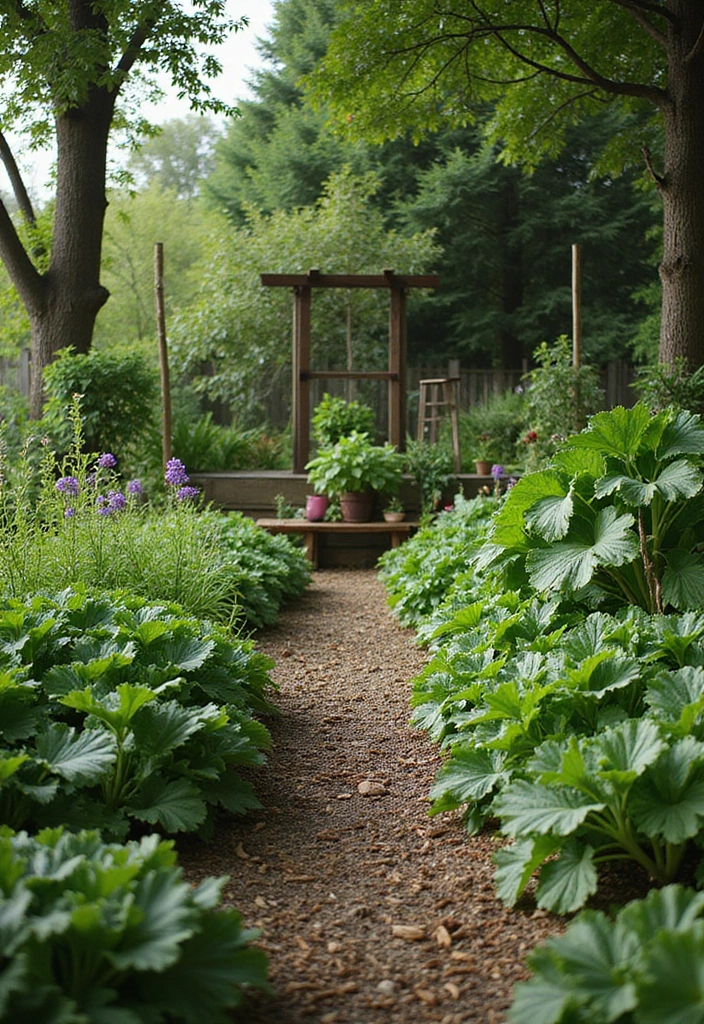
If you want a garden that looks great and serves your family, a circular design could be just what you need. A round bed feels welcoming in any yard and makes the most of your space. It keeps plants easy to reach without stepping on soil, which helps prevent soil compaction and weak plants. A circular layout also shines as a focal point when you pair it with colorful flowers or tidy borders. You get beauty and work that fits the way you move in your yard.
A circular garden uses concentric rings that wrap into a smooth circle. You walk a continuous path to reach each bed, so you don’t waste steps or strain your back. The center can host tall crops that rise above others, while the outer rings stay friendlier for smaller plants. Pick a sunlit spot with good drainage, and you’ll set up a space that shows off your plants without crowding them. This layout works well in many yards, from small patios to roomy backyards, and it adapts to different styles.
– Planting suggestion: Place taller plants at the center, such as sunflowers or corn, and arrange shorter crops like radishes and herbs on the outer edges. This creates a natural height progression that is easy to manage.
– Design tip: Create a small seating area in the middle. It gives you a peaceful spot to rest, watch pollinators, and tune in to how your plants are doing.
– Path and ring layout: Use clear, defined paths between each ring. This keeps soil intact and makes weeding and harvesting easier.
– Path materials: Choose stepping stones, gravel, or brick that drain well and match your yard style. A neat path makes you want to spend more time tending the beds.
– Maintenance idea: Install a simple drip irrigation around the rings or run a soaker hose under mulch. Mulch helps keep soil moist and cuts down on weeds.
– Companion planting benefit: Group plants that help each other side by side. Flowers near veggies attract beneficial insects and boost pollination.
– Limitations and practical notes: Circular layouts need careful planning and enough space to breathe. They work best where you can set out the rings with clear sun and easy access for maintenance.
With thoughtful planning, a circular vegetable garden becomes a living sculpture that grows food and smiles back at you. It’s not a magic trick, but the result is a yard that’s easy to care for and a joy to visit.
3. Circular Garden Design
Editor’s Choice

3 Pack Sunflower Stepping Stone, 10 Inch Decorative Garden Step Stone fo…

230FT Drip Irrigation System for Garden with 40 Nozzles & Emitters, Gard…

GardenStraw, 3 cu ft (20 lbs) Pack of 1 – All-Natural Mulch for Gardens,…
4. Kitchen Garden with Herbs

You want fresh herbs ready when you cook, not a weekly hunt for a few sprigs. A kitchen garden with herbs makes that simple. It combines tasty greens with fragrant scents and a dash of color in one easy spot.
This layout is small enough for a backyard, yet big enough to feel useful. You mix a few vegetables with easy-care herbs so your meals have flavor at hand. Place the herb section close to the house or kitchen door. That way you can snip parsley, basil, or thyme while you stand at the counter. A nearby herb bed saves trips to the far end of the yard and keeps you cooking more often.
The look should be tidy and inviting. Color from basil green, rosemary gray, and cilantro brightens the space. Herbs spill over decorative pots, raised beds, or neat in-ground rows. A soft path between beds helps you walk through to harvest and prune without stepping on plants. You want a layout that feels like a small kitchen in the yard—functional and pretty at the same time.
– Herb pairing for stronger growth: plant rosemary with carrots to keep pests away; basil with tomatoes for richer flavor and healthier fruit.
– Design tip: use colorful pots and reclaimed kitchen items as planters. A vintage teapot or copper bucket adds charm without a big price tag.
– Maintenance suggestion: harvest herbs often. Regular clipping makes plants stay green and tender, not woody. Pinch tips to encourage new growth and keep flavors bright.
What to plant and where
– Choose a mix of herbs that cook with your favorites: basil, cilantro, parsley, thyme, rosemary, chives, and mint. If you’re unsure, start with three to five that you use most.
– Add a few easy vegetables nearby, like lettuce, cherry tomatoes, or peppers. They complement herbs and fill the space quickly.
– Think about sun and water. Most herbs love sun for at least six hours, and you’ll water when the soil feels dry to the touch.
How to set it up this weekend
1) Map a small, sunny corner near the kitchen.
2) Build a low herb bed or place sturdy pots at knee height.
3) Fill with light, rich soil and a splash of compost.
4) Plant your selections, labeling each one.
5) Keep a small trimming schedule and harvest every few days.
With this layout, fresh flavors stay nearby. Your cooking becomes faster, more vibrant, and a little more fun.
4. Kitchen Garden with Herbs
Editor’s Choice

9 Herb Indoor Garden Kit – Unique Kitchen Gift for Women, Men, Mom, Frie…

Gepege 6 Inch Beaded Ceramic Planter Set of 2 with Drainage Hole and Sau…
Land Guard Galvanized Raised Garden Bed Kit, Galvanized Planter Garden B…
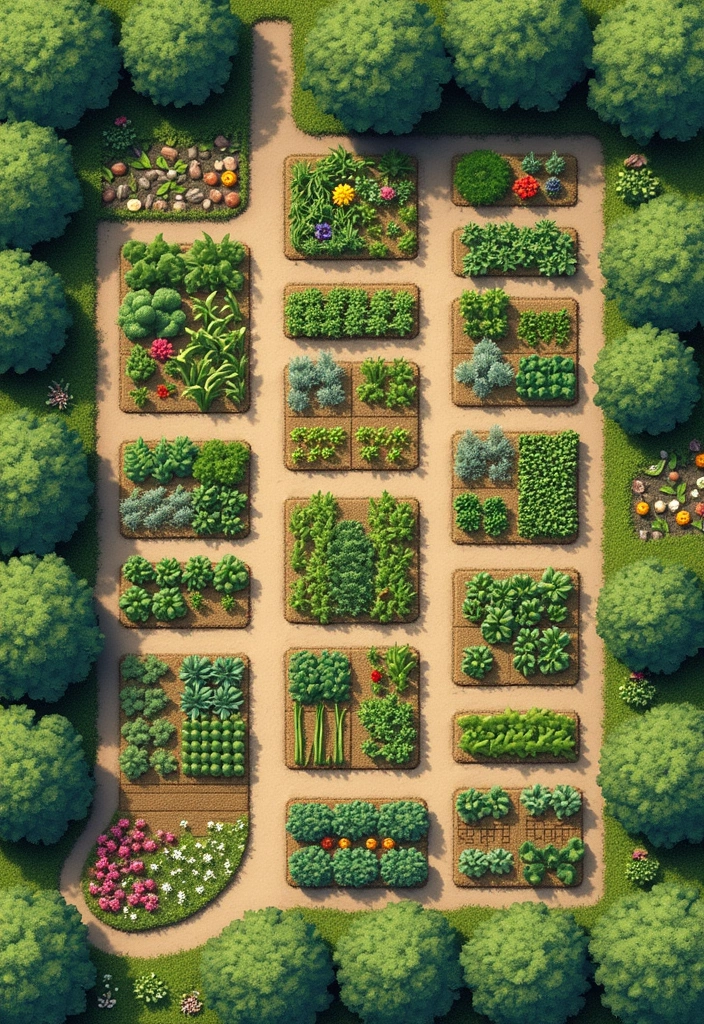
5. Square Foot Gardening
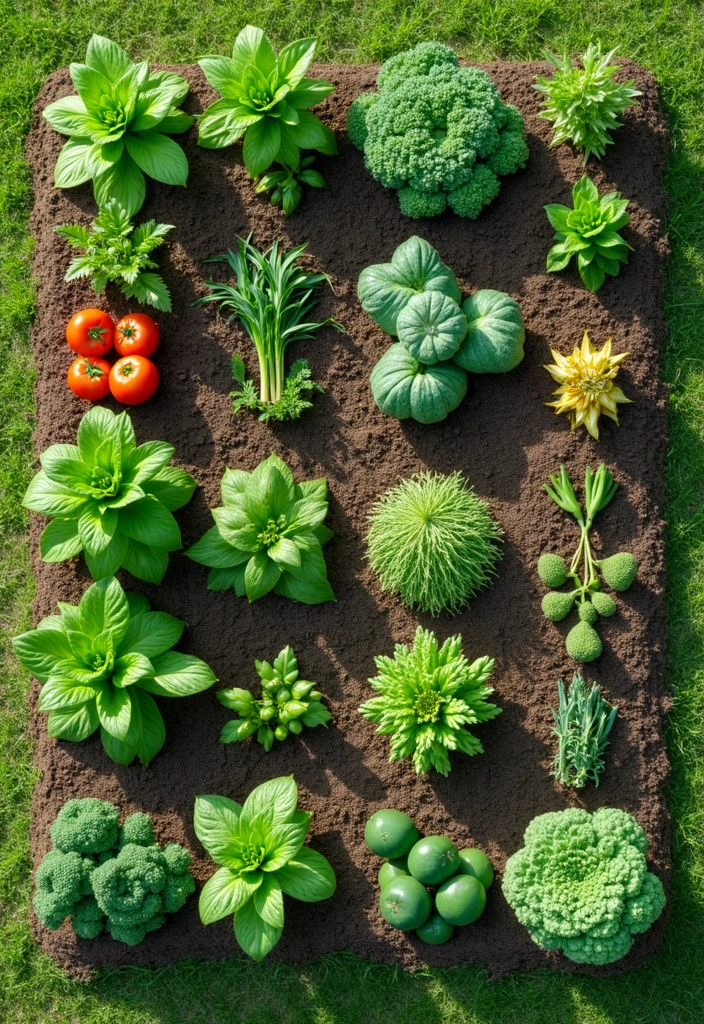
Square foot gardening helps you grow more in a small space. You cut the bed into 1-foot squares. Each square can hold a different plant. Raised beds or a grid marked on the ground both work. This setup makes planting, spacing, and harvesting simple. It fits beginners and people with limited mobility. Plus, it adds color and variety to your yard.
– Step 1: Pick a sunny spot that gets about 6 to 8 hours of sun each day.
– Step 2: Build a bed about 4 by 4 feet, or another small, reachable size. Stay within arm’s reach from all sides.
– Step 3: Create the grid using twine, string, or wood slats. Keep each square exactly 12 inches wide.
– Step 4: Fill the bed with a light, rich mix. A common blend is compost, coconut coir, and a little sand for drainage. The soil should drain well but still hold moisture.
– Step 5: Plan your crops with a planting chart. This shows how many plants fit per square. For example, you might place one tomato plant in a square or four radishes in one square.
– Step 6: Plant by season. Start with quick growers like lettuce and spinach, then add slower crops as space opens up.
Design tip: Make the grid look neat and fun. Use twine or thin wooden sticks for the lines. Color the labels or paint the edges to see squares from a distance.
Maintenance note: Water evenly and keep the soil moist, not soggy. A drip line or soaker hose works well in this setup. Mulch the surface to cut weeds and hold moisture. Check each square for weeds during regular watering. Rotate crops yearly so the soil stays healthy and pests stay away.
Thinking through what you grow helps you plan smart. This method saves space, lowers weed trouble, and makes harvests quick and satisfying. Start small this weekend: measure a patch, collect soil mix, and mark your grid. Your first harvest could come sooner than you think.
5. Square Foot Gardening
Editor’s Choice
Land Guard Galvanized Raised Garden Bed Kit, Galvanized Planter Garden B…

Back to the Roots 100% Organic Potting Mix (Value 12 Quart) | Premium Bl…

VEVOR Ground Grid 27 ftx4 ft, 1885 lbs per Sq Ft Load Geo Grid, 2″ Depth…
6. Spiral Garden Design
A spiral garden helps you get a bold look and more growing space in a small yard. It blends style with smart growing. You build a curved bed using stones, bricks, or paver edges. Start at the center and curl the bed outward in a smooth coil. The center is higher than the edge, so plants sit on different levels. Tall plants go near the center; shorter ones fill the outer rings. This height stack creates tiny rooms for each plant.
The design works in several ways. Different heights give each plant its own microclimate. Water runs down the spiral, so you need less daily care. The inner warm spots are good for sun lovers; outer spots stay a bit cooler and drier. You can fit a lot more into a small footprint without crowding.
Plus, the spiral looks great. It becomes a conversation piece in your backyard. You can tuck herbs at the top for easy cooking. The scent rises as you pass, making the space feel alive.
– Design setup: Use sturdy stones or bricks. Build a compact, even spiral with a gentle slope. Consider a uniform color for a clean look or mix textures for character.
– Planting plan: Place tall plants at the center (sunflowers, tall oregano, or ornamental grasses). Put medium-height veg in the middle rings (lettuce, kale, peppers). Grow low herbs and flowers on the outer rim (basil, thyme, nasturtium, marigold). Reserve the top edge for quick-access herbs you grab while cooking.
– Watering and care: Install a small drip system at the top. It feeds down the spiral, keeping soil evenly moist. Check for weeds and pests on a regular basis. Add a light mulch to reduce evaporation and hold moisture.
– Plant selection tips: Choose a mix of edible and beneficial flowers. Flowers like marigold invite beneficial insects. Pollinators love sun-loving herbs and blooms. Rotate plant groups so soils don’t get tired.
– Maintenance reminders: Keep the path clean and the edging intact. Refill mulch as needed. Watch for soil gaps that let weeds creep in.
This approach works in many climates. It’s not a magic fix for every yard, but it gives you a strong layout that saves space and boosts yields. Ready to sketch your spiral bed? Start with a simple plan, map the center plants, and lay out the outer rings.
Transform your small yard with a spiral garden design: it’s not just about growing vegetables, it’s about creating beautiful, layered spaces that inspire and delight!
6. Spiral Garden Design
Editor’s Choice

Beuta Landscape Edging | Garden Edging Border | Faux Stone Bricks for La…
230FT Drip Irrigation System for Garden with 40 Nozzles & Emitters, Gard…
Back to the Roots 25.7qt (1 Cubic ft) Organic Premium Mulch
7. Companion Planting Layout

If you want healthier vegetables with less pest trouble, companion planting helps. This plan pairs plants that support each other in small, natural ways. You get stronger plants, fewer pests, and richer soil.
Planning works best when you map it out. A simple companion chart shows where each crop goes and which partners fit together. Put flowers among your vegetables to lure helpful insects and break up pest scenes. The result is a garden that looks alive and smells fresh.
How to design your layout:
– Make a basic companion planting chart on paper or in a note. Mark every bed and note good pairings.
– Choose pairs that share space, water, or nutrients. Put strong friends near each other.
– Add flowering partners. Color and scent attract bees and hoverflies that chase pests.
– Leave air space. Good airflow helps plants stay healthy.
– Use vertical space. Trellises or cages lift climbers up so you save ground.
Practical pairing ideas:
– Tomatoes and marigolds. Marigolds help deter pests; keep a basil plant nearby to aid flavor and add another layer of protection.
– Cucumbers and beans. Beans fix nitrogen and help soil, while cucumbers enjoy the shade from leafy beans.
– Beans and squash. Squash shades the soil and slows weeds; beans add nitrogen that feeds both.
– Carrots and onions. Onions help repel carrot flies; carrots loosen soil for easier rooting.
– Lettuce and radishes. Radishes break up the bed early, giving lettuce room to grow.
Design and maintenance tips:
– Plan trellises for climbing plants to save space and add vertical interest.
– Watch growth closely and adjust if a pair starts fighting for nutrients or space.
– Rotate crops each season to keep soil healthy and reduce pests.
This layout adds function with color and scent. It gives you a garden that works with itself, not against it. A simple chart helps you plan now so you can enjoy a steadier harvest later.
7. Companion Planting Layout
Editor’s Choice

Vegetable Companion Planting Guide Poster Garden Poster Vegetable Variet…

RUBFAC 94″ Metal Garden Arch Trellis for Climbing Plants Outdoor, Garden…

Mighty Mint Gallon (128 oz) Insect and Pest Repellent Peppermint Oil – N…
8. Edible Landscaping
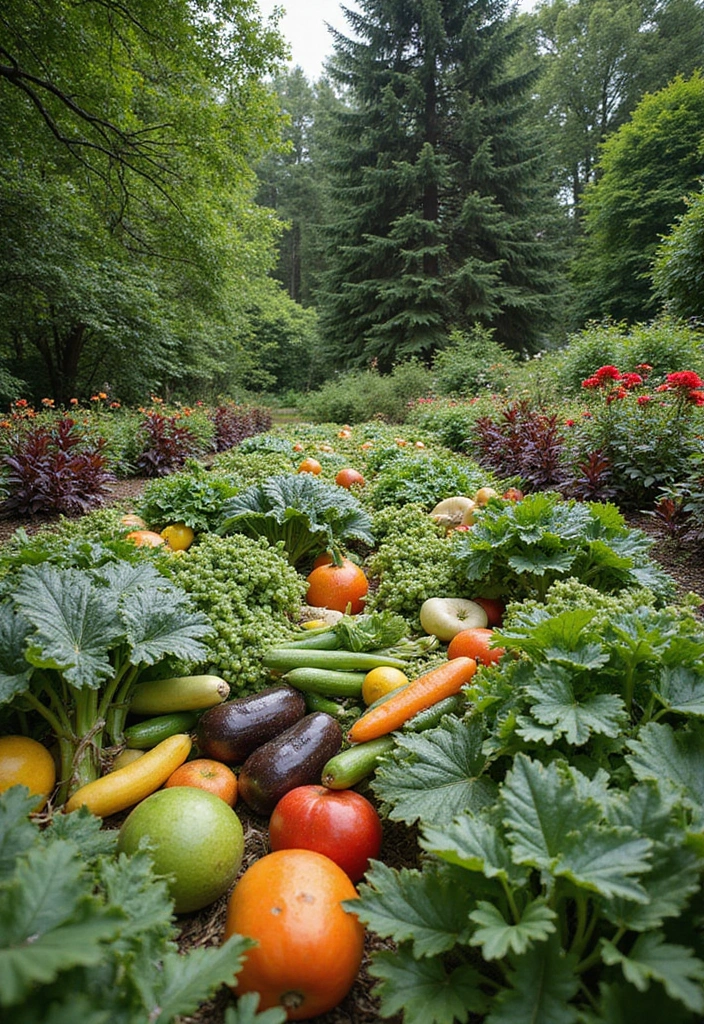
Edible landscaping lets you enjoy a yard that looks beautiful and feeds you. You don’t have to pick beauty over usefulness. You can mix food and flair in the same space.
What edible landscaping is
This approach blends fruits, vegetables, and herbs with your existing plants. It makes the garden feel like a natural part of your home, not a separate patch. You see color, texture, and scent, along with items you can harvest.
Practical layouts that work
– Berry borders: Plant berries along a fence or path to create a living edge that also gives fruit.
– Herb borders: Border beds with edible herbs like thyme, chives, and oregano for scent and flavor.
– Climbing accents: Set up a trellis for beans or cucumbers beside seating to save space.
– Mixed borders: Pair flowers with leafy greens for a space that pleases eyes and palate.
– Raised beds and planters: Build raised beds for neat, accessible growing spots on patios or uneven ground.
– Edible groundcovers: Plant creeping strawberries or thyme between stones to fill gaps and curb weeds.
Design tips
– Height and texture create depth in the plan. A tall shrub with low herbs makes a natural focal point.
– Colors match the season. Yellows and purples pop in spring and fall.
– Mulch and compost feed soil. Healthy soil helps beauty and harvest.
– Smart irrigation helps a lot. A drip system saves water and keeps roots happy.
– Keep paths clear. Walkways should invite you to sample and stroll.
Maintenance and harvesting
– Plan for seasonal color shifts as plants grow.
– Prune, trim, and tidy edges regularly.
– Harvest fruits and vegetables often to encourage more production.
Benefits at a glance
– Edible landscaping boosts biodiversity and supports pollinators.
– It lowers food costs and adds practical food sources.
– The look stays inviting, and neighbors often strike up conversations about the garden.
Ready to start?
– Pick one small corner and test a few edible ideas this season.
– You’ll see how food and beauty can grow together.
8. Edible Landscaping
Editor’s Choice

Land Guard 8×4×2 ft Galvanized Raised Garden Bed Kit, Galvanized Planter…

RUBFAC 94″ Metal Garden Arch Trellis for Climbing Plants Outdoor, Garden…
Rain Bird DRIPKITBAG Drip Irrigation Repair and Expansion Kit
9. Container Gardening

Container gardening helps you grow fresh vegetables in small spaces. It fits on a patio, balcony, or narrow yard. You control soil, drainage, and sun for every pot. You can move pots to chase sun or shield plants from wind. This method blends practicality with style.
Benefits of Container Gardening
Container growing keeps your garden flexible. You can place it where you want it. You get better soil control in each pot. You can change crops quickly with the season. You see results fast, even if space is tight.
What you need
– Containers: choose pots, planters, hanging baskets, or vertical pockets with drainage holes. Each pot should be large enough for the plant’s roots.
– Soil: use a high-quality potting mix with compost. It stays light and drains well.
– Sun and water: know your sun hours and plan a watering routine.
– Tools: a small trowel, a watering can, and a tray to catch drips.
Choosing crops and placements
– Build deep containers for root veggies like carrots and beets. They need room for roots.
– Plant herbs in small to medium pots for quick harvests.
– Greens such as lettuce and spinach do well in mid-size pots.
– Beans and tomatoes need larger pots and a stake or trellis.
– For hanging baskets, choose compact herbs or cherry tomatoes.
Design ideas
– Mix sizes and colors for a lively display.
– Use a tiered stand so herbs are easy to reach.
– Add wall planters or a vertical system to save floor space.
– Choose pots that complement your outdoor style for a cohesive look.
Planting tips
– Fill pots to about one inch below the rim to leave space for watering.
– Add slow-release fertilizer in the soil and feed every few weeks.
– Plant seeds or transplants at the right depth and water gently after planting.
Maintenance and care
– Check soil moisture daily in warm weather. Containers dry out faster than ground beds.
– Mulch the soil surface to cut evaporation and keep roots cool.
– Look for signs of overwatering, pests, or nutrient gaps and fix quickly.
– Move pots as needed to protect from strong winds and to chase sun.
9. Container Gardening
Editor’s Choice

Indoor Self Watering Planters with Drainage Holes and Saucers, 8, 7, 6.5…

Miracle-Gro Potting Mix, For Container Plants, Flowers, Vegetables, Annu…

Garden Tools Set, 8 Piece Gardening Tools Set with Non Slip Ergonomic Ha…
10. Community Garden Layout
You want a community garden layout that brings neighbors together and grows tasty vegetables. The right design makes it easy to share space, learn from each other, and keep everyone safe and happy. A smart plan also keeps paths clear and beds easy to reach, so beginners feel confident from day one.
Shared plots and welcoming spaces
– Assign each neighbor a plot with clear borders or markers that let them personalize their area without blocking others.
– Build wide, smooth paths that are at least 4 feet across so people in wheelchairs or with wagons can move easily.
– Include a central communal space where gardeners can gather, chat, and watch demonstrations.
– Add a small herb garden that everyone can use, a shaded picnic spot for breaks, and simple educational signs about planting and care.
– Use low borders or natural edging to keep beds tidy while still inviting people to move around.
Planting layout that saves steps and helps crops thrive
– Group plants by their needs. Put root veggies in one zone and leafy greens nearby to cut down on walking and soil wear.
– Think about height. Place taller plants to the back or north so they don’t shade smaller plants.
– Color-code markers or labels for quick identification. Use pictures or icons so kids and new gardeners can read them easily.
– Plan for seasonal changes. Leave space for fall crops and spring seedlings, and think about how beds look year-round.
– Keep water access close to beds. A faucet or rain barrel near the plots saves trips and waste.
Maintenance and community building
– Schedule regular group workdays. A small crew fixes fences, moves compost, and tidies paths together.
– Create a simple tool shed and a compost bin. A designated area keeps tools organized and available.
– Add educational signs that explain best planting times, water-saving tips, and composting basics.
– Encourage shared responsibilities. Rotating roles—like watering, weeding, or record-keeping—builds trust and skills.
– Think about accessibility all year. Provide seating, shade trees or umbrellas, and cooling water stations for hot days.
How to start and implement
1. Survey your space and mark entry points, plots, paths, and the central area.
2. Decide how many plots you can offer and how to border them.
3. Draw a rough map that shows paths, beds, and the communal zone.
4. Add the herb garden, picnic spot, and signs.
5. Set up a small shed and a compost area near the back.
6. Create a simple schedule for regular workdays and seasonal tasks.
7. Start with a pilot season and adjust based on feedback.
A well-planned community garden layout invites sharing, learning, and growth. You’ll see neighbors helping each other, kids learning where food comes from, and vegetables filling every bed. This approach stays practical, affordable, and easy to manage while creating a lively, sustainable space for your whole neighborhood.
10. Community Garden Layout
Editor’s Choice

Gardening Tools 9-Piece Heavy Duty Gardening Hand Tools with Fashion and…
Land Guard Galvanized Raised Garden Bed Kit, Galvanized Planter Garden B…

EPICA Countertop Compost Bin Kitchen | 1.3 Gallon | Odorless Composting …
11. Pollinator Garden
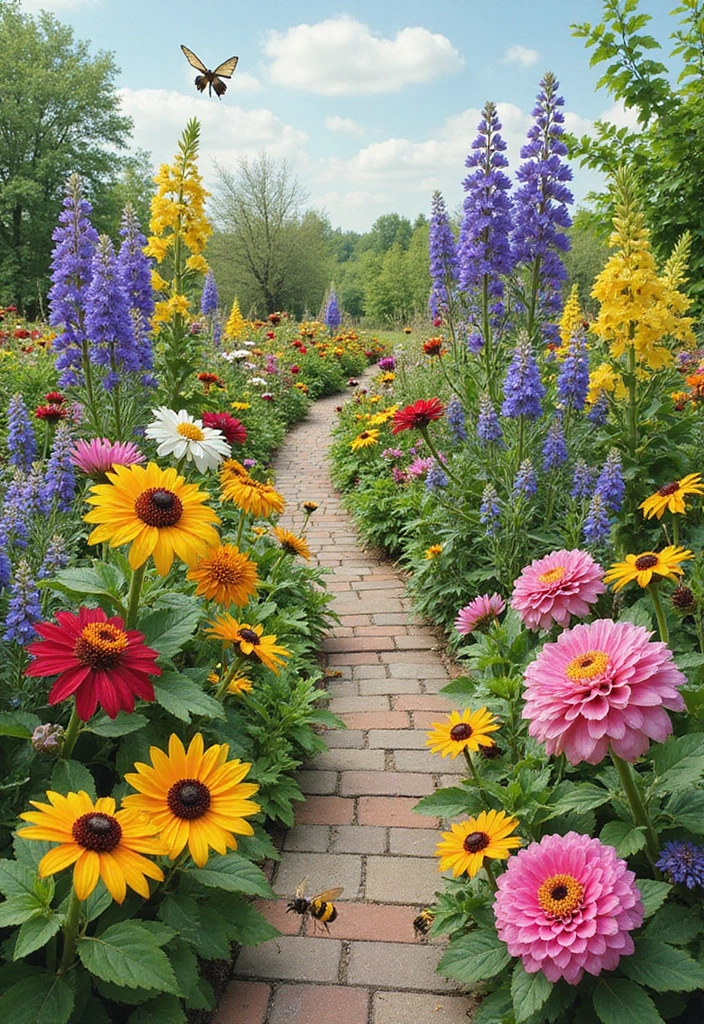
You want a yard that feeds your veggies and looks good too. A pollinator garden can do that. It invites bees, butterflies, and other helpers to your veggie beds. When these guests visit many flowers, your crops set fruit and grow stronger.
What you gain is simple. More pollinators means more fruit. A steady mix of blooms keeps color in your yard for many months. Native plants fit your soil and climate, so your garden stays healthy with less work. It also brings local wildlife closer, which makes your backyard feel alive.
Design ideas that work
– Bloom at different times. Pick plants that wake up in spring, blaze through summer, and sparkle again in fall. This keeps nectar available for pollinators most of the year.
– Plant in clusters. Group three to six of each plant together. Pollinators notice big patches more than single plants.
– Favor native species. Native plants toughen your garden against local pests and drought. They also support native bees and butterflies best.
– Add a water source. A shallow birdbath, a saucer with rocks, or a tiny pond gives thirsty visitors a safe drink.
– Use bright colors and varied shapes. Nectar lovers like bold yellows, purples, and blues. Mix tall stalks with low groundcovers for shelter and movement.
– Keep chemicals out. Skip most sprays. If pests show up, try hand-picking or soap sprays before you reach for harsh chemicals.
A practical plan you can use
– Step 1: Find a sunny spot. Most pollinators love at least 6 hours of sun each day.
– Step 2: Choose a six-to-eight plant line-up. Include early bloomers, mid-season plants, and late bloomers.
– Step 3: Create color blocks. Plant in small groups rather than one-by-one gaps. This looks garden-smart and draws more pollinators.
– Step 4: Add water and shelter. Place the water feature where it’s easy to reach, and add a few low branches or a brush pile for shelter.
– Step 5: Maintain with care. Mulch to hold soil, water deeply but not often, and avoid chemical sprays. Check plants for disease and remove the ones that fail.
Plant picks you can trust (easy, common options)
– Spring bloomers: crocus, salvia, creeping phlox
– Summer stars: bee balm, lavender, coneflower, daylily
– Fall favorites: aster, goldenrod, mums (identify non-toxic varieties)
Care and upkeep tips
– Water at ground level to protect bees and save water.
– Mulch to keep moisture and feed soil life.
– Watch for pests but choose gentle fixes first.
– Prune dead stems after blooming to keep air flowing and new growth strong.
Common questions you’ll probably ask
– Do I need to change my soil? Most pollinator plants thrive in average soil with good drainage.
– How much space should I give each plant? Clusters of 3–6 plants fit well in most yards.
– Will bees stay if I plant near my vegetable beds? Yes. Pollinators move between flowers and crops, helping both.
Take a small step today. Pick one plant that blooms next season and add it in a sunny corner. Watch for visitors and let your garden grow from there.
A vibrant pollinator garden isn’t just pretty – it’s essential! Invite nature’s helpers to your veggie beds, and watch your crops flourish with color and life.
11. Pollinator Garden
Editor’s Choice

Northeast Wildflower Seeds – Extra Large 1 Ounce Packet – Over 7,500 Nat…

Alpine Corporation TEC114 31″ Tall Outdoor Antique Flower Birdbath with …
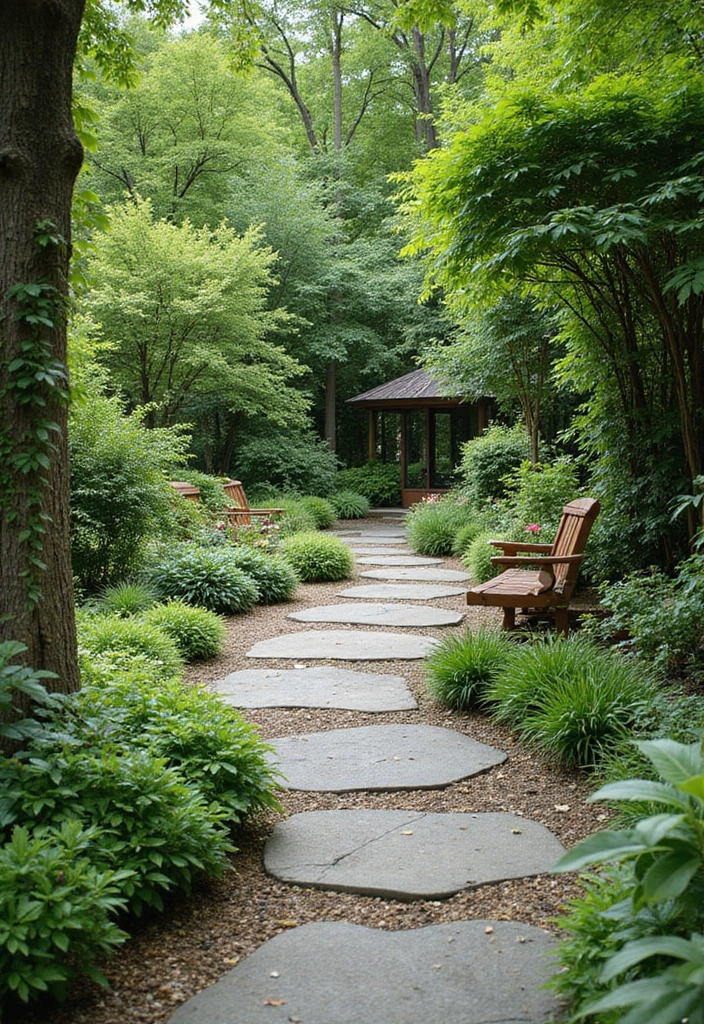
12. Zen Vegetable Garden

You’re looking for a vegetable garden that feels calm and easy to care for. A Zen vegetable garden can give you that peace while you grow fresh food right outside your door.
This style blends simple ideas with real function. It uses clean lines, a soft color palette, and uncomplicated shapes. You get a space that looks tidy and stays easy to work in.
Think of a layout with raised beds filled with vegetables, set among quiet gravel paths. The gravel makes a low, soothing sound when you walk and helps keep weeds down. It also creates clear routes so you don’t trample seedlings or spill soil where you don’t want it. The overall look stays uncluttered—no busy fences or loud colors.
Natural borders are key. Use stone or weathered wood to frame each bed and define the space without shouting. These materials age well and blend with the garden’s calm vibe. If you want height without distraction, place a few slender bamboo accents or tall grasses at the corners to draw the eye upward.
Planting for mood matters here. Choose crops that feel quiet and steady to look at, such as leafy greens and soft purples. Think lettuces, spinach, Swiss chard, kale, and beets with pale stems. Herb varieties like mint, dill, and thyme add fragrance as you tend them. The goal is a palette that stays soothing as you work: mostly greens with touches of lavender or purple.
To make the space truly serene, add small, gentle features. A light rock arrangement can imply balance, while a shallow water feature adds a cooling sound and a reflective surface. A bamboo screen or a single ornamental plant can give privacy without crowding the view. Keep these elements subtle so they don’t compete with the growing beds.
If you’re building this yourself, here’s a straightforward plan you can follow.
– Step 1: Pick a sunny site with good drainage and a view you enjoy.
– Step 2: Sketch a simple layout that places raised beds on a grid and leaves space for paths.
– Step 3: Build or install raised beds with natural materials like cedar or stone.
– Step 4: Lay down gravel paths, keeping them wide enough for a wheelbarrow.
– Step 5: Add borders around beds and any vertical accents in a cohesive tone.
– Step 6: Fill beds with vegetables that fit your climate, then mulch to cut down on watering.
Maintenance stays light. Keep paths clear so you can tend plants with a relaxed pace. Water at the base of each plant and check for thirsty spots during dry spells. Periodic pruning helps air flow and keeps the bed looking neat.
A Zen vegetable garden offers real benefits: less stress as you garden, easier upkeep, and a space that invites you to slow down. It works well in small yards and large lots alike, and it adapts to many climate zones. You get a place to grow food, find calm, and enjoy the simple act of tending your plants.
12. Zen Vegetable Garden
Editor’s Choice
Land Guard Galvanized Raised Garden Bed Kit, Galvanized Planter Garden B…

10LB Black Pea Gravel for Landscaping, 3/8 Inch Black Pebbles for Plants…

Bamboo Stakes,4FT Natural Bamboo Garden Stakes,BOVITRO 25Pcs Plant Stake…
You might also like

13. Cottage Garden Blend
You want a garden that feeds you and feels warm at the same time. A cottage garden blend does just that. It pairs vegetables with ornamental plants for a friendly, eclectic look. You get color, scent, and texture in one space.
This style shines because it blends form and function. The beds hold edible crops while blooming perennials and wildflowers brighten the scene. It looks like an English countryside corner, yet it works in a real backyard. You’ll see pollinators buzzing by and you’ll taste herbs and greens in the same mix.
Plan the layout with flow in mind. Imagine winding paths that invite you to wander and discover. Let beds curve gently instead of using rigid lines. A soft, natural rhythm makes the space feel inviting rather than chore-like.
– Design goal: Mix vegetables, herbs, and flowers in the same beds for year-round interest. Keep color and texture in mind so the patch feels cohesive, not scattered.
– Plant palette: Choose practical veg like lettuce, spinach, beans, and carrots. Add herbs such as thyme, oregano, and chives. Include flowering companions like calendula, nasturtium, and alyssum. Edible flowers can be bright accents.
– Structure: Use rustic features to anchor the look. A low picket fence, a simple trellis for climbing plants, or a stone border helps define space without shouting. Path materials can be gravel or brick to keep the vibe relaxed.
– Planting ideas: Create color drifts by repeating a few hues across beds. Plant herbs between vegetables to help with flavor and pest control. Let a few perennial blooms stay in place for ongoing structure, while annuals shift with the seasons. Mix tall plants at the back and shorter ones in front for easy viewing.
– Maintenance: Stay practical. Weeding can be lighter in this style, since some wild growth adds charm. Mulch to slow weeds and keep moisture. Harvest regularly to keep beds tidy and productive.
Implementation steps to try this season:
1) Map your space and note sun spots. 2) List 6–12 preferred plants (veg, herbs, and a few flowers). 3) Sketch curved beds and plan a simple path network. 4) Set up a low fence or trellis as a backbone. 5) Plant in drifts, repeat colors, and tuck in herbs between veg.
Practical tips:
– Keep a seating area near the garden so you can enjoy the view and the scent.
– In small yards, use vertical supports and compact varieties to save space.
– Regularly deadhead flowers and pinch herbs to promote fuller growth.
This cottage blend works even in modest spaces. It gives you a live, colorful landscape and fresh picks for the table. Start small, then let the beds expand with the seasons.
13. Cottage Garden Blend
Editor’s Choice
RUBFAC 94″ Metal Garden Arch Trellis for Climbing Plants Outdoor, Garden…
Land Guard 8×4×2 ft Galvanized Raised Garden Bed Kit, Galvanized Planter…
Back to the Roots 25.7qt (1 Cubic ft) Organic Premium Mulch
14. Fruit Orchard Garden

You want a backyard that gives you fruit and beauty. A fruit orchard garden can deliver both. It blends trees, bushes, and vines with edible groundcover. You get bright spring blossoms, shade in summer, and fresh berries and fruit through the seasons. Combine color, scent, and flavor in one space.
Think of this layout as a small farm that fits your yard. You plant a mix of tall fruit trees, mid-height trees, and low shrubs. You add climbing vines on a trellis to save space and add height. Edible groundcover, like strawberries or creeping herbs, fills gaps between beds and boosts harvest. Create paths between rows with stepping stones or gravel so you can reach every tree without stepping on the beds. Soft mulch around the bases keeps moisture and slows weeds.
Design tip: Place taller trees in the back and shorter bushes in front for a tidy, tiered look. This helps you see all the fruit and makes picking easy.
Maintenance hint: Prune trees each year. Regular pruning keeps shape, health, and fruit production strong. Water deeply during dry spells so roots reach far. Add compost or well-rotted manure in spring to feed your soil. Mulch the beds to conserve moisture and tame weeds. Check for pests and use natural controls first, like beneficial insects or homemade sprays.
Harvesting suggestion: Start a simple picking calendar. Note when each fruit tends to ripen and plan harvest days. Pick fruit when color is vivid and the fruit gives slightly to the touch. For berries, pick in the cool morning to keep flavor bright. After harvest, use fruit the same day or freeze or dry for later treats. Stagger your varieties if possible so you have fruit over a longer season rather than all at once.
Getting started today
1) Step 1: Find a sunny spot with at least six hours of sun each day.
2) Step 2: Test the soil and mix in compost to improve texture and nutrients.
3) Step 3: Choose fruit that fits your climate and yard size.
4) Step 4: Sketch a simple layout with space for beds, trees, and paths.
5) Step 5: Start with a few trees and a berry patch so you can learn as you grow.
With thoughtful planning, your backyard fruit orchard rewards you with fresh picks, beauty, and a sense of accomplishment. It’s a place to learn about seasons and to share fruit with family and friends.
14. Fruit Orchard Garden
Editor’s Choice

Fiskars Bypass Pruning Shears, 5/8-Inch Cut Capacity Garden Clippers, Ga…

Utopia Kitchen Compost Bin for Kitchen Countertop, 1.3 Gallon Compost Bu…
Back to the Roots 25.7qt (1 Cubic ft) Organic Premium Mulch
15. Wildlife Friendly Garden
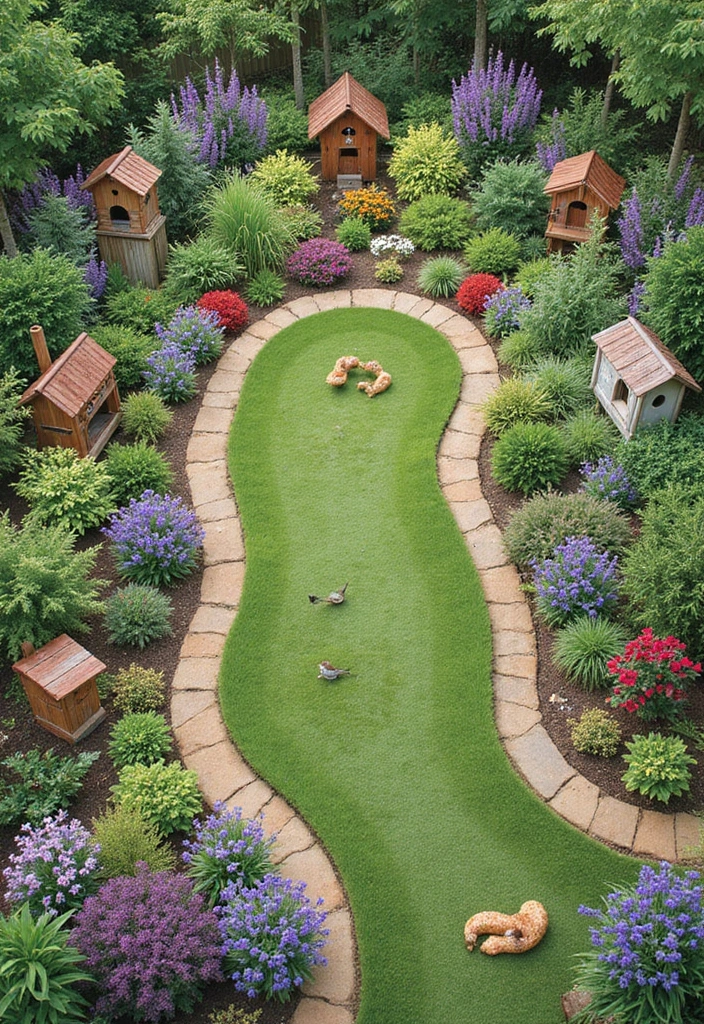
You want a garden that feeds you and helps wildlife. A wildlife-friendly design can do both. You get a healthier veggie space and a richer, livelier yard.
Why this works
– Birds eat pests, keeping your vegetables safer.
– Butterflies and bees pollinate, boosting harvests.
– Small mammals tidy up fallen fruit and leaves, letting soil breathe.
– A calm, natural backdrop makes you enjoy your garden more.
What you need to start
– Native plants that fit your climate. They need less water and attract local insects.
– A mix of plant heights: low ground covers, mid shrubs, and a few small trees.
– Simple shelter features: birdhouses, bat boxes, and insect hotels.
– Habitat builders: rock piles, fallen logs, and a shallow water dish or tiny pond.
– A little space kept wild. Let some corners stay untamed for wildlife.
Layout ideas that work with veggie beds
– Create natural borders with native shrubs. They calm the edge and give birds safe perches.
– Plant in layers. Ground covers under taller plants protect soil and invite small creatures.
– Place birdhouses and bat boxes where they’re sheltered from strong winds but easy to see from your garden.
– Put insect hotels in sunny spots near your veggie beds. They attract pollinators and beneficial insects.
– Add a small water feature if you can. A shallow bird bath or pond draws life without much work.
Planting plan that draws in wildlife
– Include a variety of flowering plants that bloom at different times. This feeds bees and butterflies all season.
– Mix in nectar-rich shrubs and a few native trees for shade and shelter.
– Choose host plants for caterpillars and larvae. They might draw more birds later.
– Keep a corner of bare soil or leaf litter. Some insects nest there and teach your soil to stay healthy.
Maintenance that supports wildlife
– Let some areas stay a little wild. It’s home to helpful insects and ground dwellers.
– Mulch lightly and feed with compost. Healthy soil feeds both veggies and wildlife.
– Water during dry spells, but avoid soggy spots. A shallow dish works well and is easy to clean.
– Prune with wildlife in mind. Don’t cut all shelter at once; give critters places to hide.
Practical steps you can take this weekend
1) Map sun and shade in your yard.
2) Pick 8–12 native plants with different bloom times.
3) Add a birdhouse, a bat box, and an insect hotel.
4) Build a small rock or log pile for shelter.
5) Install a shallow water feature or bird bath.
6) Leave a corner to grow a little wild.
Common questions, quick answers
– Will wildlife steal veggies? Some may nibble, but the trade-off is better pest help and pollination.
– How much care is needed? Light, regular checks plus seasonal pruning keep it balanced.
– Can this fit a small garden? Yes. Start with one habitat area and grow from there.
With these steps, your garden can feed your family while inviting nature to stay. A lively, productive space awaits you.
15. Wildlife Friendly Garden
Editor’s Choice

STARSWR Bird House for Outside,Bird Houses Outdoor, Natural Wooden Bird …

Premium Weatherproof Insect Hotel – Durable Bug House, Bee Home Box for …

Daoeny 35In Metal Bird Bath for Outside, Vintage Freestanding Birdbaths …
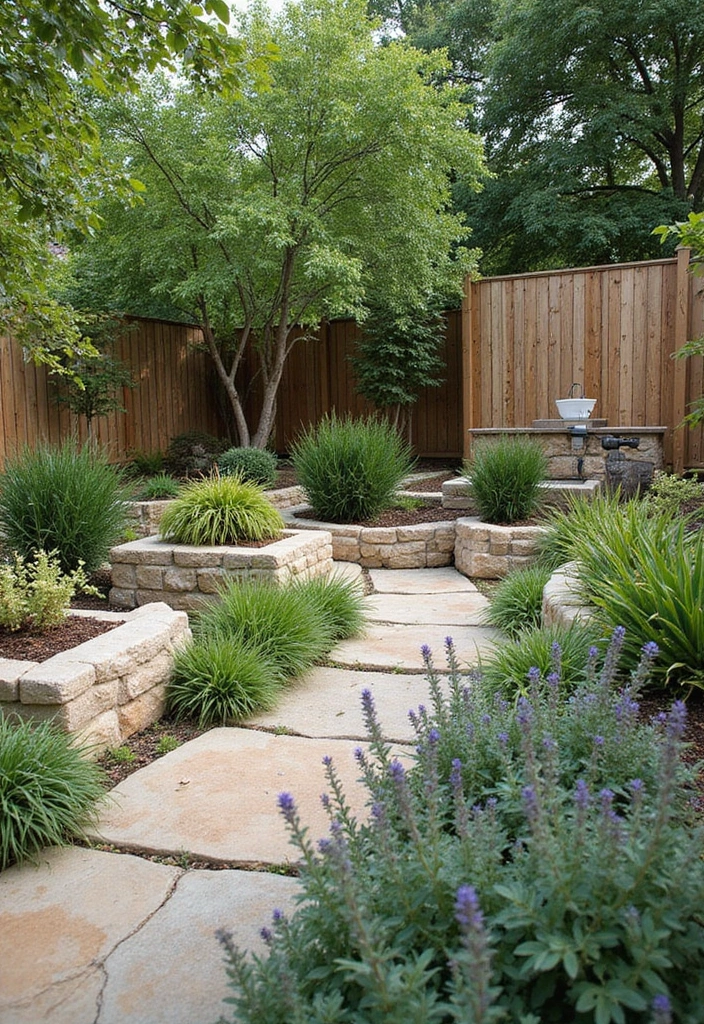
16. Tiered Garden Layout

You want more growing space in a sloped yard. A tiered garden layout makes that possible. It turns a hill into flat beds you can reach without a bad back. It also helps water move away from roots and keeps your work manageable.
What a tiered garden design is
A tiered or terraced garden uses steps cut into the hillside. Each level is a small, flat bed. Stone walls, brick edging, or wooden steps mark the edges. The result looks natural and lasts for years.
Why this design helps your garden
– It gives you more growing room without heavy digging.
– It guides water down the slope, cutting erosion and drying roots evenly.
– It makes weeding, watering, and harvesting easier because you stay close to the plants.
– It creates a layered view that blends rocks, wood, and greens.
Planning steps
1) Check the slope and note how the sun moves across your yard.
2) Decide how many tiers you want and how wide each bed should be.
3) Pick materials that fit your style and budget—stone for a classic look, wood for warmth, or brick for a tidy edge.
4) Plan safe paths between levels so you can move easily.
5) Ensure each bed has room for the crops you choose and enough soil depth.
Building and care
– Use sturdy edges to keep soil in place.
– Stone walls stay strong for decades.
– Wooden steps look inviting but need proper treatment.
– Add drainage with a slight slope and a shallow trench to guide water away.
– Install a simple irrigation line or soaker hose that reaches every bed.
– Fill beds with loose, well-drained soil and mix in compost.
Planting ideas by tier
– Lower tiers for deep-root crops like carrots, potatoes, beets, onions, and garlic.
– Upper tiers for shallow-root crops such as lettuce, spinach, radishes, herbs, and bush beans.
– Place taller plants toward the back of each bed so sun reaches the smaller plants.
– Use trellises for climbers on beds where space allows.
Maintenance tips
– Mulch helps keep moisture even.
– Mulch reduces weeds.
– Prune edges to keep lines neat.
– Check after heavy rain for erosion and fix quickly.
– Refresh compost and soil mix each season.
Common pitfalls to avoid
– Don’t stack beds too high.
– Don’t stack beds too narrow.
– Build in easy access with a good path.
– Start small and expand later.
16. Tiered Garden Layout
Editor’s Choice
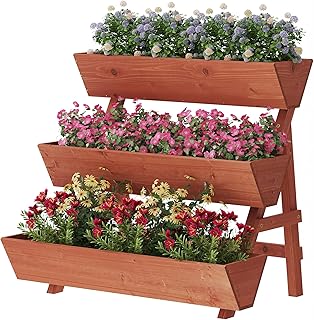
Raised Garden Bed, 3 Tier Vertical Garden Planter for Indoor & Outdoor, …

Flat Soaker Hose 100ft, Garden Hose with Heavy Duty Double Layer Design,…
Utopia Kitchen Compost Bin for Kitchen Countertop, 1.3 Gallon Compost Bu…
17. Four-Season Garden Layout

You want fresh veg all year. A four-season garden layout can make that happen. It pairs crops with the weather you get and uses simple tools to stretch growing time. You’ll enjoy a steady harvest and fewer gaps in your plate.
– Season-by-season crop choices: In early spring, sow peas and radishes. They pop up quickly and fill empty beds. For summer, plant tomatoes, cucumbers, peppers, and beans. These crops love long days and sun. Come fall, add pumpkins, squash, kale, and broccoli. They handle cooler nights and keep producing. In winter, grow hardy greens like kale, chard, and spinach, plus herbs in a protected bed. Rotate families so one bed doesn’t stay tired.
– Extend your season with protection: A cold frame or small greenhouse traps warmth and protects early or late crops. A row cover can shield plants from light frost. Mulch thickly to lock in moisture and warmth. Ventilation matters, so open it on warm days to avoid damp mold.
– Smart planting schedule: Make a simple calendar for sowing, transplanting, and harvest times. Plan for succession planting so one crop follows another in the same bed. Rotate crops each year to keep soil healthy and slow pests. Note which varieties work best in your spot and stick with them.
– Design and layout tips: Group crops by season in easy-to-reach zones. Put taller plants at the back or on the north side to cut shade on smaller beds. Use wide paths for a wheelbarrow and good airflow. Mark beds with seasonal signs so you know what’s growing where at a glance. A sunny wall can act as a warm microclimate to give a head start when it’s chilly.
– Maintenance and care: Check soil health every few weeks and add compost to feed soil life. Keep irrigation steady and avoid overwatering. Mulch to suppress weeds and retain moisture. Look for pests early and use simple traps or row covers to keep them away. A quick garden walk helps you catch trouble fast. Keep a small notebook to track what works.
– Quick-start plan for this weekend: Map your beds and mark spring, summer, fall, and winter zones. Choose one crop for each season to test first. Install a cold frame or row cover for the first weeks of spring. Start a simple garden journal to record results and ideas.
17. Four-Season Garden Layout
Editor’s Choice

Outsunny 9′ x 3′ x 3′ Mini Greenhouse with Zippered Doors & Roll-up Wind…

Clever Fox Gardener’s Journal – Guided Gardening Notebook to Plant Veget…

Garden Netting, Jevrench Durable Ultra Fine Garden Netting, Garden Plant…
18. Shade Garden Layout
Shade in your yard can feel like a wall when you want to grow vegetables. But you can turn that wall into a quiet, productive corner. A shade garden can be calm and fruitful with a clear plan. You’ll harvest greens longer into the season and enjoy a cooler, easier-to-care-for space.
Start by mapping the light. Watch how sun slips through the trees from morning to late afternoon. Some spots get a few bright hours; others stay dim all day. Note where the best shade-loving crops will thrive. This helps you place beds, containers, and paths so you use every inch wisely.
Layout options give you many chances to shape the space. Raised beds are great for shade because their soil stays loose and drains well. Build one long bed along a fence or stack several shorter beds in a corner. Or use sturdy containers—deep pots, half-barrels, or wooden boxes—that you can move as the sun shifts. Put taller plants like pole beans or a trellis near the back or along a wall so light reaches the greens in front. This keeps the space open and easy to walk through. A small seating nook lets you enjoy the patch while you pick.
What to plant in a shade garden? Choose crops that tolerate softer light. Leafy greens shine here: lettuce, spinach, and Swiss chard stay tasty even when the sun isn’t strong. Add radishes for quick, crisp harvests. Herbs such as parsley, chives, and cilantro handle dim light and still taste bright in meals. If you want a touch of variety, try peas or bush beans where the sun breaks through a bit more in the morning. Start with a small test patch to learn what grows best in your yard, then expand.
Soil and care matter more in shade. Use a rich mix: equal parts compost and garden soil, plus a little perlite to keep drainage open. Mulch to keep roots cool and stop weeds. Water slowly at the base so roots soak in moisture without soggy leaves. A simple drip line or soaker hose makes steady moisture easy to manage.
Make the space inviting and easy to tend. Shade gardens deserve color and texture too. Add a bench, a soft light, a bird bath, or a sculpture to create a focal point. Reflective surfaces, pale mulch, or light stones brighten the area and lift the mood. A well-planned path helps you move with ease and keeps leaves dry.
– Planting tip: Place all shade-tolerant crops in one zone so you can water, prune, and harvest without stepping into every corner.
– Design hint: Use light-colored materials for paths to brighten the shaded areas.
– Maintenance suggestion: Regularly monitor moisture levels as shaded areas may retain water longer.
18. Shade Garden Layout
Editor’s Choice
Land Guard Galvanized Raised Garden Bed Kit, Galvanized Planter Garden B…
Flat Soaker Hose 100ft, Garden Hose with Heavy Duty Double Layer Design,…

Michigan Peat Compost and Manure Blend, Garden Magic Mix with Odor-Free …
19. Minimalist Garden Design

Is your yard cluttered with plants that slow you down? A minimalist garden design can give you calm, order, and fresh harvests. It sticks to clean lines, a small plant list, and a quiet color mix. You use raised beds or slim containers to create even rows. Gravel paths and a simple wooden trellis add structure without feeling busy. The look is modern, and the upkeep is easier. You can focus on a few crops and still get variety through texture and height. This approach works well in small yards and on balconies where space is precious.
Start with a plan. Pick 4 to 6 crops that grow well in your climate and taste good together. Place them in a neat grid or a single long row. Use uniform containers or raised beds to keep the feel tidy. Stick to a restrained color palette—green, white, gray, and natural wood.
Design tip: Choose a small set of crops that complement each other and fit your space.
Planting suggestion: Interplant herbs and vegetables in a clean, organized grid so you see order rather than chaos.
<Maintenance note: Regularly clear away debris to keep paths and beds neat.
Layout specifics help you move fast in the garden. Beds about 2 to 3 feet wide let you reach the center from either side without stepping on the soil. Keep all edges straight and even. Use the same wood type for framing and the same color planters for a cohesive feel. Plant textures matter as much as colors. Mix leafy greens, herbs, and compact vegetables to add variety without crowding.
Paths and edges play a big role. A gravel path feels soft underfoot and hides spills after a light rain. Edges in wood or metal keep the border clear and clean. If you want a touch of warmth, add a small seating area with a simple bench near the edge.
Irrigation and care keep the look simple and productive. A drip irrigation line or soaker hose delivers water directly where it’s needed. It saves water and cuts weekly chores. Mulch lightly to hold moisture and slow weed growth. Check the beds every week for peeling bark, broken stems, or stressed leaves. A quick prune or stake can maintain the tidy silhouette you want.
Common questions and honest limits. Won’t minimalist feel cold or stark? You can it with texture: vary leaf shapes, use different greens, and add one soft accent plant. Will it limit your harvest? Not if you plan well. Choose crops that fit your space and harvest window.
Take your time to sketch a simple plan on paper. Start small with one raised bed and a couple of containers. Add more as you learn what works for your light and soil. With steady care, your minimalist garden will stay calm, productive, and easy to enjoy.
19. Minimalist Garden Design
Editor’s Choice
Land Guard Galvanized Raised Garden Bed Kit, Galvanized Planter Garden B…
Rain Bird DRIPKITBAG Drip Irrigation Repair and Expansion Kit

40 LBS Grey Pea Gravel – Landscape Rocks – Drainage Rock – Gardening – A…
20. Rustic Farmhouse Garden

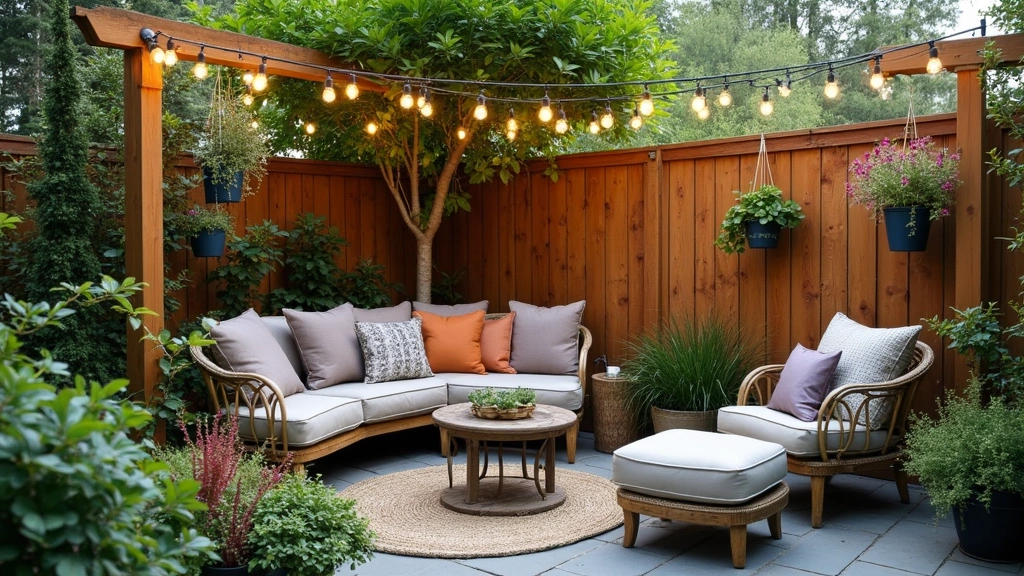
A rustic farmhouse garden brings a warm, welcoming feel to your yard. It looks lived-in and cozy, yet it remains practical for daily life. You’ll enjoy a space that supports vegetables, herbs, and flowers without feeling fussy.
– Design idea: Build raised beds from reclaimed wood. Old crates make great borders and extra planters along a fence line. Let a few vintage tools grace a wall for character that’s not busy.
– Materials and texture: Choose natural tones and rough finishes. Stone paths, gritty gravel, and weathered wood blend with green beds. A little bare soil here and there keeps the look calm and honest.
– Planting mix: Combine edibles with bloomers and herbs. Heirloom tomatoes and beans sit next to lavender, sage, and calendula. The colors stay soft, like a cozy quilt you can walk through.
– Layout strategy: Put tall plants in the back or center to shade smaller crops. Create small seating spots near a flower bed so you can pick and rest. A curved path invites you to wander and enjoy the space.
– Maintenance approach: Keep care simple and steady. Let some grasses or wildflowers fill small pockets for a natural look. Mulch to hold moisture, and water early in the day when it’s cooler.
– Seasonal planning: Start cool-season crops in spring, then switch to warm-season crops as the weather warms. Harvest often to keep your garden busy and productive. Rotate crops so soil stays healthier year to year.
– Decoration ideas: Add a weathered bench, a rain barrel, and a simple bird feeder. These touches bring life and tiny moments of joy without crowding the space.
Why this works for you
– It’s adaptable. You can scale up or down based on your yard size.
– It stays approachable. Natural materials and simple layouts cut upkeep.
– It stays stylish. The farmhouse vibe never feels out of date when you balance texture, color, and greenery.
Practical steps to start today
– Scout corners for light and water access. Pick a sunny rise for herbs and leafy greens.
– Gather materials you already have. Reuse crates, pallets, and old tools for a personal touch.
– Sketch a simple plan. Put beds on a gentle curve and mark a walking path with stones.
With these ideas, your rustic farmhouse garden becomes a friendly, practical retreat. You’ll grow food, enjoy flowers, and keep a look that’s true to country charm.
20. Rustic Farmhouse Garden
Editor’s Choice
Land Guard Galvanized Raised Garden Bed Kit, Galvanized Planter Garden B…
Back to the Roots 25.7qt (1 Cubic ft) Organic Premium Mulch
Gardening Tools 9-Piece Heavy Duty Gardening Hand Tools with Fashion and…
21. Urban Garden Design
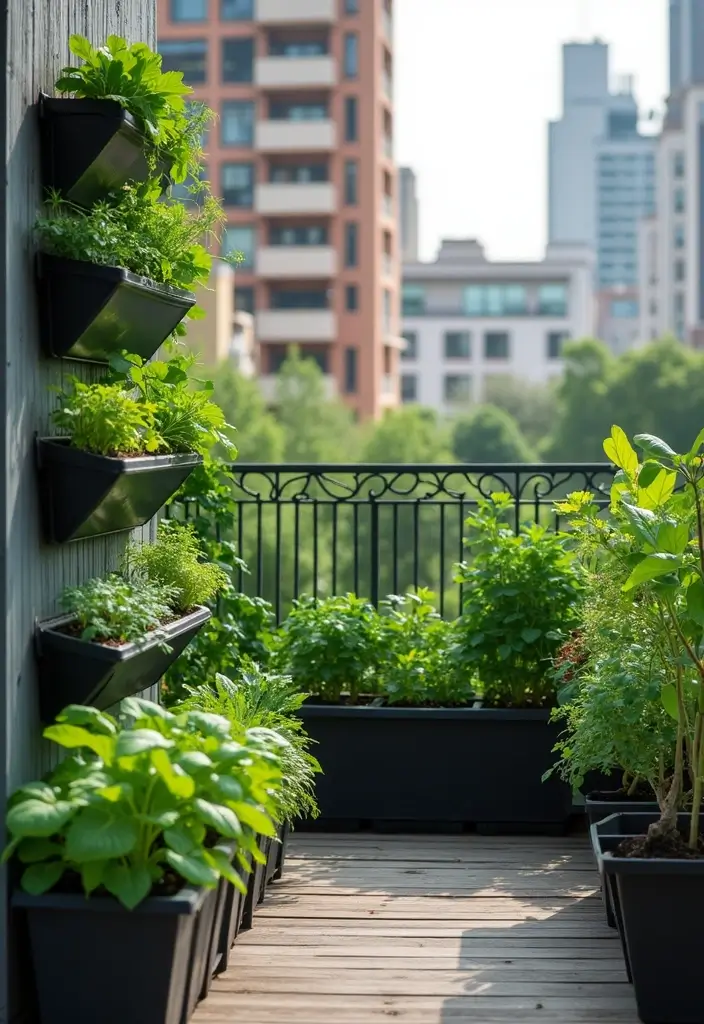
You want a veggie garden, but space is small. An urban garden design solves that. It turns balconies, rooftops, and tiny backyards into productive green spaces. You get fresh flavors, color, and a sense of calm right outside your door.
Start with a simple plan. Check how much sun your space gets from morning to late afternoon. Note where walls can hold a trellis and where concrete or wood makes a good base for containers. Think about access: you want herbs and veggies close to your kitchen for easy picking.
Build smart zones. Put the high-need plants in places that get the most light. Use walls for vertical growing so you don’t waste floor space. Create a small cooking corner with a stool or bench nearby to make harvest and prep quick. Keep a tidy edge for easy maintenance.
Choose containers you can move and stack. Here are easy starting options:
– Lightweight fabric bags for herbs and greens. They drain well and are simple to switch out.
– Deep plastic boxes or ceramic pots for tomatoes, peppers, or bush beans.
– Wide, shallow trays for leafy greens like lettuce, spinach, and arugula.
– Stylish, compact planters that blend with your urban décor.
Add vertical and railing ideas. Vertical planters give you a lot of green in a small footprint. Think lattice panels, stacked pots, or hanging baskets on a balcony railing. Wall-mounted trellises work great for cucumbers, peas, and small cherry tomatoes. A vertical herb tower keeps basil, thyme, and oregano within reach.
Pick crops that thrive in tight spaces. Opt for compact varieties and fast harvests. Good bets include:
– Leafy greens: lettuce, kale, chard.
– Small tomatoes and peppers.
– Bush beans and radishes.
– Fresh herbs: basil, parsley, cilantro, chives.
– Compact strawberries for a splash of sweetness.
Learn easy care tricks. Use a lightweight potting mix with good drainage. Add a thin layer of mulch on top to hold moisture. Install a simple watering plan with a drip line or a careful hand-watering schedule. Check soil moisture daily in hot weather; containers dry out quickly. Observe sun patterns as seasons shift and adjust plants accordingly.
Maintenance feels lighter when you keep a simple routine. Water consistently, feed every few weeks with a balanced mix, and prune as needed. Rotate crops so soil stays lively. If a space goes unused, tuck in a compact herb patch or a container filled with cherry tomatoes to bring life back quickly.
Small spaces can deliver big harvests when you design with purpose. Start with one balcony, one vertical setup, and a handful of containers. Grow what you love, and you’ll taste the difference in every bite.
21. Urban Garden Design
Editor’s Choice

Gardzen 10-Pack 10 Gallon Grow Bags, 300G Thickened Aeration Fabric Pots…

Amazing Creation Stackable Planter, Vertical Oasis Tiered Garden Planter…
Indoor Self Watering Planters with Drainage Holes and Saucers, 8, 7, 6.5…
22. Hydroponic Garden Layout
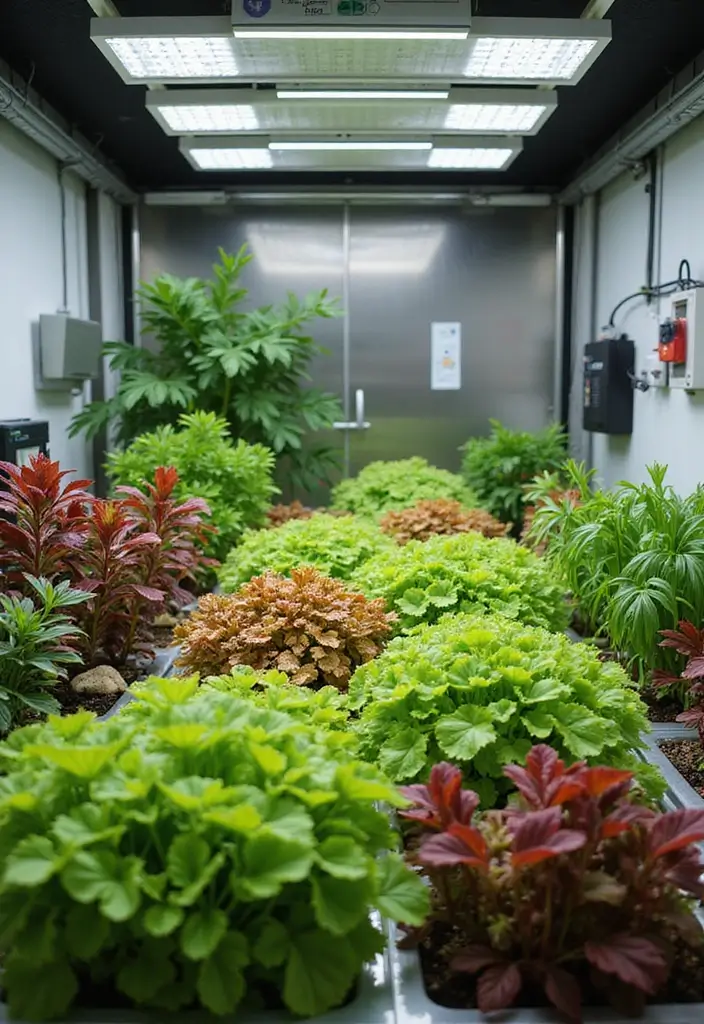
You want fresh greens in a small space. A hydroponic garden layout can help you get them. In a soil-less system, plants drink a nutrient-rich water mix instead of soil. It saves space and cuts mess. The setup can look clean and modern in any home.
How to design your hydroponic layout
– Layout options: Tiered shelves, vertical towers, and wall frames let you stack plants and grow up rather than out.
– Lighting for indoors: If you grow inside, pick bright LED grow lights. Run them about 12 to 16 hours a day.
– Materials and style: Choose sleek, sturdy materials like white plastic, glass, acrylic, or powder-coated steel for a clean look.
What to plant and how to start
– Starter crops: Lettuce, spinach, arugula, and fresh herbs grow fast in hydroponics and give you quick harvests.
– Planting tips: Keep roots shallow, use a light growing medium, and space plants so they get air and light.
– Nutrient management: Use a ready-to-use hydroponic nutrient solution and follow the label. Check the reservoir regularly for levels and temperature.
Maintenance and steady results
– Maintenance plan: Check nutrient levels weekly and adjust pH to about 5.5–6.5.
– Keep it clean: Clean the reservoir and lines monthly to prevent algae.
– Watch the movement: Inspect pumps and airflow to keep water moving smoothly.
A practical setup you can copy
On a sunny balcony, mount a two-tier shelf against the wall and add a compact vertical tower beside it. This combo fits a small space and makes harvesting easy. You’ll see a quick, clear difference in how fast greens grow compared with soil beds. The colors of fresh leaves bring a lively look to your space.
Know the limits so you stay on track
Hydroponic systems use electricity for pumps and lights, so plan for costs and reliability. They can require more upkeep than traditional beds. If you skip nutrients, pH, or cleaning, plants won’t perform well.
Quick-start plan
– Pick a sunny spot or a bright balcony.
– Choose a simple, starter-ready hydroponic kit.
– Start with lettuce and herbs; add leafy greens as you gain comfort.
– Set a weekly check routine for nutrients, pH, and clean components.
With a smart hydroponic garden layout, you bring fresh produce into a tight space. It feels high-tech and is surprisingly attainable. Start small, learn as you go, and watch your backyard transform into a vibrant, productive green space.
22. Hydroponic Garden Layout
Editor’s Choice

Hydroponics Growing System Indoor Garden: Herb Garden Kit Indoor with LE…

Grow Light for Indoor Plants – Upgraded Version 80 LED Lamps with Full S…

General Hydroponics Flora Series: FloraMicro, FloraBloom, FloraGro – 3-P…
You Might Also Like

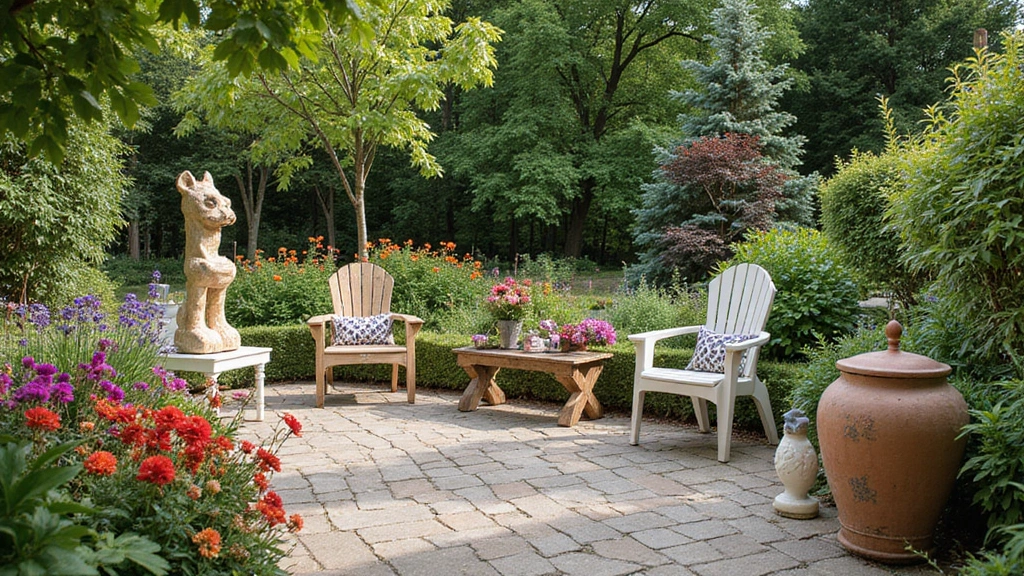
23. Artistic Garden Design
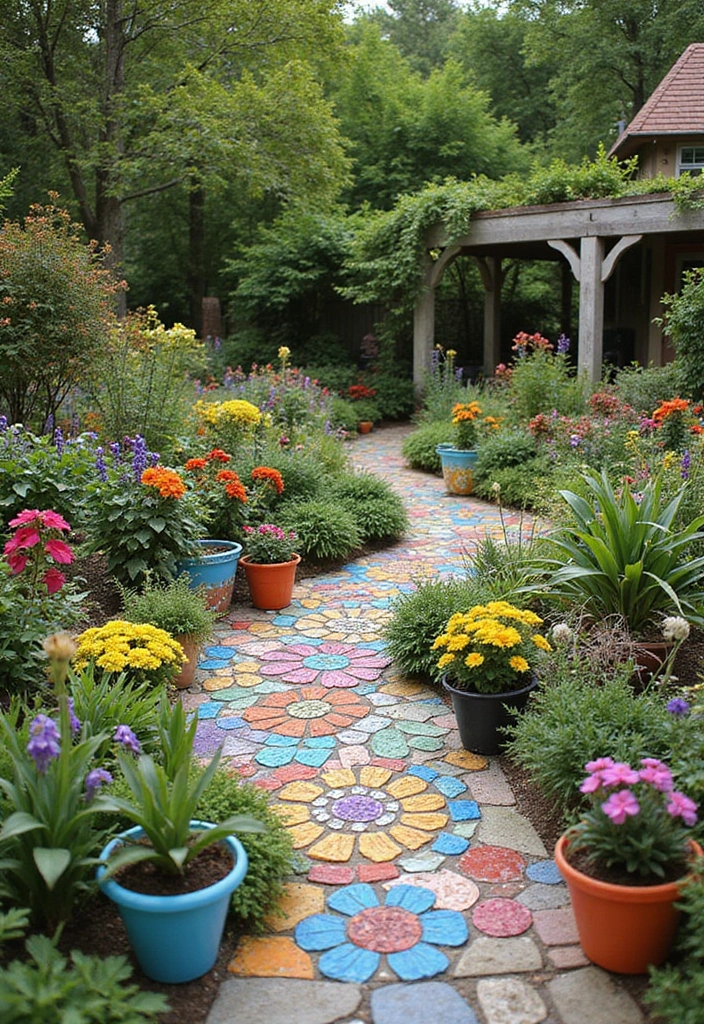
If you want a garden that shows your personality, artistic garden design can help. It blends art with edible plants so you can enjoy color and flavor in one space. You guide the vibe, and the garden does the rest.
This style uses color, shapes, and clever layouts. It invites your eyes to travel from one point to the next. You can make paths of mosaic tiles or paint containers in colors that fit your mood. The goal is a space that feels intentional, not random.
Your garden can tell a story or carry a clear theme. You might aim for a quiet cottage look, a bold modern feel, or a nostalgic farm vibe. Set a mood, then let the plants and décor reinforce it.
– Design hint: Use plants with striking colors and textures to create visual interest.
– Planting suggestion: Mix traditional crops with ornamental plants for a vibrant, usable display.
– Maintenance note: Regularly step back and check the overall balance, so the art stays alive.
– Design hint: Create focal points like a bright trellis, a colorful sculpture, or a painted container that draws the eye.
– Planting suggestion: Place taller plants at the back or center of beds to frame the scene and keep paths clear.
– Maintenance note: Refresh with small plant swaps each season to keep the palette fresh.
Plan with purpose. Start by choosing a theme you love—zesty, calm, or playful. Pick a color palette and stick to it. Decide where you want your main sights to appear. Let a maker’s eye guide you, but keep practicality in reach.
– Color strategy: Pair two to four main colors and use lighter shades for contrast.
– Texture mix: Combine smooth leafy greens with fuzzy herbs or lacy flowers.
– Pattern idea: Try a simple checkerboard or a winding, natural-feel path to add rhythm.
Planting ideas that balance beauty and bite. Mix herbs, edible flowers, and compact vegetables. Use ornamental grasses as borders to soften edges. Choose containers that contrast with your beds—bright ceramics or dark metal—to frame the plants.
– Container tips: Repaint or decal planters to echo your theme.
– Garden edge: A low wall or a row of decorative stones can separate art from edible beds.
– Vertical accents: Trellises and arbors support climbers and add height.
Maintenance basics you can actually keep. Schedule a quick monthly walk through to remove tired plants and tidy paths. Prune to maintain color balance and shape. Keep a small palette of core plants handy so you can swap in fall or spring.
Five practical steps to start now:
1) Pick a theme you truly love. 2) Choose a 2–4 color palette. 3) Sketch a simple path or bed layout. 4) Select a mix of vegetables and ornamentals. 5) Set up a light, easy maintenance plan.
Readers often ask: Can I mix edible crops and art every season? Yes, with thoughtful color and height balance. Will this slow harvest? Not if you plan smart and keep the beds tidy. A garden that looks like art can still feed your table and your imagination.
23. Artistic Garden Design
Editor’s Choice

Youway Style Flower Mosaic Tiles for Crafts Bulk,1LB Iridescent Mosaic T…

DeeCoo 3 Piece Ceramic Plant pots Indoor Pots Set with Drainage Holes, 5…
RUBFAC 94″ Metal Garden Arch Trellis for Climbing Plants Outdoor, Garden…
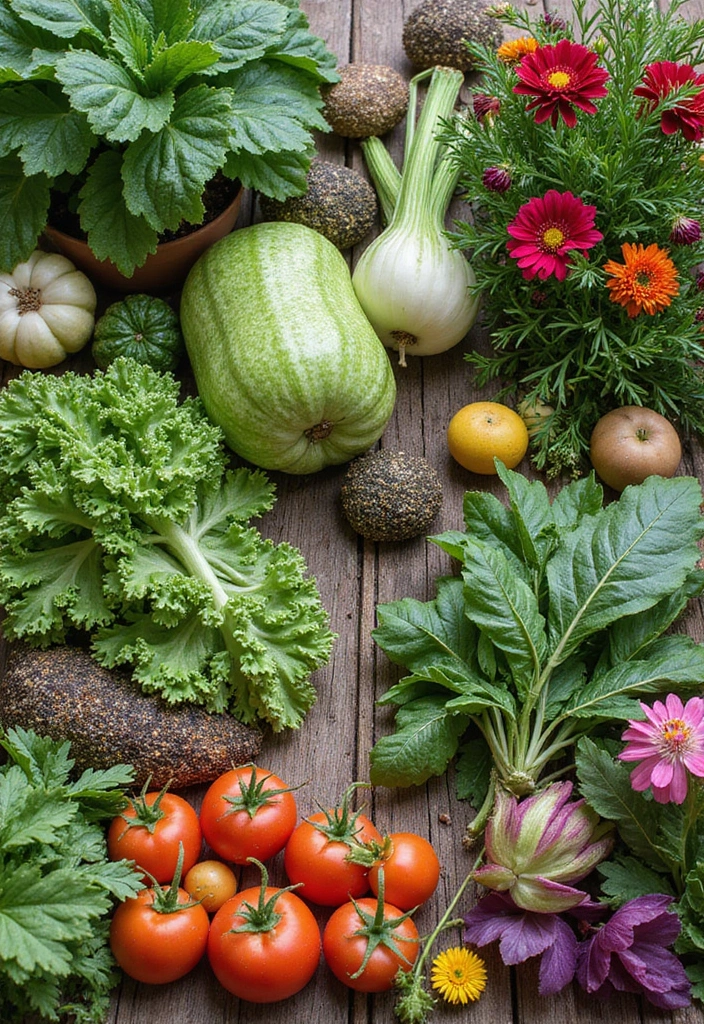
24. Naturalistic Garden Design
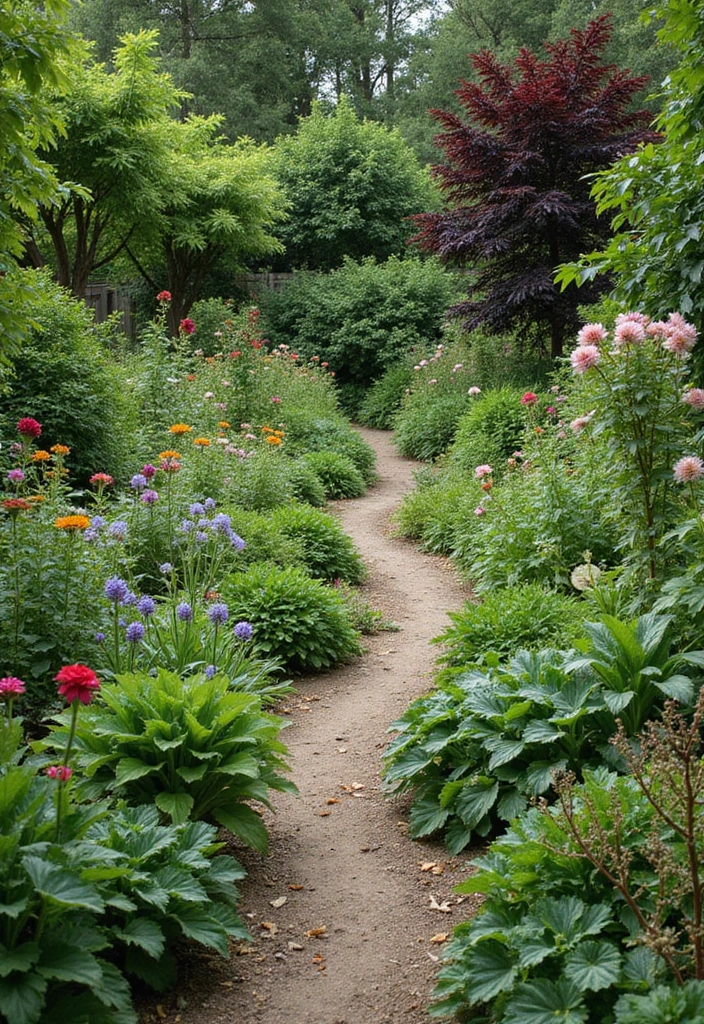
You want a garden that feels wild and real, yet it still feeds your family. Naturalistic garden design fits that goal. It blends a meadow-like feel with practical growing spaces. You’ll invite birds, bees, and butterflies while you harvest fresh vegetables. The beds mix with grasses and native wildflowers so the space looks like a small corner of nature, not a rigid grid.
Biodiversity is the heart of this style. A natural landscape draws pollinators and helps keep pests in check. You can grow food while letting nature handle part of the work. Paths help you wander without breaking the look. Choose materials that age gracefully and fit the scenery.
– Design tip: Group plants by water and sun needs to keep the system balanced and easy to care for.
– Planting suggestion: Mix annuals and perennials so you see color through the year and attract pollinators.
– Maintenance note: Let some spots grow a little wild to boost habitat and cut down on weeding.
Now think about paths and the edges of beds. Create winding routes with natural materials like bark chips, rounded gravel, or flagstones. The paths invite you to stroll, touch leaves, and smell herbs as you pass.
Choose plants that fit a natural rhythm. Native grasses can form a soft backdrop, while wildflowers add color and motion. Add vegetables where they belong, especially in sunny pockets. A simple rule helps: place plants by soil moisture and light so each area stays steady.
– Path and edge ideas: Use natural materials that blend with the landscape.
– Plant mix ideas: Pick a blend of native perennials, small grasses, and a few annuals for constant color.
– Wildlife focus: Leave space for self-seeding and little patches of woodland for beneficial insects.
Getting started can be easy with a quick plan.
– Step 1: Observe how sun and shade move through your yard during the day.
– Step 2: Note where rain pools and where the soil stays dry.
– Step 3: Mark a few veggie beds near the heart of the garden.
– Step 4: Choose native plants that fit those spots and mix in a few herbs.
– Step 5: Lay out paths with natural materials so you can walk without tripping over roots.
With steady attention, your garden becomes a living landscape that still nourishes your table.
24. Naturalistic Garden Design
Editor’s Choice

Back to the Roots Heirloom Organic, Non-GMO & USA Grown Seeds, 30ct Herb…

100% Natural Pine Bark Mulch Nuggets (8 Quarts), Small Mulch Chips for I…

River Rock Stepping Stones Outdoor for Garden Walkway, 10 inch Diameter …
25. Fantasy Garden Design
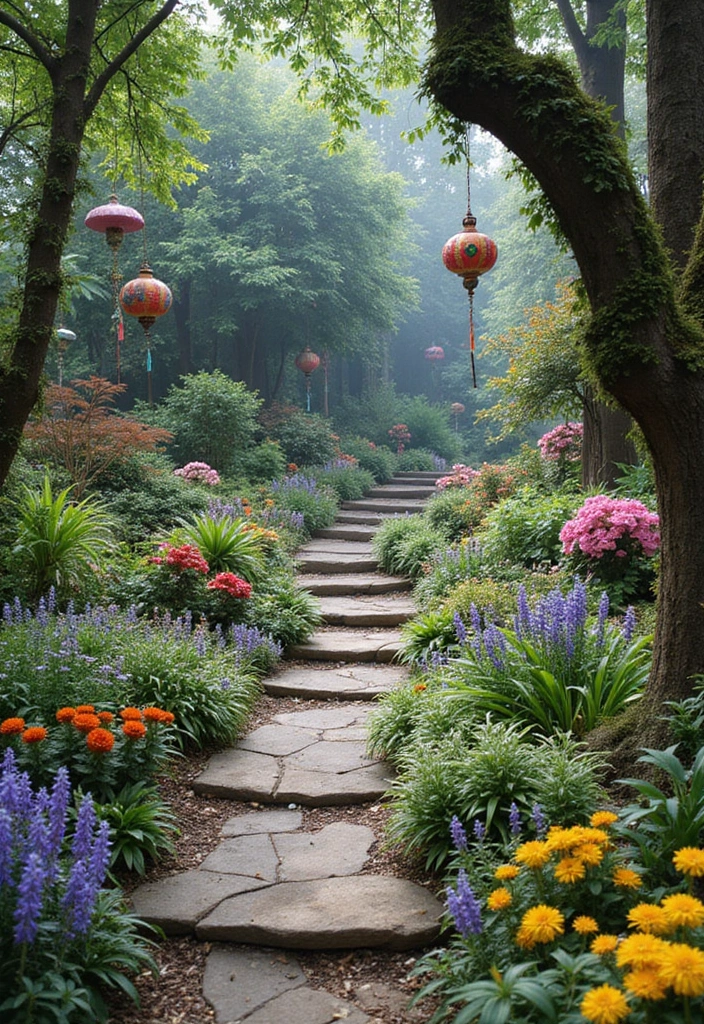
You want a veggie garden that feels like a story. A fantasy garden design blends food with magic and fun. You can mix bright colors, playful textures, and tiny scene touches. This plan makes gardening feel like a creative game you can control. You’ll see fresh vegetables beside artful, eye-catching accents.
– Lighting and pathways: String tiny fairy lights along winding paths to glow softly after dusk, guiding your steps and creating a dreamlike mood.
– Color and texture: Group bold flowers with unusual vegetables to craft a vibrant, otherworldly palette you can enjoy from morning to night.
– Unique crops: Choose vegetables with strange colors or shapes—purple carrots, striped zucchinis, blue potatoes—to surprise the eye and spark chatter at harvest time.
– Garden features: Add a small sculpture, a miniature bridge, or a wooden arch to anchor the theme, then place seating nearby so you can savor the scene.
– Planting plan: Place tall sun lovers at the back, mid-height crops in the middle, and ground covers at the edges to create depth like a stage for your edible performers.
– Seasonal color and care: Rotate colors with the seasons by swapping fast-growing greens and annual flowers, keeping the style fresh all year.
– Maintenance and care: Regularly prune, weed, and tidy decorations to keep the look sharp, and check irrigation to prevent trouble before it starts.
How to start in four steps
1) Survey your space to note sun, shade, water access, and traffic flow.
2) Pick a simple color theme and a few unusual vegetables to begin the magic.
3) Sketch a basic layout that places tall plants at the back and gives your beds a natural rhythm.
4) Add one lighting feature and a small decorative element, then refine as seasons change.
Why this approach works for you
– It makes gardening a playful, inviting hobby that still yields fresh food.
– It helps you stand out with a memorable look your friends will notice and ask about.
– It stays flexible, so you can swap plants or decorations as your yard grows.
– It scales with your budget, starting small and expanding when you’re ready.
Tips for success
– Start with two or three focal areas to avoid clutter.
– Use color to guide eye movement and keep your garden feeling united.
– Choose unusual vegetables that suit your climate and soil.
– Keep notes on what thrives so you can repeat wins next season.
A fantasy garden design can transform any backyard into a magical edible landscape. With simple steps, bold colors, and a touch of whimsy, your vegetables become part of a living story you can taste and share.
25. Fantasy Garden Design
Editor’s Choice

Brightown 12 Pack LED Fairy Lights Battery Operated String Lights – 7ft …
Cosmic Purple Carrot Seeds for Planting, 500+ Heirloom Seeds Per Packet,…

26. Therapeutic Garden Design
You want a space that helps you relax while you garden. A therapeutic garden blends calm with purpose. It fits hospitals, schools, and homes alike. The goal is to boost mood and still give you a place to grow vegetables.
Why this design helps
You get a retreat from stress. You also gain a place to harvest fresh food. The design supports movement, breathing, and focus. It works with your daily routines, not against them.
Layout ideas for calm and function
– Soft, rounded pathways guide your steps and reduce tension.
– A short walking meditation path invites slow, mindful steps.
– A quiet seating area invites breaks and breathing space.
– A fragrant herb border awakens the senses as you pass.
– Raised or accessible beds keep vegetables easy to reach.
Plant choices that soothe and satisfy
– Lavender and chamomile offer gentle scents that calm the mind.
– Lemon balm and rosemary add brightness and year-round color.
– Mint and thyme bring fresh aromas but stay in check with borders.
– Native grasses and soft perennials move in the breeze, adding texture.
– Choose colors like soft greens, blues, and purples to feel tranquil.
Paths, seating, and small water features
– Use non-slip pavers or swept gravel for safe, clean paths.
– Place a sun or shade bench where you can see the beds while you rest.
– A tiny fountain or birdbath adds soothing sound without chaos.
– Keep sight lines clear so you can notice vegetables at harvest.
Practical steps to design your therapeutic space
1. Set your goals — calm, health, or social time with others.
2. Map your area and measure walkways, beds, and seats.
3. Choose zones: meditation corner, scent beds, veggie beds.
4. Pick materials that suit your climate and care level.
5. List plants for scent, color, and easy maintenance.
6. Install with safety in mind and start a simple care routine.
Maintenance and care tips
– Mulch beds to lock in moisture and cut weeds.
– Water deeply but not wastefully; use drip irrigation if possible.
– Prune herbs after blooms to keep growth neat.
– Check soil every season and amend as needed.
Putting it into practice
Start small and test one corner first.
Build a gentle path and a simple bench.
Plant a few sensory herbs near the fence.
Watch your mood improve as you work.
A therapeutic vegetable garden layout design can turn your backyard into a sanctuary. Harvest fresh food while nurturing your mind and spirit – relaxation and purpose can bloom together!
26. Therapeutic Garden Design
Editor’s Choice

VINGLI 38.5″ Patio Park Garden Outdoor Metal Rose Bench,Cast Iron Cast A…
Rain Bird DRIPKITBAG Drip Irrigation Repair and Expansion Kit

3 Pack Rubber Stepping Stones Outdoor Garden Rubber Pavers Pathway Walkw…
27. Water-Wise Garden Layout
You want a garden that uses less water but still gives you plenty of veggies. A water-wise layout helps you do just that. It blends simple design with smart choices so your garden stays productive in hot, dry weather.
What makes a water-wise garden work
– Smart plant choices. Pick crops that handle less water once they’re established. Herbs like rosemary, thyme, and oregano are great. Leafy greens that stay moist with mulching also perform well.
– Efficient irrigation. Use drip lines or soaker hoses. They deliver water directly to the roots and cut waste. A simple rain barrel can top off your supply in a dry spell.
– Mulch and soil health. Mulch cools the soil, slows evaporation, and feeds soil life. Stones and dark mulch both work well in this layout. Healthy soil drinks in water and feeds plants longer.
– Native and drought-tolerant plants. Native perennials and drought-tolerant vegetables thrive with less care. They create a calm, low-water backbone for your bed.
– Low-water raised beds. Build beds with stone or rock edges to reduce evaporation and keep soil moisture where you want it.
How to design your space
– Map your yard. Note where the sun is strongest and where wind cools the soil. Place thirstier plants in spots that get morning sun and afternoon shade if possible.
– Group by water needs. Put plants that require similar water together. It makes watering simpler and more precise.
– Choose the right crops. Include herbs like thyme or rosemary, squash varieties that tolerate drier conditions, and greens that respond well to mulch and slower watering.
– Add a smart irrigation plan. Run a drip system in the beds and a short hose for quick, spot watering. Attach a simple timer to keep schedules steady.
– Layer mulch on every bed. Use a 2–4 inch blanket of mulch. It keeps soil cool, slows evaporation, and hides dry patches.
Maintenance that keeps it working
– Check soil moisture. Look for soils that feel barely damp far below the surface. If it’s bone dry, water a little more that day.
– Watch plant signals. Wilting during heat means you may need to water earlier or adjust the timer. No leaves turning yellow means you’re on the right track.
– Refresh mulch yearly. Replenish to keep the soil cool and moist. It also helps suppress weeds that steal water.
Practical tips to get started
– Start small. Build one or two utility beds first, then add more as you get comfortable.
– Choose durable materials. Natural stone, compact gravel paths, and sturdy edging hold up well in sun and rain.
– Track results. Note which crops seem happiest with your watering plan. Use that data to fine-tune next season.
Common questions you might have
– Can a small yard work with this layout? Yes. Start with a compact bed, a drip line, and a rain barrel. You’ll see the system becomes easier to manage over time.
– What about very hot summers? Mulch is your best friend then. It keeps the surface cool and makes every drop count.
– Do I need fancy gear? Not at first. A basic drip kit, a timer, and a simple mulch routine go a long way.
Bottom line
A water-wise garden layout saves water without sacrificing yield. With careful plant choices, smart irrigation, and steady mulch, you get a vibrant, low-maintenance vegetable space you can enjoy all season.
27. Water-Wise Garden Layout
Editor’s Choice
Rain Bird DRIPKITBAG Drip Irrigation Repair and Expansion Kit

50-Gallon ECO Rain Barrel Made with 100% Recycled Plastic, Flat Back Rai…
Back to the Roots 25.7qt (1 Cubic ft) Organic Premium Mulch
28. Community Education Garden
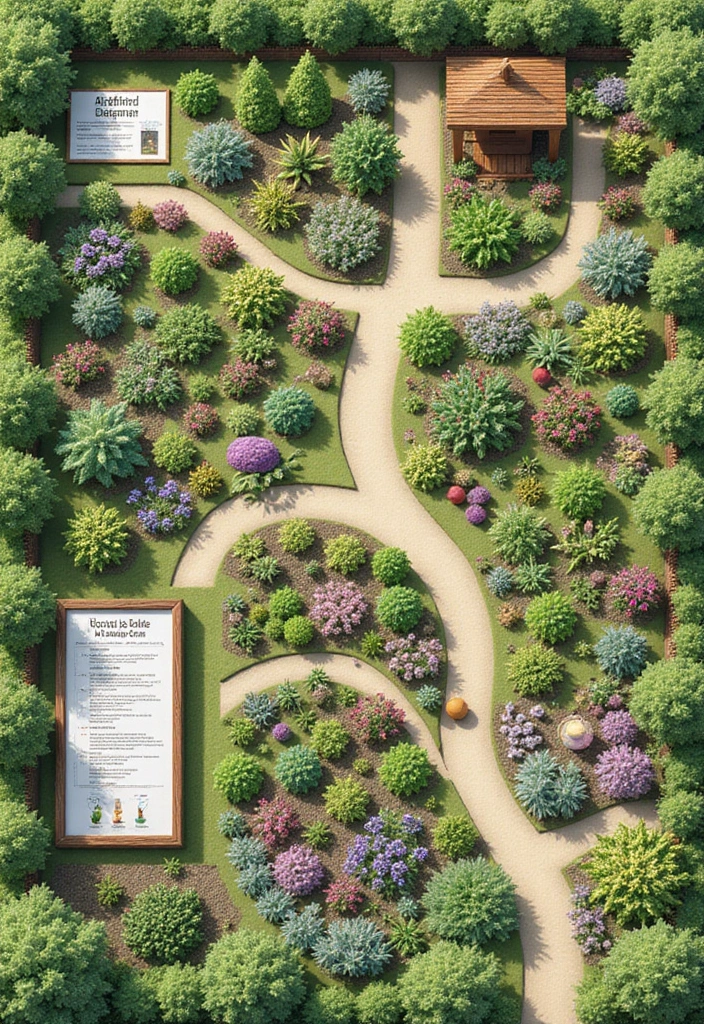
You want a garden that teaches as you grow. A community education garden puts learning at the heart of your space. You show how soil, water, and care work together. Visitors see real lessons in action: a child turning compost, a neighbor comparing mulch layers, and a student reading a simple guide by a sign. The layout should feel welcoming and doable for beginners while proving that good gardening comes from steady practice.
What it looks like matters. A winding path ties the beds together. A small shelter or bench gives people a place to sit and study. Clear signs by each area explain what to do and why it matters. You can place a compost area, a demonstration bed for permaculture, and a veggie plot side by side so every visitor learns by doing. This setup invites questions, not just observations.
Design tip: Set up a small learning hub near the beds to host classes and workshops.
Planting suggestion: Plant a diverse mix of crops that illustrate techniques such as companion planting and crop rotation.
Maintenance note: Schedule monthly community workdays so the garden stays lively and cared for.
Getting started is easier if you break the work into simple steps. Use a quick map of your space and write down what you want visitors to learn first. Pick three demo areas that cover soil, water use, and plant care. Put up signs with plain language and friendly pictures. Reach out to locals who want to help, like a nearby school or a neighbors’ group. They will bring people, energy, and ideas.
Steps to launch:
1) Map your space and decide what you want learners to see first.
2) Choose three demo areas, such as composting, water-wise irrigation, and different bed styles.
3) Install simple signs with clear, friendly language to explain each area.
4) Invite neighbors, schools, or clubs to join and build a steady group of volunteers.
Benefits come through steady practice. You’ll see kids pick up composting steps, adults learn drip irrigation, and seniors share tips on pruning. The garden becomes a living classroom that fits many lives—after-school projects, weekend workshops, and casual visits. This isn’t a luxury feature; it’s a practical way to grow skills and build community.
Keep expectations realistic. A community education garden grows best with clear goals, a simple layout, and regular, friendly input from volunteers. It takes time, but the payoff is a yard that teaches, feeds, and connects people every season.
28. Community Education Garden
Editor’s Choice

VITEVER 100pcs Plant Labels, T-Type Plastic Tags with Marker Pen, Waterp…

Presto Products Geobin Compost Bin – 246 Gallon, Expandable, Easy Assemb…
Rain Bird DRIPKITBAG Drip Irrigation Repair and Expansion Kit
29. Therapeutic Community Garden
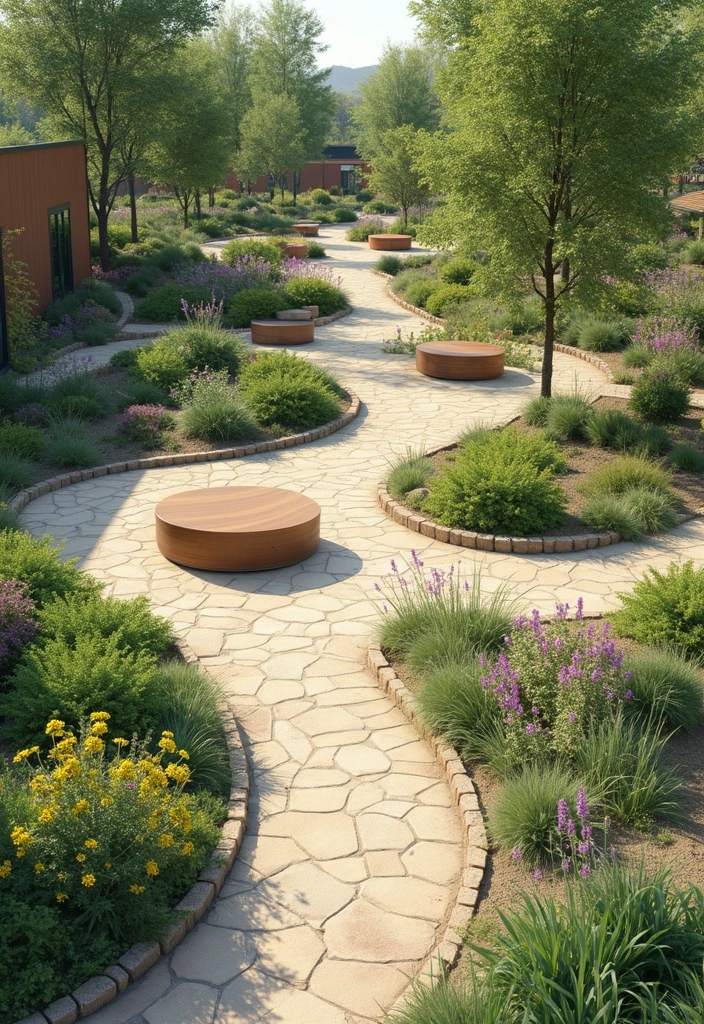
If you want a space that helps people heal and feel cared for, a therapeutic community garden can do that. It blends social time with gentle healing, so everyone benefits. You design it with accessibility in mind, and that makes your yard usable for neighbors of every age and ability.
– Design priorities: wide, smooth paths that are easy to roll on; raised beds you can reach from a standing or seated position; benches and shaded corners for rest and talk; and safe, flat surfaces that cut tripping risks.
– Plant choices: a mix of textures, scents, and colors that people can enjoy with hands, noses, and ears.
– Engagement: spaces that invite conversation, calm work, and shared success.
Layout ideas help the space feel welcoming and easy to use. Create a looped path so you never feel stuck. Put a central gathering area with a few benches where people can chat or plan activities. Use raised beds in a ring or a simple grid so volunteers with mobility aids can work side by side with others. Add a small shaded corner with seating for quiet moments. A sensory corner works well near the entrance to set the mood.
Sensory plantings bring the healing power to life. Choose easy-to-care-for varieties that can be touched, smelled, and heard. Examples include soft lamb’s ear, fragrant rosemary, mint to crush in your hands, and lavender for a calm scent. Use herbs near paths for fragrance, and add textured plants like grasses or velvety leaves for contrast. Keep color gentle and inviting, not busy.
Practical steps to get started:
– Assess your space and set a clean, low-cost plan. Measure the yard and mark path routes with simple stakes.
– Map accessible routes. Make all main areas reachable from a wheelchair or walker.
– Pick beds that fit your space and comfort level. Aim for 24–30 inches (60–75 cm) in height.
– Select a sensory plant list. Plan a mix of touch, smell, and sight experiences.
– Add seating and shade. Place benches near plant displays and a few trees or umbrellas for relief.
– Create a simple maintenance plan. Rotate volunteers, set monthly tasks, and keep a shared note for notes and ideas.
Maintenance and inclusion go hand in hand. Invite neighbors and families to join in. A regular, friendly schedule builds ownership and pride. Keep tools and supplies ready, and use a small sign-in to track who helped and when.
Common questions you may have:
– How much money is needed to start? Start small with a few raised beds and a bench. Expand as you gain volunteers.
– How do I recruit volunteers? Host a monthly work day and offer short tasks that anyone can do.
– What if someone can’t weed but can plant? Offer shifting roles so everyone can contribute.
This layout centers on people. It respects limits while exposing everyone to the full joy of gardening. With care, your therapeutic community garden becomes a steady source of relief, connection, and growth for your block.
29. Therapeutic Community Garden
Editor’s Choice
Land Guard Galvanized Raised Garden Bed Kit, Galvanized Planter Garden B…

Garden Bench,Outdoor Benches,Iron Steel Frame Patio Bench with Mesh Patt…
30. Seasonal Harvest Garden

You want a garden that feeds you through more than one season. A Seasonal Harvest Garden makes that possible. It blends crop rotation with smart season planning so your veggies stay fresh and abundant. You’ll split your space into spring, summer, fall, and winter sections, and you can add covers or a small greenhouse to push the growing window when needed. This approach cuts waste, boosts soil health, and gives you a wider variety of produce all year long.
With this layout, your main goal is simple: harvest often, not all at once. You plant to match each season’s weather, light, and soil mood. You group crops by when they thrive. Then you move them around the beds to keep soil happy and pests off guard. The result is steady harvests and less surprise gaps in your table.
How to set up your Seasonal Harvest Garden
1) Map your climate and dates. Write down last frost and first frost dates. This helps you plan when to start seeds and when to transplant.
2) Pick crops by season. Spring shines with greens, peas, and radishes. Summer loves tomatoes, peppers, beans, and cucumbers. Fall favors brassicas, root vegetables, and leafy greens. Winter options include hardy greens and stored vegetables you can catch in the pantry later.
3) Plan a rotation. Move plant families to new beds each year. This keeps soil from wearing out and lowers disease risk. A simple rule is to rotate families every season or every year, depending on your space.
4) Use season extenders. Row covers, cold frames, and small greenhouses help you protect tender crops. They speed up growth and protect harvests when nights stay chilly.
5) Build a smart calendar. Mark planting dates, transplant days, and harvest windows. A clear schedule keeps you from missing the best picking times.
6) Practice succession planting. After one crop finishes, plant another that fits the season and space. This fills beds and keeps output steady.
7) Keep soil healthy. Add compost, mulch, and occasional feeding to support crops through rotations. Healthy soil means bigger harvests with less water and effort.
Implementation tips you can try this weekend
– Design tip: create four seasonal zones in your yard and label what to plant where.
– Planting suggestion: include a mix of fast growers and longer-season crops for each period.
– Maintenance note: check beds weekly for gaps, pests, and thirsty plants. Adjust irrigation and shade as needed.
A Seasonal Harvest Garden is honest about limits. It won’t give you nonstop sunshine, but with season extenders and careful planning, you’ll enjoy fresh produce most of the year. It’s practical, attainable, and surprisingly simple once you map your climate and start small.
Transform your backyard into a Seasonal Harvest Garden, where every season brings fresh flavors! Enjoy a bountiful variety of produce all year long while nurturing your soil and minimizing waste.
30. Seasonal Harvest Garden
Editor’s Choice

Garden Netting, Jevrench Durable Ultra Fine Garden Netting, Garden Plant…
Outsunny 9′ x 3′ x 3′ Mini Greenhouse with Zippered Doors & Roll-up Wind…

THEGROW’ING Updated 43 Gallon Compost Bin Outdoor, Fast Assemble Tumblin…
Conclusion
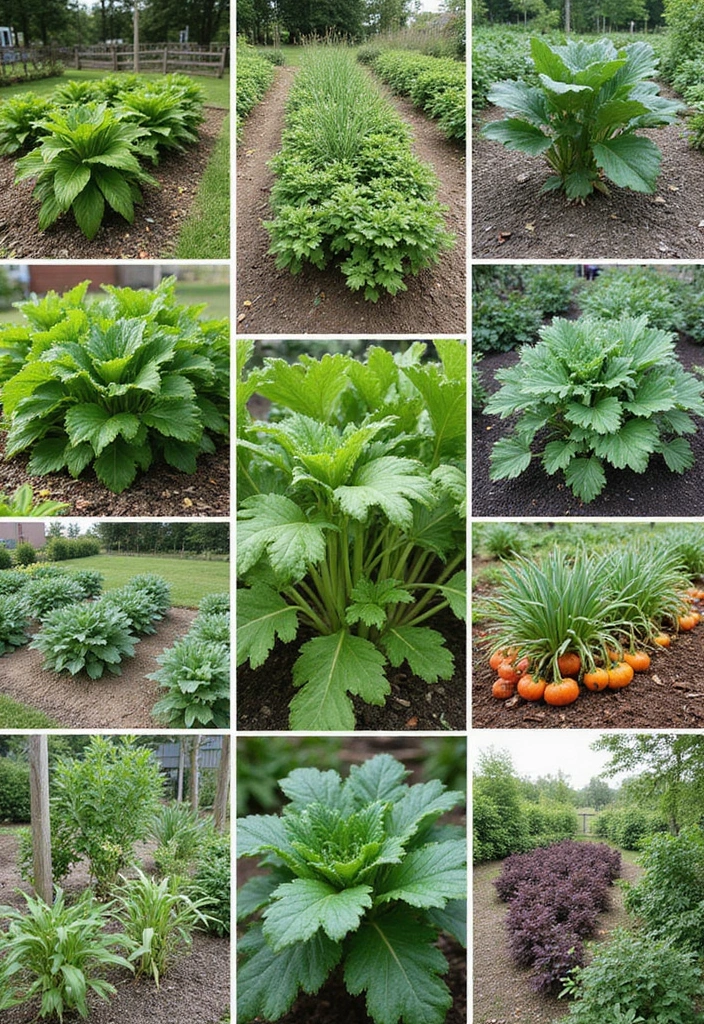
From raised beds to vertical gardens, the possibilities for vegetable garden layout designs are truly endless.
Each design offers unique benefits and aesthetics, enabling you to transform your backyard into a flourishing oasis of color and nutrition.
Embrace your creativity and find the layout that fits your space, style, and gardening goals. Happy gardening!
Note: We aim to provide accurate product links, but some may occasionally expire or become unavailable. If this happens, please search directly on Amazon for the product or a suitable alternative.
This post contains Amazon affiliate links, meaning I may earn a small commission if you purchase through my links, at no extra cost to you.
Frequently Asked Questions
What Are the Best Vegetable Garden Layout Designs for Small Backyards?
If you’re dealing with limited space, consider designs like the vertical garden or container gardening. These layouts maximize your growing area without taking up too much ground. Vertical gardens can utilize walls and fences, while containers allow you to move plants around for optimal sunlight. These options can transform any small backyard into a vibrant vegetable paradise!
How Can I Incorporate Herbs Into My Vegetable Garden Layout?
Integrating herbs into your vegetable garden layout is a fantastic idea! A kitchen garden design can make fresh herbs readily accessible while adding beauty and fragrance to your space. Plant herbs like basil, parsley, and thyme alongside your vegetables for both culinary delights and pest-repelling benefits. This way, cooking becomes a breeze, and your garden looks stunning!
What Is Companion Planting and How Can It Benefit My Vegetable Garden?
Companion planting is a clever technique where certain plants are grown together to enhance each other’s growth and reduce pests. For example, pairing tomatoes with basil can improve flavor and deter harmful insects. In your garden layout, consider a companion planting layout to create a healthier ecosystem. This method not only boosts your yield but also makes gardening more sustainable!
What Are Some Creative Vegetable Garden Layout Ideas for Families?
For families, engaging children in gardening can be a delightful activity. Opt for a cottage garden blend that combines vegetables with colorful flowers, making it visually appealing for kids. You could also create a spiral garden design that adds a fun element while maximizing space. These layouts encourage family participation and make the gardening experience joyful and educational!
How Can I Make My Vegetable Garden More Sustainable?
To enhance sustainability in your vegetable garden, consider a water-wise garden layout that conserves water while producing a bountiful harvest. Utilize native plants and implement drip irrigation systems to minimize waste. Additionally, incorporating a wildlife-friendly garden design can help attract beneficial insects and pollinators, creating a balanced ecosystem. This way, your garden thrives while being kind to the environment!
Related Topics
vegetable garden layout design
garden planning
raised bed gardening
vertical garden
container gardening
edible landscaping
companion planting
small space gardening
seasonal harvest
community garden
urban gardening
beginner friendly


")


I love these garden layout ideas! I’ve been trying to figure out how to arrange my veggies without them fighting for space. What layout do you think works best for smaller yards?
These designs are amazing! I once tried to plant my tomatoes too close to my peppers, and let’s just say it turned into a veggie wrestling match! What’s your funniest garden fail?
Did you know that planting marigolds near your veggies can help keep pests away? I learned that the hard way after a bug buffet in my garden last summer!