

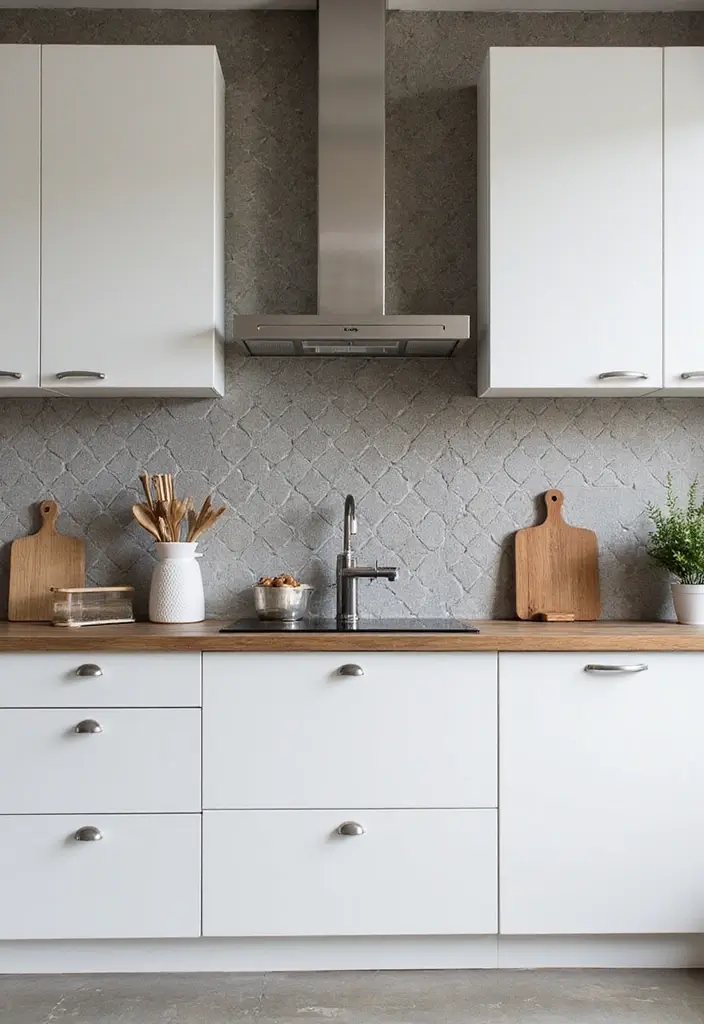
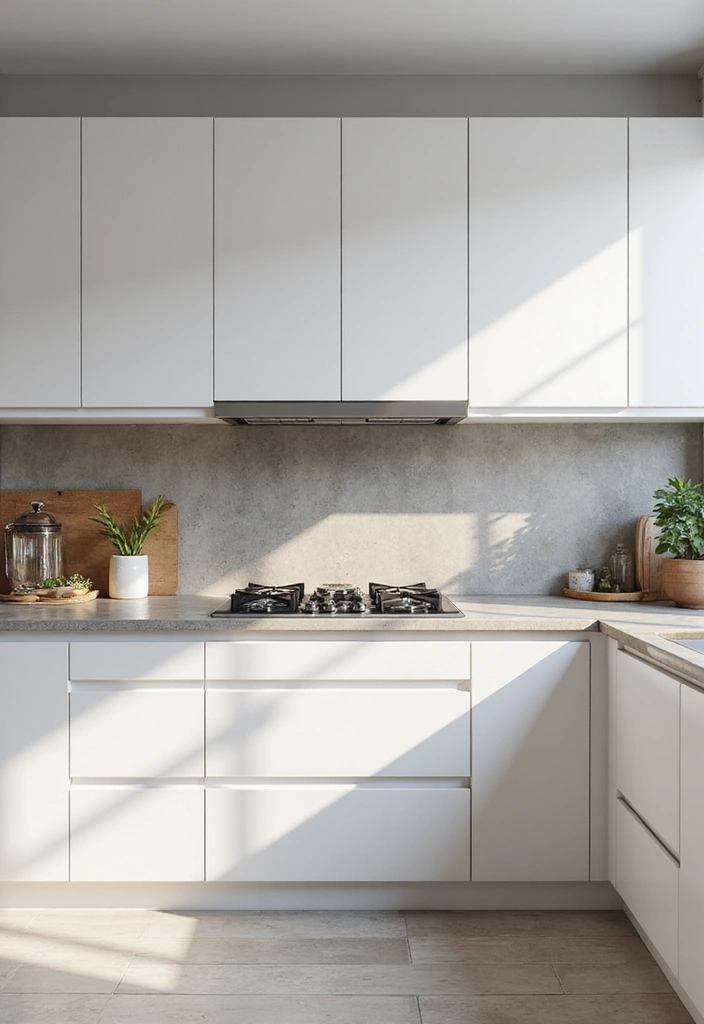
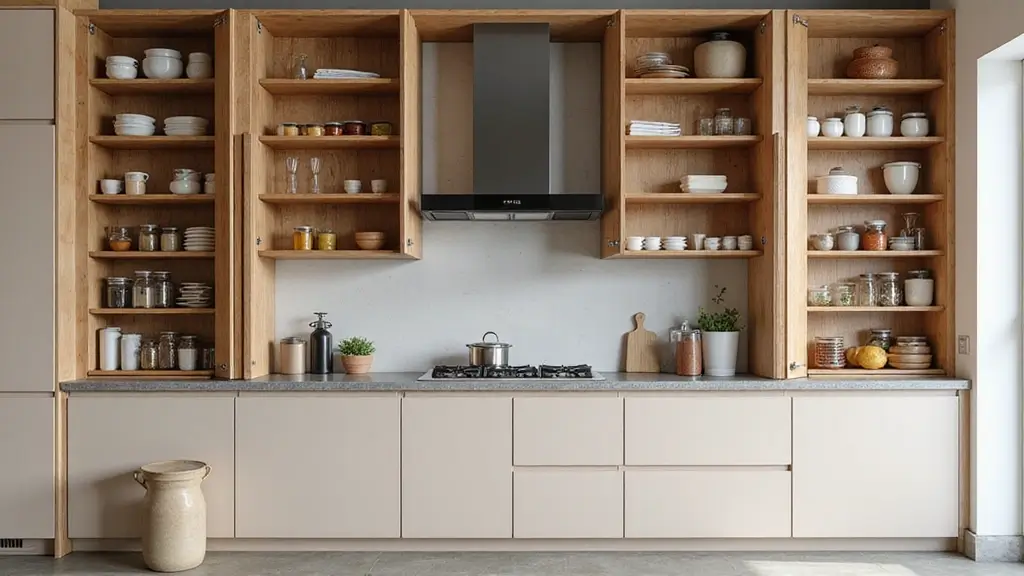
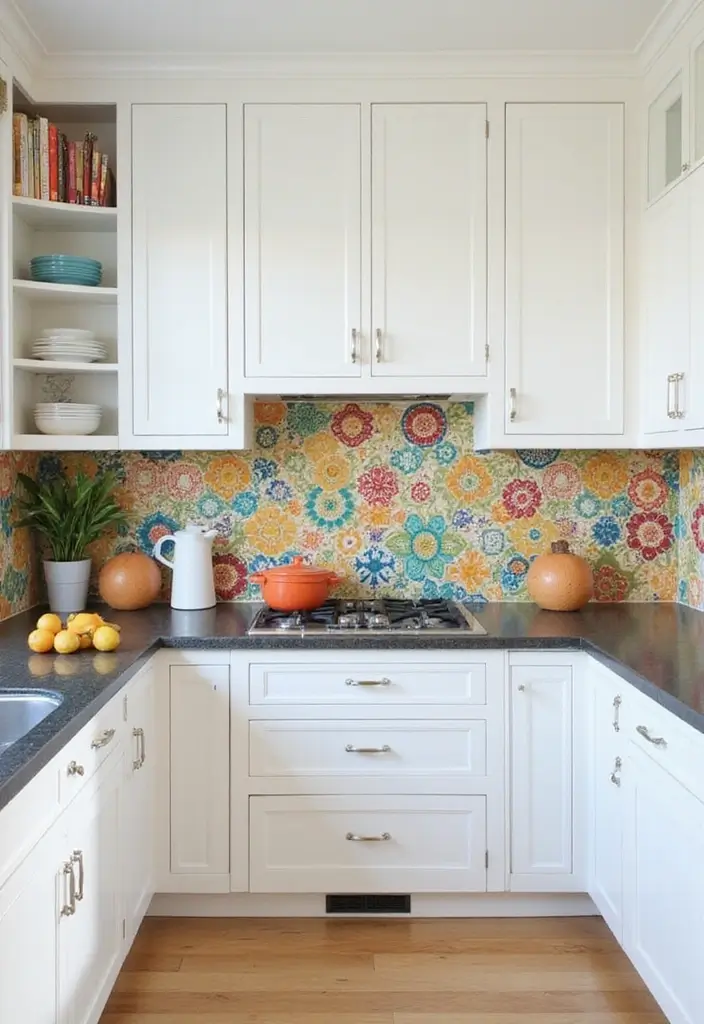
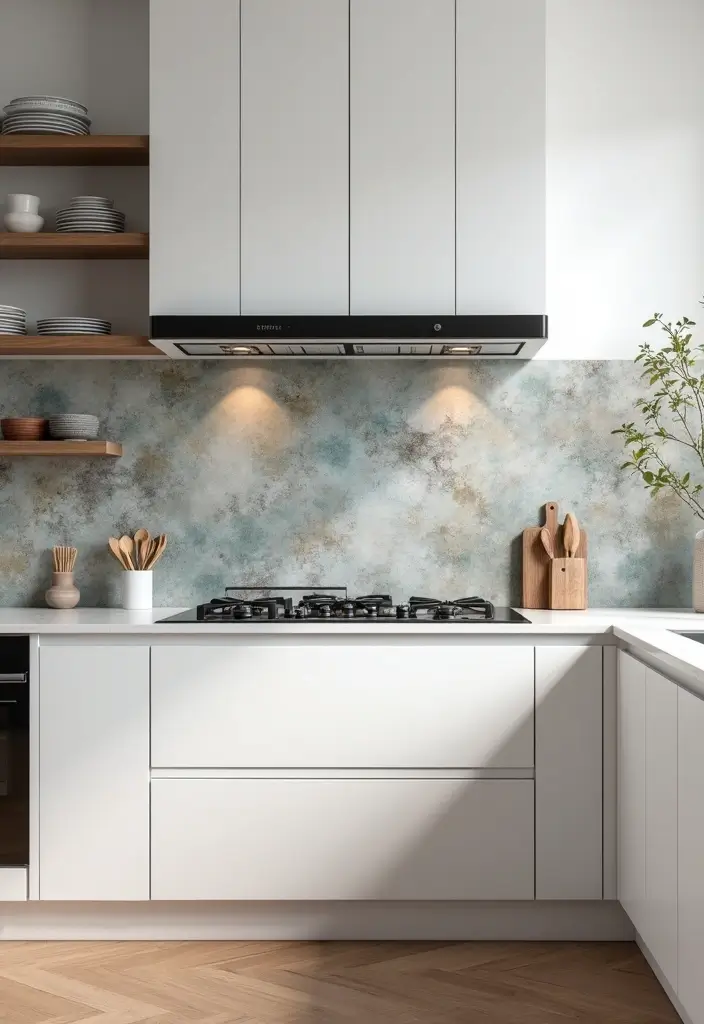
I put this together because white cabinets give your kitchen a bright, clean feel, and the backsplash is where you add heart. It can stay calm and airy or grab attention with color and texture. I want to help you pick confidently instead of wandering the tile aisle in a daze.
If you’re in the middle of a kitchen update with white cabinets, or you want a quick, reversible change as a renter, this post is for you. If you care about style that lasts, easy cleaning, and a budget you can manage, you’ll find ideas that fit. This is for home cooks, DIY lovers, and anyone who wants their space to feel personal without a big mess.
Here you get 25 stunning backsplash ideas that work with white cabinets. You’ll see a mix of materials like glass, ceramic, stone, and metal, plus patterns from classic subway to bold mosaic. Each idea comes with the feeling it creates and where it shines in real life.
With white cabinets, you can swing toward soft neutrals or punch in color. A glossy tile adds light, a matte texture adds depth. Glass can make a small kitchen feel bigger, while stone brings a warm, tactile vibe. These contrasts help you tailor the room to your daily rhythm.
Start by saving two or three favorites. Then order samples and hold them under your kitchen lighting. Consider maintenance: glass cleans easy, natural stone needs sealing, white marble shows stains. If you rent, look for peel-and-stick options that let you test a new look without a full redo.
Take this guide as a map. Pick a mood board, choose one material family, decide a budget, and plan your installation around these. By the end you will see a short list of favorites and a clear path to bring your white cabinets to life. Let’s dive in and find the perfect backsplash for your space.
Contents
- 1. Classic Subway Tiles for Timeless Elegance
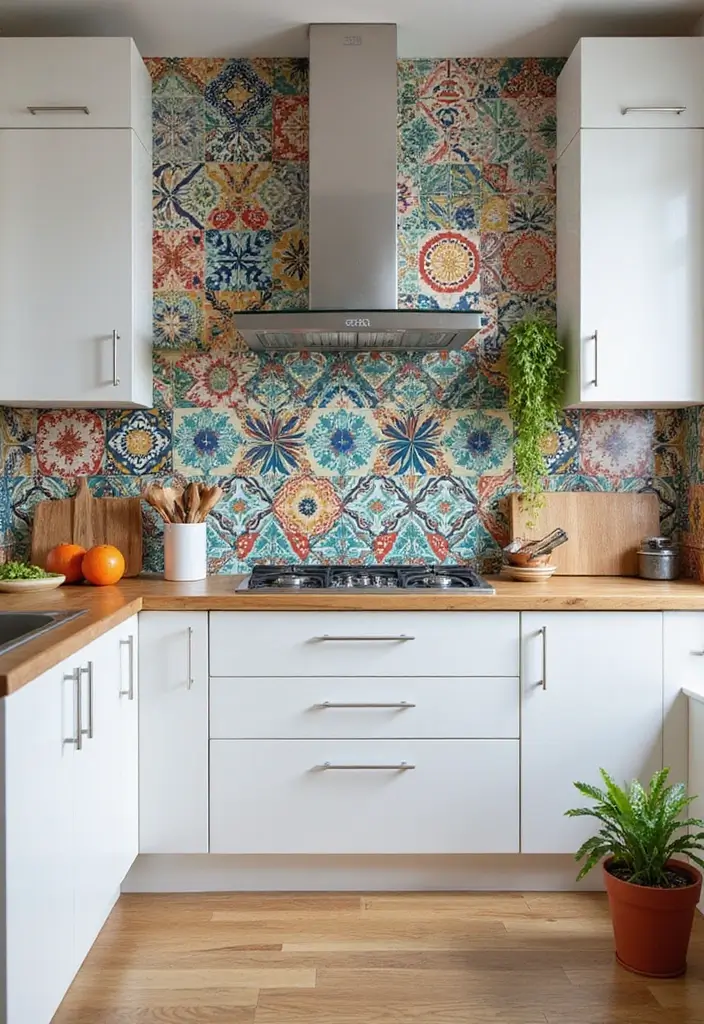
- 2. Bold Mosaic Designs for a Pop of Color
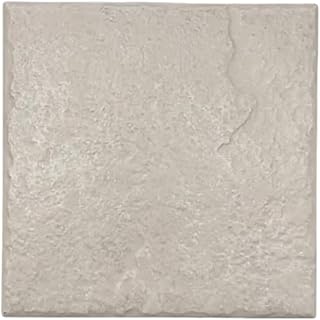
- 3. Elegant Natural Stone for a Rustic Touch
- 4. Glossy Glass Panels for a Sleek Finish
- 5. Vintage Tin Tiles for a Unique Flair
- 6. Sleek Cement Tiles for an Industrial Feel
- 7. Artistic Handmade Tiles for a Personal Touch
- 8. Contemporary Patterned Tiles for a Bold Statement
- 9. Soft Subtle Textures for a Cozy Feel
- 10. Dual-Toned Backsplashes for a Modern Twist
- 11. Natural Wood Elements for a Warm Touch
- 12. Minimalistic Designs for a Clean Look
- 13. Colored Grout for a Fun Twist
- 14. Textured 3D Panels for Depth
- 15. Iridescent Tiles for a Touch of Glam
- 16. Geometric Patterns for a Modern Edge
- 17. Bold Black Accents for Dramatic Contrast
- 18. Elegant Marble for a Luxurious Vibe
- 19. Vibrant Colored Tiles for a Fun Kitchen
- 20. Unique Recycled Material Backsplashes for Sustainability
- 21. Peel-and-Stick Tiles for Easy Updates
- 22. Stainless Steel for a Modern Industrial Feel
- 23. Chalkboard Paint for a Fun, Interactive Space
- 24. High-Gloss Finishes for a Contemporary Look
- 25. Customizable Backsplashes for a Unique Look
1. Classic Subway Tiles for Timeless Elegance
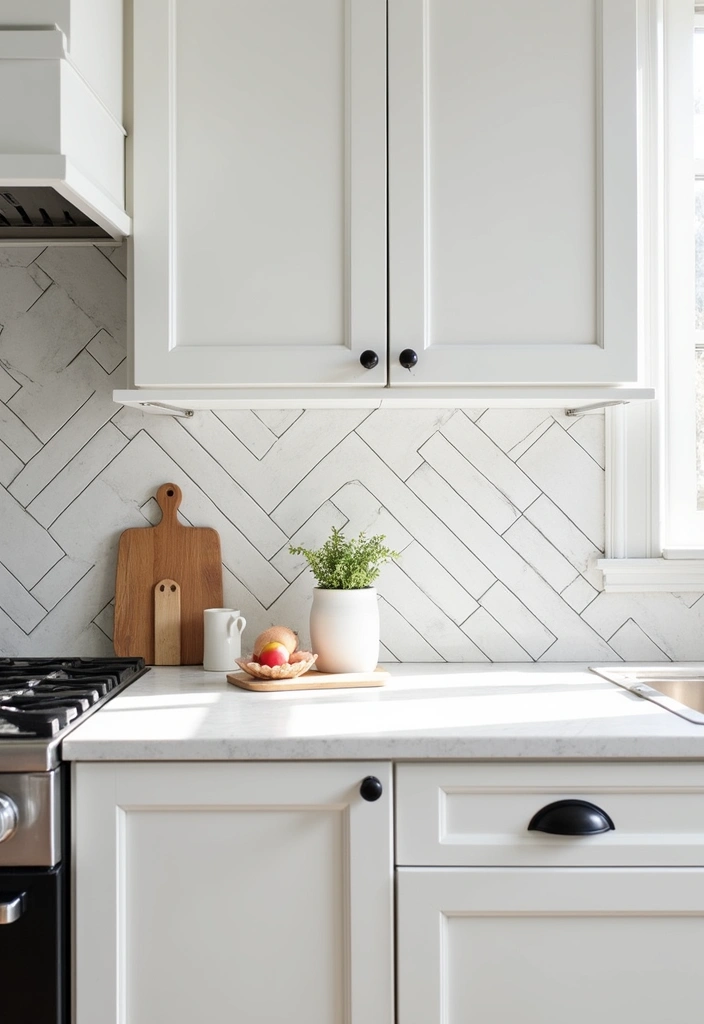
You want a backsplash that matches white cabinets and lasts year after year. Classic subway tiles fit that need. They give a clean, polished look and stay easy to clean. You can set them in simple rows or mix in patterns for a fresh vibe. A glossy finish helps reflect light and make the room feel bigger.
Here is why subway tiles work well with white cabinets. The slim, rectangular shapes draw the eye along the wall. That makes the kitchen feel more open. They come in white, black, and soft pastels to suit many moods. The timeless style never feels loud or out of place.
Let’s break down practical ways to use them in your kitchen.
– Pattern options:
Traditional straight lay keeps lines calm and orderly. Herringbone adds a playful twist without shouting. Stacked or vertical layouts bring a modern edge that still reads as clean and simple.
– Finish and color:
A glossy glaze bounces light across the wall, brightening a small kitchen. If you want contrast, black or deep gray tiles create a bold look. Soft pastels paired with white cabinets soften the space and soften reflections.
– Grout choices:
White grout blends in, making the wall look continuous. Dark or charcoal grout makes each tile edge pop and adds crisp lines. Light gray grout sits between the two, balancing care and look.
– Accent ideas:
Add a thin strip of a different tile near the stove for a surprise touch. A small mosaic panel at a corner or behind the sink can become a quiet focal point without overpowering the room.
– Care and durability:
Wipe tiles with mild soap and warm water to remove splashes quickly. Avoid harsh chemicals that dull the glaze. Seal or refresh grout if you notice stains or gaps after years of use.
– How to pick for your space:
Look at your kitchen size, how much natural light you have, and your budget. If the room is bright, keep the tile light to preserve airiness. If you have a lot of wood or metal fixtures, a darker grout can anchor the look.
Overall, classic subway tiles give you a dependable, stylish backdrop for white cabinets. They blend with many styles and stay simple to care for.
1. Classic Subway Tiles for Timeless Elegance
Editor’s Choice

102-Piece Peel and Stick Wall Tile for Kitchen Backsplash, Bathroom, Fir…

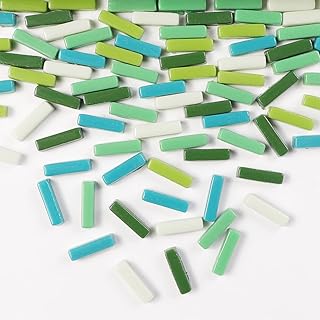
2. Bold Mosaic Designs for a Pop of Color

Bold Mosaic Designs for a Pop of Color
You want a kitchen that feels personal but stays easy to clean. A bold mosaic backsplash can do that.
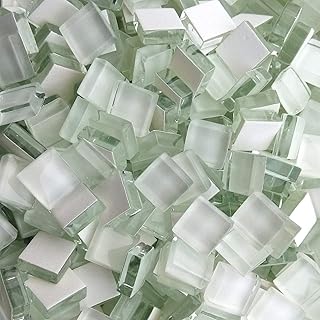
Mosaic tiles let you add color and pattern without repainting walls. They come in many shades and designs. You can pick blues and greens, or a multi color mix that tells your story. White cabinets set a clean stage, so the tiles don’t clash. The patterns, especially geometric ones, create movement. They act as a focal point that draws the eye across the room.
Here is why mosaics work well with white cabinets. They bring texture and a bit of shine. They break up the flat look without overpowering the space. You get depth while keeping a calm overall feel.
Next, practical ways to use mosaics in your kitchen
– Make the mosaic a statement piece above the stove or the kitchen island.
– Keep the grout color neutral so the tiles stay the main event.
– Choose glass mosaics for extra sparkle and light bounce.
– Opt for smaller tile sizes if you want busy patterns that line up neatly.
– Pick a color palette that matches your mood—cool blues for calm, warm earth tones for coziness.
– Consider mixing materials, like glass with ceramic, to add texture without a heavy look.
Tips to guide your selection
– If you want a bold effect, go with a high contrast mix of colors. The white cabinets will help the colors pop.
– For a softer touch, lean toward pale tones in a tight color family. It still feels lively next to white.
– Look for mosaics that are mesh-mounted. That makes installation easier and keeps lines straight.
– Check the tile sizes. Tiny tiles create more sparkle; larger ones read more like a single panel.
Maintenance and practicality
– Glass mosaics are usually easy to wipe clean. They resist fingerprints and smudges.
– Porcelain and ceramic mosaics hold up well in busy kitchens.
– Seal grout if you use cement-based grout. It helps prevent stains and makes cleaning smoother.
Next steps
– Browse color stories that match your countertops and hardware.
– Bring home samples and test how they look in your morning and evening light.
– Plan your layout before you buy. Decide if you want a full wall or a partial band.
Mosaic backsplashes suit cooks who want a room that speaks to their style. They offer color, texture, and a simple way to elevate white cabinets. With the right tile choice, you get a kitchen that feels bright, inviting, and uniquely yours.
2. Bold Mosaic Designs for a Pop of Color
Editor’s Choice

Lanyani 1050 Pieces Mixed Shapes Glass Mosaic Tiles for Crafts, Colorful…

Lanyani Broken Ceramic Porcelain Tiles for Mosaic Crafts Glazed Irregula…
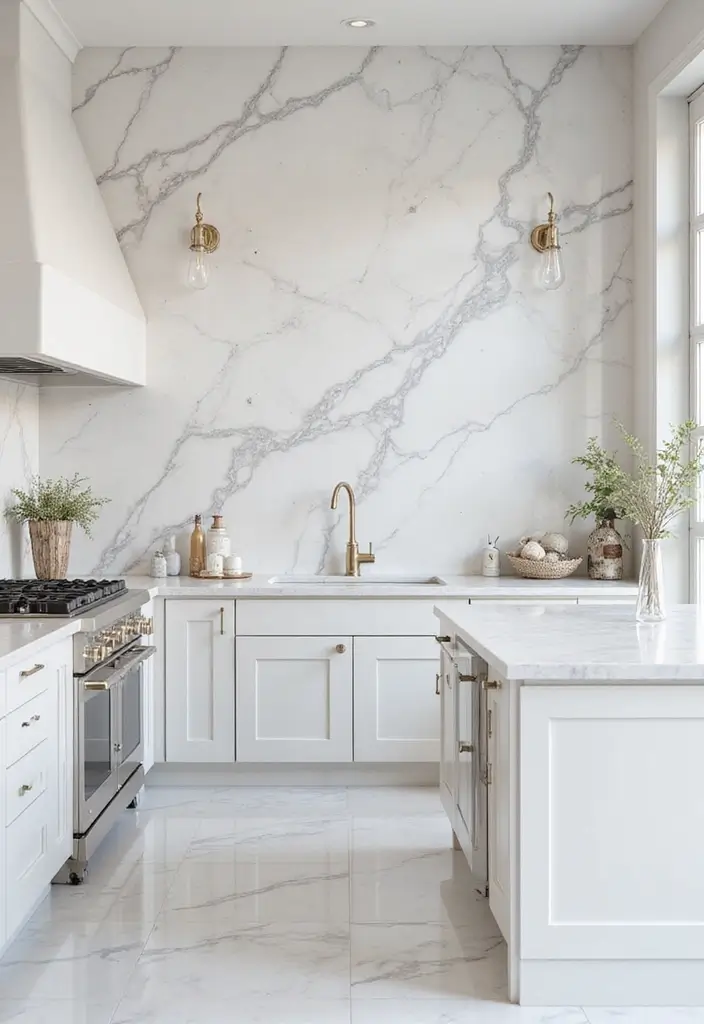
3. Elegant Natural Stone for a Rustic Touch
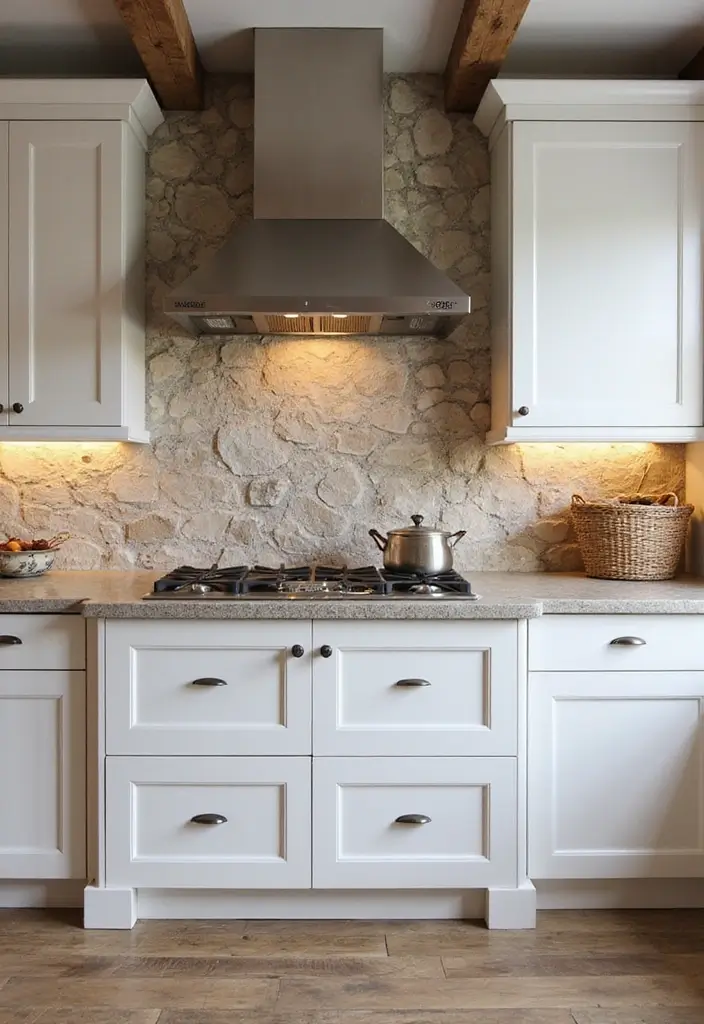
You want a kitchen that feels warm yet clean. Natural stone can give you that with white cabinets. It adds texture without adding clutter.
Here is why stone works well. Marble offers a soft shine that lightens the room. Slate brings depth and a touch of rugged charm. Both feel natural and inviting.
The look is unique. Each slab has its own veining and markings. No two backsplashes are alike. The patterns catch light differently and add character. This makes your cooking space feel special and a bit luxurious.
Maintenance matters. Stone loves protection from stains. Sealing helps keep it safe from spills. Do the seal once and recheck it every year or two. Clean with a gentle soap and water, then dry. Avoid harsh acids that can dull the surface.
Key considerations
– Use larger stones for a bold look.
– Pair with wooden accents for warmth.
– Keep other elements minimal to highlight the stone.
Here are practical ideas to apply this look. Pick a slab with clear veining that matches your cabinet tone. Install with clean, straight joints to keep the surface feel calm. Choose light grout to let the stone stand out. If you have a wood island or trim, let the stone share the stage rather than compete with it. This creates a welcoming kitchen that still feels fresh and easy to live in.
Next steps to bring this to life. Decide between marble or slate based on the mood you want. Check the stone’s seal and plan a sealing date. Gather samples and compare how they look with your white cabinets and hardware. Then hire a pro for careful installation and a proper seal that lasts.
If you want trends without overdoing it, go with marble for a timeless glow or slate for a rustic charm. Matte finishes blur any marks and stay modern, while a polished seal can catch more light. Pair the backsplash with simple fixtures and soft lighting to keep the focus on the stone.
3. Elegant Natural Stone for a Rustic Touch
Editor’s Choice

Weiman Granite & Stone Sealer Spray – Protects Kitchen Countertops, Sink…
Daltile Natural Stone Slate 12″ x 12″ in Natural Cleft Brazil Black (6 P…

Stone Care International Granite Cleaner – 32 Fluid Ounces Granite & Sto…
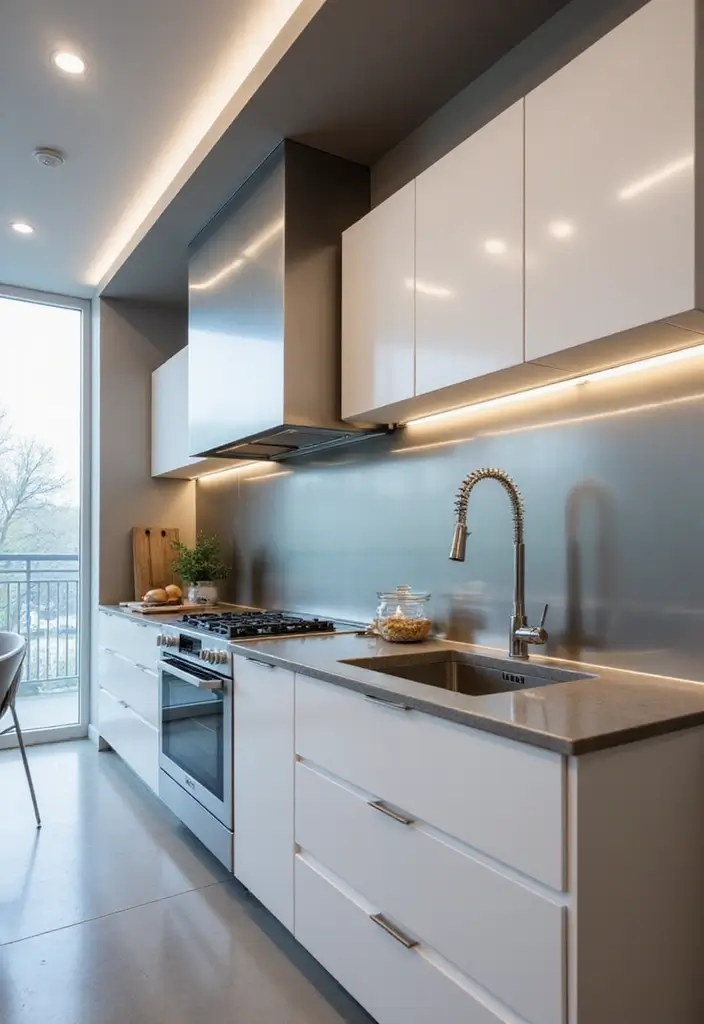
4. Glossy Glass Panels for a Sleek Finish

Glossy Glass Panels: A Sleek Finish
You want a splash that feels fresh with white cabinets. Glossy glass panels fit that brief. They shine, clean easily, and reflect light to make your kitchen feel bigger. Here is how to use them well.
– Why it works: The high gloss catches daylight and lamps. White cabinets stay crisp. You get a bright, calm backdrop that makes colors pop.
– Color and texture options: Clear glass stays ultra clean and bright. Frosted glass hides fingerprints but keeps the glow. You can also tint glass for a softer look. Subtle textures add depth without stealing the shine.
– Lighting adds drama: Backlighting behind glass creates a soft halo at night. It highlights metal accents and wall color. If you backlight, plan for a safe LED setup.
– Cleaning and care: Use a microfiber cloth and a gentle glass cleaner. Wipe from edge to edge to avoid streaks. Dry the surface after cleaning. Skip harsh scrubs or abrasive cleaners.
– Installation tips: Hire a professional for best results. Glass panels must sit flush with the wall and cabinets. Edges should be finished and sealed to prevent moisture. Ask about tempered glass for extra strength and safety.
– Pairing with fixtures: Stainless steel, brushed nickel, or chrome fixtures pair well with glass. These metals keep the look cohesive and bright.
– Pros and challenges: Pros are brightness, simple upkeep, and a modern feel. Challenges include fingerprints in bright light and a higher price than some options. Weigh these as you plan.
– Practical steps to get started:
1. Measure the wall area to cover.
2. Choose panel thickness and glass type.
3. Pick color or texture.
4. Gather quotes from pros and set a date for installation.
5. Prepare the wall and seal edges before mounting.
– Quick decision guide: If you want a night glow, choose backlit glass. If you prefer low upkeep, go with clear or frosted glass that hides marks better.
– Common questions: Can glass backsplashes crack? Tempered glass handles impacts better. Do you need grout? Most glass panels stay grout-free, but you may need small joints at edges. DIY installation is possible but tricky; a pro gives a cleaner finish.
4. Glossy Glass Panels for a Sleek Finish
Editor’s Choice

‘vidaXL Kitchen Backsplash, Transparent 27.6″x19.7″, Tempered Glass, Hea…
MagicFiber Microfiber Cleaning Cloth, 6 Pack – Premium Cloth for Glasses…

LED Strip Lights, HitLights 4 Pre-Cut 1ft/4ft Small Light Strips Dimmabl…
5. Vintage Tin Tiles for a Unique Flair

Here is why you might love vintage tin tiles for a white kitchen. They add texture and a hint of old charm while keeping your cabinets clean and bright. A tin tile backsplash can turn a plain wall into a real focal point that still feels calm and simple.
Tin tiles come in patterns that catch light. They can stay metallic or be painted to fit your color story. Choose copper, pewter, bronze, or soft neutral that blends with your cabinets. Avoid colors that shout and lean toward calm hues to keep a vintage feel. The finish should let the texture shine without taking focus from white cabinets.
Where they shine best. Behind the sink or stove, a panel creates a bold backdrop that draws the eye. A narrower strip along the counter line adds texture without overwhelming the space. The reflective surface helps brighten a kitchen with white cupboards, especially when you pair it with warm wood or soft textiles.
Style pairing and balance Tin tiles work best when you pair them with the right accents. They fit rustic or farmhouse looks and suit industrial style. Keep the rest of the room simple so the tile does the talking. White cabinets act as a quiet stage, balancing the metal with wood tones, linen, or muted fabrics. Lighting with a warm glow brings out the depth of the tile.
Practical implementation Here is a simple way to start:
– Decide finish: leave natural metal or paint to match your palette.
– Pick a tile size and layout: measure your wall and plan for outlets and corners.
– Plan the work: set aside tools, gather spacers, and prepare a clean surface.
Care and durability Tin tiles offer charm but they can dent if hit hard. They may need a seal to slow tarnish in humid kitchens. They work best when installed over a smooth, clean surface and wiped with a soft cloth. If you paint them, recoat every few years to keep the color fresh.
Common questions Do you need a pro for cutting around outlets? You can DIY, but precision matters. Will tin tiles last? With proper seal and care, they hold up well in a busy kitchen. Are they hard to clean? A gentle wipe with mild soap keeps them looking good.
Next steps Measure the wall, browse patterns, and pull color swatches. If you feel unsure, hire a pro to cut and fit around outlets and corners. Start with a small panel first to test the look before committing to a full wall. Keep a sample strip on hand to compare with your cabinets as you decide.
Embrace the charm of vintage tin tiles! They not only add texture and personality to white cabinets but also create a stunning focal point that whispers elegance and simplicity.
5. Vintage Tin Tiles for a Unique Flair
Editor’s Choice

RoomMates TIL4873FLT StickTiles Copper Tin Peel and Stick Tile Backsplash

Custom Building Products 4000 Acrylic Ceramic Tile Mastic, 1-Gallon

GE GE5050 Silicone II Aluminum and Metal Sealant, 10.3 oz Tube, Metallic…
6. Sleek Cement Tiles for an Industrial Feel
If you crave an industrial edge with clean white cabinets, cement tiles can deliver. They bring bold patterns and a sturdy feel to a kitchen that gets daily use. A full backsplash or a narrow band of tile can anchor the room and add real character.
What makes cement tiles stand out
– Bold patterns and colors pop against white surfaces, making the backsplash the focal point.
– The material is durable and easy to wipe clean, ideal for busy kitchens.
– Geometric layouts turn simple walls into a work of art.
Design ideas you can actually use
– Try a geometric pattern in grayscale. This reads modern and stays calm with your white cabinets.
– A Moroccan-inspired motif in soft sand or blue tones adds warmth without overpowering the room.
– A simple grid or honeycomb pattern with dark grout creates crisp lines that define the space.
Practical steps to get it right
– Seal the tiles and grout after installation to guard against stains. A penetrating sealer helps keep the surface looking fresh.
– Pick a grout color that makes the tile pattern stand out. White grout makes the pattern bold; dark grout adds drama.
– Keep the rest of the decor minimal. Let the tile do the talking, and add small metal or wood accents for balance.
– Use a mild, pH-neutral cleaner for daily care. Avoid harsh chemicals that can dull the finish.
– Plan for maintenance. Reapply sealant per the product directions, especially in high-traffic kitchens.
Layout and installation tips
– Map the pattern around outlets and corners before you start. A pro can help cut edge pieces so the pattern stays clean.
– If you cannot seal the surface properly, consider selecting pre-sealed cement-look porcelain tiles. They mimic the look with less upkeep.
– Check the tile’s weight and support needs. Cement tiles are solid, but your backsplash should still be installed with proper support.
Common questions, quick answers
– Are cement tiles durable enough for a kitchen? Yes, with sealing and proper care.
– Do I need a pro to install them? A pro ensures straight lines and a smooth finish.
– Can I change the look later? Yes. You can swap to a different pattern or grout color to refresh the space.
Next steps
Here is why this option works for white cabinets. Cement tiles bring texture, create a strong focal point, and stand up to daily use. Let your pattern choices guide the mood of the room. Let’s break it down: pick a pattern, choose a grout color, and plan your sealant routine. Next steps include layout planning, selecting a pattern, and hiring a tile installer if you want the cleanest edge near outlets. Your kitchen can feel both sturdy and stylish with cement tiles.
6. Sleek Cement Tiles for an Industrial Feel
Editor’s Choice

Miracle Sealants 511 Impregnator Advanced Penetrating Sealer for Counter…
Tenedos Scandiano Series 2.5×10 Blue Handmade Look Glossy Porcelain Subw…

Zep Neutral PH Industrial Floor Cleaner – 1 Gallon – ZUNEUT128 – Concent…
7. Artistic Handmade Tiles for a Personal Touch

You want a kitchen that feels personal and real. Handmade tiles can give your white cabinets a warm, human touch. They carry texture and color that show a maker’s hand. With the right choices, your backsplash becomes a story, not just a surface.
What makes handmade tiles stand out
These tiles show tiny quirks. A glaze may run a bit, or color may glow differently under light. That variation isn’t a flaw; it adds depth and charm. The result is a kitchen that looks crafted, not factory-made. You can feel the difference as you move through the room and catch little details in the pattern or tone. It is easy to notice the glow of a blue glaze, the drum of a speckled cream, or a bold stripe that runs like a seam in a painting.
Choosing handmade tiles for your space
– Find local makers who can tailor options to your room. Local artisans often offer a coast-to-coast range of colors and textures you can see in person.
– Mix and match to create a mosaic or keep one color for a calm, cohesive look. A single accent tile can become a focal point behind the stove.
– Check for fit and finish. Look at edge smoothness, glaze evenness, and how well the tile feels when you run your hand over it. Ask about color consistency and any expected tint shifts after firing.
– Think about maintenance. Some handmade tiles need gentler cleaning or special grout choices. Talk with the maker about care and recommended sealer if needed.
A practical approach to care and upkeep
Most handmade tiles take cleaning like any ceramic piece. Use a soft cloth and a mild soap solution. Avoid harsh cleaners that can dull glaze or crack a tile over time. Wipe spills quickly to prevent staining the grout. If you plan to seal, do it as directed by the maker or installer. Routine wipe-downs keep the surface looking bright and your grout line clean.
Design ideas you can try
– Create a focal strip behind the stove with a small mosaic of mixed patterns. Let the colors echo your cabinet tones.
– Use a solid color tile as a backing field and place a few patterned tiles at eye level for a playful accent.
– Install a long, narrow run of tiles as a backsplash border to frame your cabinets, then add a plain, easy-to-clean grout in between sections.
– Try different shapes—squares, bricks, or tiny hexes—to add texture without overwhelming white cabinets.
What to expect when you go handmade
Prices are often higher than mass-made tile. The upside is a one-of-a-kind look and a longer story behind each piece. Lead times may be longer, and installation might require a tile setter who understands variation. Plan for a little extra time and budget for occasional color shifts that come with handcrafting.
Next steps to get started
– Visit a local showroom or studio to see tiles in person. Request samples that you can view with your cabinet color and lighting.
– Bring photos of your kitchen and note where you want tiles to stand out.
– Talk about maintenance and sealing with the maker or installer. Confirm care instructions before you buy.
– Map a layout that keeps edges clean and lines straight, yet leaves space for natural tile variation.
Handmade tiles give your kitchen personality and warmth without losing the clean look of white cabinets. With careful choices, you’ll enjoy a backsplash that feels both crafted and timeless.
7. Artistic Handmade Tiles for a Personal Touch
Editor’s Choice

COLOR Y TRADICIÓN 9 Mexican Tiles 4″ x 4″ Hand Painted Talavera F-30
Miracle Sealants 511 Impregnator Advanced Penetrating Sealer for Counter…

MR.SIGA Microfiber Cleaning Cloth,Pack of 12,Size:12.6″ x 12.6″
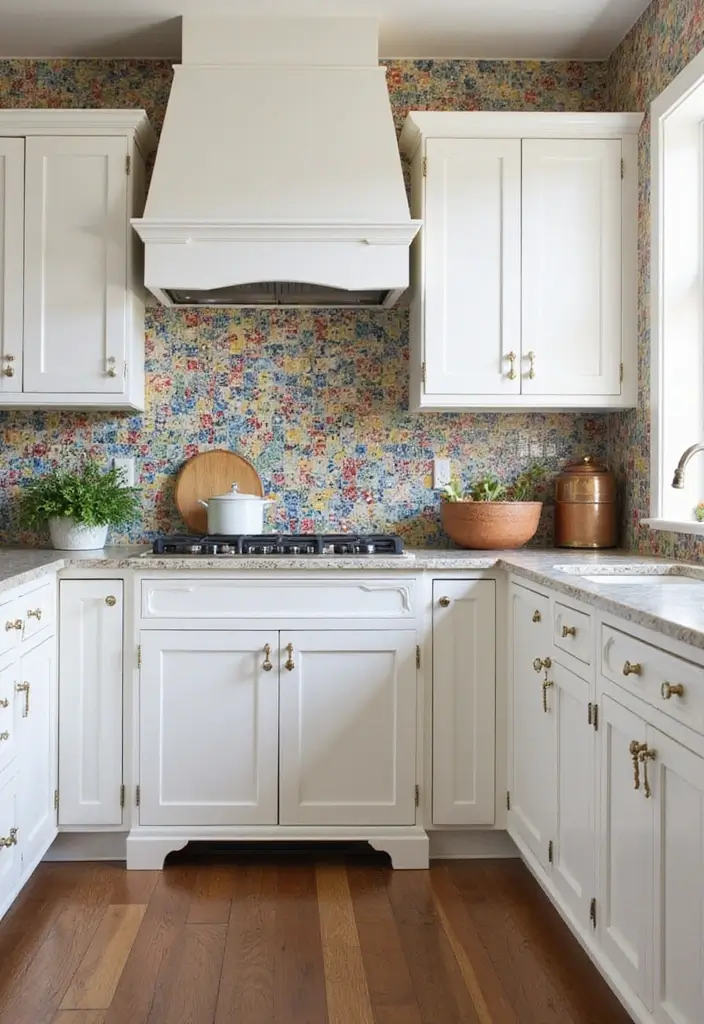
8. Contemporary Patterned Tiles for a Bold Statement
You want a kitchen that stands out while your white cabinets stay calm and clean. Contemporary patterned tiles can give you that.
Patterned tiles come in many looks. Floral motifs soften a space. Geometric shapes bring a sharp, modern edge. Abstract patterns add energy that shifts with the light. With white cabinets, these designs become the star of your backsplash.
Here is why patterns work with white cabinets. They add character without stealing the show from your cabinets. They create a focal point you can build on. They also adapt to many moods, from playful to calm, depending on your color choice.
Tips for using patterned tiles
– Use the pattern as an accent, not the whole wall. A stripe, a panel, or a small square keeps balance.
– Pair the tiles with neutral surfaces. Think plain countertops and simple backsplashes nearby.
– Mix tile sizes for texture. A few larger tiles with smaller ones create visual interest.
– Choose a grout color that helps the pattern pop. A light grout blends, a dark grout defines.
Next, think about color and contrast. A tile with a touch of black or charcoal can echo metal fixtures. A soft blue or sage can cool a busy pattern. If your room feels small, pick lighter tiles and keep the surrounding surfaces simple. If rooms feel roomy, you can afford a stronger pattern or darker grout.
Materials and styles to know
– Porcelain and ceramic tiles are durable and easy to clean. They handle daily kitchen spills without fuss.
– Matte finishes hide smudges better than gloss. They give a quieter, more refined look.
– Gloss tiles sparkle in bright light and can feel lively. Use them sparingly if you want a calmer backdrop.
– Popular shapes include hex, subway, and small squares. Hex tiles create a honeycomb vibe. Subway patterns stay timeless. Other shapes add a playful twist.
– Pattern options include florals, geometric lines, and abstract swirls. Each sets a different mood for your space.
Practical steps to try
1) Pick one pattern you love and a color palette that fits white cabinets.
2) Mock it up with a few cutouts on the wall or a test board at home.
3) Plan how it will meet outlets and corners, and mark cuts with care.
4) Hire a pro for precise fit around edges and fixtures.
Care and upkeep
– Seal grout or choose a grout that cleans easily.
– Wipe with a mild cleaner on a regular basis.
– Avoid harsh scrubs that wear the pattern down.
If you want a bold statement with white cabinets, patterned tiles can be a smart, stylish choice. Start small, pick the right colors, and keep the rest simple. Your kitchen will feel fresh, inviting, and ready for quick meals or those weekend guests.
8. Contemporary Patterned Tiles for a Bold Stat…
Editor’s Choice

COLOR Y TRADICIN 25 Mixed Color Mexican Talavera Tiles, 4×4 Square, 25 P…
Miracle Sealants 511 Impregnator Advanced Penetrating Sealer for Counter…

Goldblatt 2 Piece Glass Tile Nippers Set – Heavy Duty Wheeled Glass Mosa…
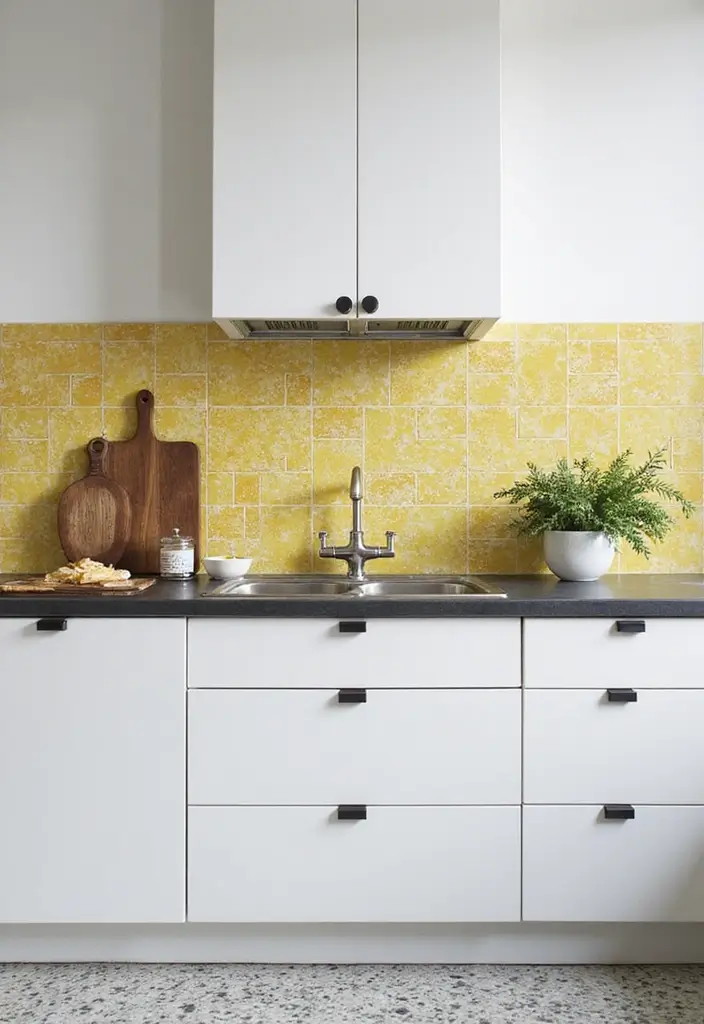
9. Soft Subtle Textures for a Cozy Feel
Soft Subtle Textures for a Cozy Kitchen
You want a warm kitchen with white cabinets. Soft textures can help you get that cozy feel. They add depth without shouting for attention.
Here is why textures matter. They give the eye something to see and the hand something to feel. Light will bounce differently on a textured surface, so the room reads softer and more inviting.
Let’s break it down. Start with texture ideas that stay calm and light.
– Textured ceramic tiles with a gentle pattern in ivory or stone
– Soft-hued glass tiles in cream, pale gray, or blush
– Matte or linen-finish tiles that hide fingerprints and smudges
– Beadboard or a small brick pattern in narrow strips
– Natural stone slabs with a honed, non-glossy surface
Next steps: where to place textures for the best effect.
– Use the backsplash as the texture hero. Let it run the full width behind your counter.
– Try a texture strip, about 6 to 12 inches high, behind the stove or sink to add interest without overdoing it.
– Pair a textured tile with plain white field tiles to keep the look calm.
Practical design tips
– Choose light colors to boost brightness and keep the space airy
– Mix materials, not colors. Combine a textured tile with a smooth one for depth
– Add warm metallics like brass, copper, or gold through hardware or lighting to create a homey glow
– Plan the grout color carefully. A soft gray or bone tone often hides smudges while preserving the gentle look
– Keep cleaning in mind. Choose textures with grooves that are easy to wipe or seal
Here is what you can expect. The textures bring warmth and dimension to white cabinets. The play of light and shade makes meals feel cozier and family moments more inviting.
Common questions
– Will textured backsplashes be hard to clean? Answer: Choose textures with shallow grooves and seal the surface. Wipe with a damp cloth and mild soap
– Can texture go with light colors? Yes. Texture reads best with soft tones. White cabinets stay clean-looking when you keep colors light and grout pale
– How many textures should I use? Two textures are plenty. One main texture and one smooth surface keep the room calm
Two quick looks you can copy
– Look A: behind the stove, ivory textured ceramic with a soft gray grout, paired with white field tiles
– Look B: a strip of soft-hued glass, with a linen finish, above dark counters and brass hardware
Next steps
Head to the store with a short list. Order samples. See how they feel in your light.
9. Soft Subtle Textures for a Cozy Feel
Editor’s Choice
Tenedos Arctic Ivory Square 6×6 Ceramic Wall Tile Textured Matte, Kitche…
White Crystal Mosaic Tiles Squares Stained Glass for Crafts Supplies DIY…

Miracle Sealants Matte Finish Sealer for Tile & Stone, Water-Based, Quart
10. Dual-Toned Backsplashes for a Modern Twist
You want white cabinets that still feel warm and inviting. A dual-toned backsplash can give your kitchen a fresh look without losing that cozy vibe. Two colors work together to catch the eye and add depth. One color can glow as the main tile, while the other serves as a subtle accent.
Here is why this move helps you today:
– It creates contrast that makes your cabinets stand out in a good way.
– It adds texture and interest, especially when you mix different finishes.
– It helps draw attention to the ceiling line and the upper shelves.
How to choose your two colors
– Start with your kitchen’s overall color plan. Pick shades that feel like they belong together.
– Pick one color as the star tile and the other as a supporting shade.
– Make grout work for you. A grout color that harmonizes both colors keeps the look clean.
Texture and finishes matter
– Pair matte tiles with glossy ones to gain depth without glare.
– A smooth tile with a slightly rough accent can surprise your eyes in different lighting.
– If you use glass or ceramic, keep the second color in a more opaque tile to balance shine.
Layout ideas you can try
– Use the darker color on the lower area of the backsplash for a grounded feel.
– Install the lighter color higher up or in a vertical pattern to draw the eye upward.
– Mix a narrow strip of the accent color at the top or bottom for a clean edge.
Practical pairings to consider
– Charcoal charcoal-gray tile with white cabinets creates a timeless contrast.
– Navy or inky blue tiles paired with white surfaces brings a calm, modern look.
– Soft taupe or warm gray as the base, with a crisp white or pale blue accent, keeps things light.
Tips for a smart, lasting result
– Order sample tiles and compare them in your kitchen lighting before buying.
– Check how the colors respond to natural daylight and under your stove light.
– Plan enough grout lines and choose a grout color that ties the two shades together.
Common questions you might have
– Will this look busy? If you keep one color as the main tile and the other as a small accent, you stay balanced.
– How do I keep it upkeep friendly? Choose tiles and grout that wipe clean easily and avoid very busy patterns.
– Can I remove it later? Yes, it’s easier to replace a small accent strip than the whole backsplash.
Next steps
– Collect color samples that match your cabinets and countertops.
– Draft a small mockup with the two colors in different areas of your kitchen.
– Visit a tile shop with your palette and ask for finish and grout options that fit your plan.
With these ideas you can craft a two-tone backsplash that fits white cabinets perfectly. It brings in character, texture, and a clear sense of style—without overwhelming the room.
10. Dual-Toned Backsplashes for a Modern Twist
Editor’s Choice

3×6 White Glossy Ceramic Subway Tile Wall Backsplash Made in USA (Full B…

TEC Grout Colorant – Refresh and Seal or Change Grout Joint Color | A Fa…

You might also like
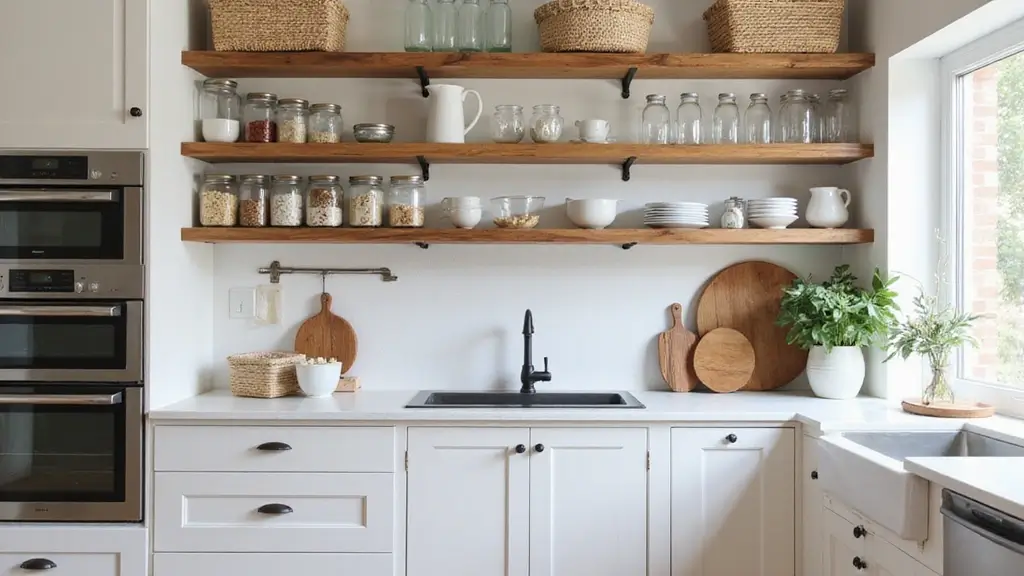
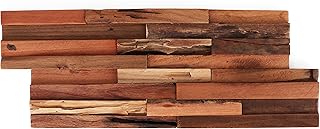
11. Natural Wood Elements for a Warm Touch

If your white cabinets feel a bit cool, consider a natural wood backsplash to warm the space. Wood brings texture and a soft, inviting feel to any kitchen. You can choose reclaimed boards for a rustic look or smooth panels for a clean, contemporary vibe. Make sure the wood is sealed for kitchen use so it holds up to steam and splashes.
Here is why wood works well with white cabinets:
– It softens the brightness and adds depth.
– The grain adds subtle pattern without shouting for attention.
– It ages gracefully and can be refreshed with a new coat of finish.
How to pick the right wood
– Light woods like maple, birch, or ash keep the room feeling airy.
– Dark woods bring drama but can make a small kitchen feel cozier.
– If you love both effects, try a light backsplash with small dark accents around the edges.
Moisture and finish matter
– Choose a finish rated for kitchens or moisture resistance.
– A clear varnish or polyurethane protects the surface from splashes and heat.
– Water-based seals can cut odor and cure faster after installation.
– For heavy cooking, opt for a thicker seal and a stain that hides fingerprints.
Practical styling ideas
– For a bright, open feel, keep most of the wood light in tone.
– Tie in metal accents like faucet, lighting, or cabinet pulls for an urban edge.
– Use dark fixtures or decor to create a striking contrast against the white and wood.
Installation and care tips
– Hire a pro if you’re unsure about measuring and sealing. A precise fit matters.
– If you DIY, cut precise gaps around outlets and corners to avoid gaps that trap moisture.
– Clean with a mild soap solution and a soft cloth. Avoid harsh cleaners that dull the finish.
– Inspect the surface a few times a year. Look for warping or softened spots near the sink.
Common questions you might have
– Will wood back splashes warp in humidity? Use a proper kitchen-grade seal and vented space to keep moisture away.
– How long does it last? With good seal and care, it can look great for many years.
– Is it hard to maintain? A quick wipe and re-seal every few years is usually enough.
Next steps for your project
– Gather a few sample boards and place them next to your cabinets to see the color in your light.
– Check moisture ratings and pick a finish that fits your cooking style.
– Decide if you want all wood or a mixed look with tile at the stove.
Natural wood adds a warm, welcoming touch that many kitchens crave. With the right wood, finish, and care, your white cabinets will feel cozy and stylish for years to come.
11. Natural Wood Elements for a Warm Touch
Editor’s Choice

Yutianli PVC Slat Wall Panel Peel and Stick 118″x 15.7″ Faux Wood Slat P…
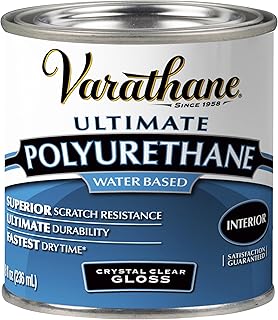
Varathane Water-Based Ultimate Polyurethane, Half Pint, Gloss
FIXSMITH Microfiber Cleaning Cloth – Pack of 8, Size: 12 x 16 in&FIXSMIT…
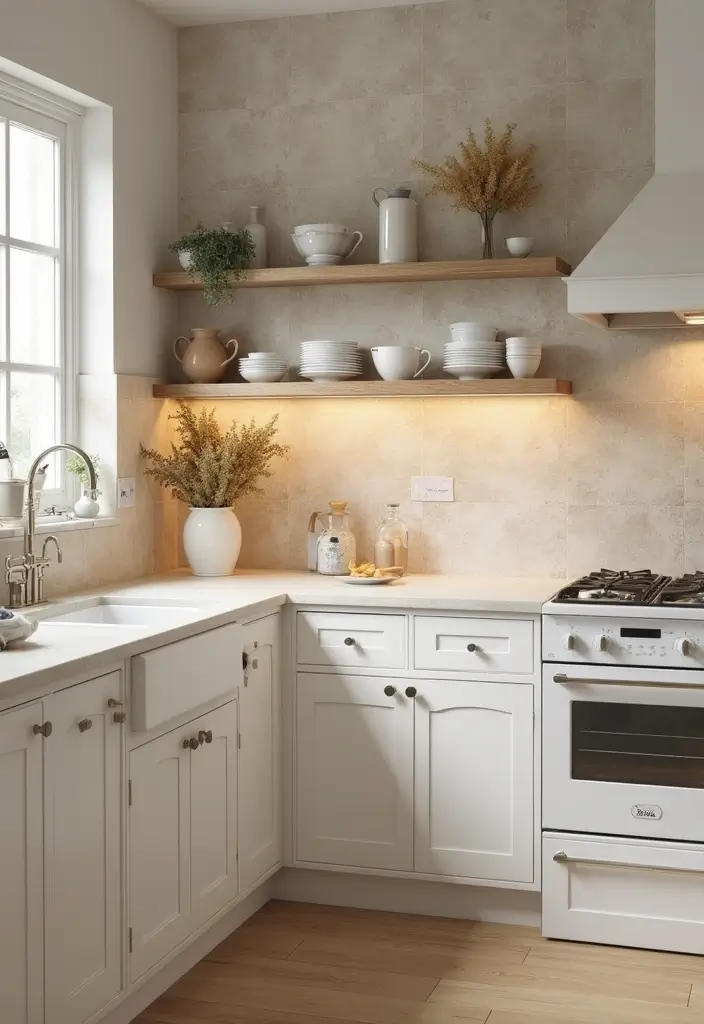
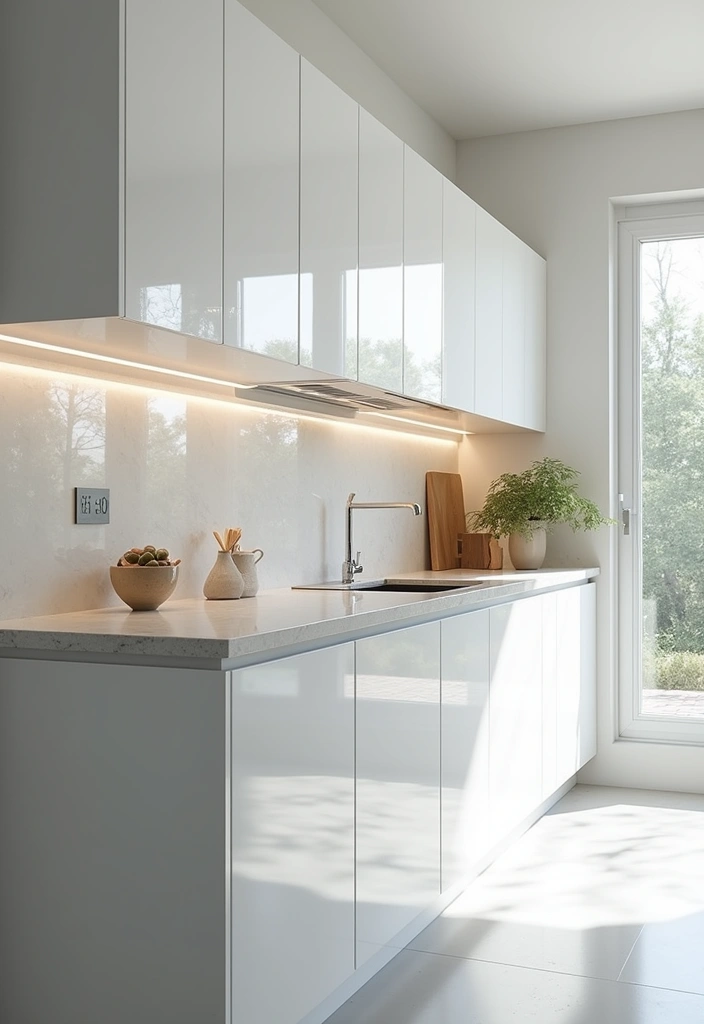
12. Minimalistic Designs for a Clean Look
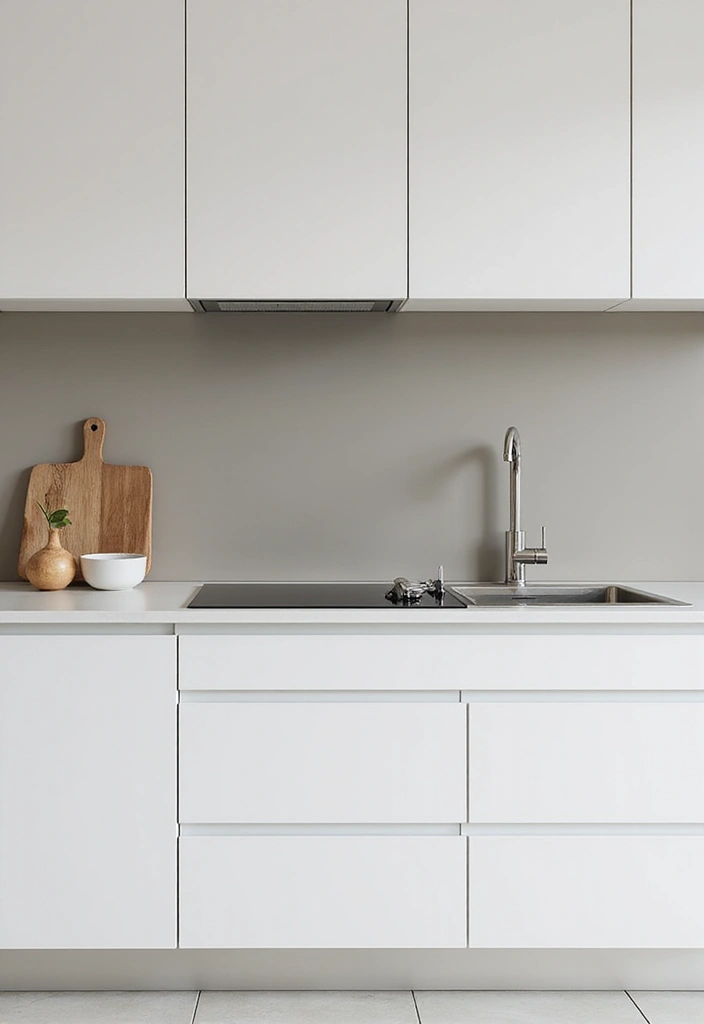
If you want white cabinets to feel bright and calm, a minimalist backsplash can do the job. It gives you a clean stage where your cabinets take center stage. You get a kitchen that looks uncluttered and easy to live in.
What makes minimalist backsplashes work with white cabinets
Minimal design uses simple shapes and soft colors. It keeps lines clear and patterns very subtle. The goal is to reduce noise and let the space breathe. A smooth porcelain or matte tile finishes this look with a quiet, steady feel. You’ll notice fewer seams and fewer distractions.
Key choices to keep the look cohesive
– Stick to a narrow color palette. Think whites, off-whites, light grays. A tight range keeps everything in harmony.
– Use large tiles. Bigger tiles mean fewer grout lines, which makes the wall look seamless.
– Pick a flat or matte finish. It reflects less glare and stays calm under kitchen lights.
– Choose sleek fixtures. Go with clean metal or satin finishes that fit the simple vibe.
Practical steps for installation
– Measure the space behind the sink and stove. Know your width, height, and tile size before you buy.
– Pick tile size that suits the room. 12×24 or 24×24 formats often look neat with white cabinets.
– Decide on grout color. A light gray or white grout hides dirt better and keeps the wall looking smooth.
– Plan edge trims. Use a simple bullnose or a slim trim to finish the top edge for a clean border.
– Prep the wall. Make sure the surface is flat and dry before you lay tiles. A good base keeps gaps small and lines straight.
Realistic looks you can try this month
– A solid, soft gray porcelain run behind the cook area. It reads quiet and modern while staying warm with your lighting.
– A matte white or very light cream tile laid in a simple offset or vertical stack. It adds texture without busy patterns.
– A light, glass subway tile with a matte glaze. It catches a touch of light and remains understated.
What you gain with a minimalist backsplash
You get a kitchen that feels larger and easier to clean. The clean lines reduce clutter in your eyes and your cabinet doors. Maintenance is simpler because there are fewer grout lines to scrub. With white cabinets, the look stays bright and timeless.
Common questions, quick answers
– Will a minimalist backsplash feel cold? It can feel cool, but good lighting and a touch of warm wood or brass accents keep it welcoming.
– How do I pick a grout color? Match the grout to your tile tone. A light gray grout hides smudges and still looks neat.
– Can I add texture without losing the look? Yes. A matte finish or a subtle grain in the tile gives depth while staying calm.
Next steps
Here is why this approach fits white cabinets. It brings light, reduces clutter, and makes every day cooking feel easier. Let’s break it down: choose a color family, pick large-format tiles, and decide on a clean edge trim. Then you can plan a quick, tidy install that you can finish over a weekend.
12. Minimalistic Designs for a Clean Look
Editor’s Choice

MS International La Paloma Encaustic 8 in. x 8 in. Glazed Porcelain Wall…


Art3d 20ft Outside Vinyl Corner Trim Peel and Stick for Tile and Wall Ed…
13. Colored Grout for a Fun Twist
Colored grout is a small change that makes a big impact with white cabinets. It adds a touch of personality without overhauling your whole kitchen. The right shade in the joints can wake up plain subway tiles or hex patterns and pull your entire look together. Think of it as a tiny accent that sits right between your tiles and cabinets.
Here is why colored grout works well with white cabinets. It creates a clear line that guides the eye and defines the tile pattern. Darker grouts hide kitchen messes a bit better. Light pastels or bold hues add fresh energy and a hint of playfulness. The result is a fresh, custom feel that stays easy to live with.
Color choices that pair well with white cabinets
– Choose a shade that contrasts with the tile color. For classic subway tiles, cobalt blue or charcoal can look striking. For a softer vibe, mint or blush pastel tones work nicely.
– Use color to highlight the tile pattern. A tight white grout around inverted tiles can make the shape pop, while a colored grout frames each tile more clearly.
– Consider the lighting in your kitchen. A color that looks bright in daylight may feel different under warm bulbs. Test swatches in the actual space.
Practical tips for testing and applying
– Start with samples. Put small squares of tile and grout on a board or a hidden wall area. Check under the kitchen light and near your sink to see how it behaves with water splashes.
– Plan the amount of color. A bold line along a row or a single border band gives a playful touch. Using color in every joint can feel busy, so keep it restrained.
– Pick the right grout type. Cement grout with a seal can work well, but epoxy grout resists stains better in busy kitchens. If you choose cement grout, seal it after the grout cures.
Maintenance and care
– Seal colored grout after it cures. A seal helps keep spills from staining the color. Reapply as the product directions suggest.
– Clean with gentle, pH-neutral cleaners. Avoid acids or harsh scrubs that can wear down the color in time.
– Expect some wear on light colors. If you notice fading or staining, you can regrout or refresh the color on a small section first.
Real life looks to try
– A bright cobalt line along a classic subway tile creates a modern twist without losing the timeless feel.
– A soft pastel edge on hex tiles gives a gentle retro vibe that still fits contemporary white cabinets.
– A dark charcoal grout on white tiles can make the whole backsplash look sharper and easier to maintain.
Next steps: sketch your plan, grab tile and grout samples, and test them in your kitchen. With the right shade and care, colored grout becomes a simple, stylish upgrade.
A splash of color in your grout can turn ordinary tiles into a stunning design statement! With white cabinets, it’s the perfect way to add personality and charm to your kitchen without a full makeover.
13. Colored Grout for a Fun Twist
Editor’s Choice

Red Devil 042260 Pre-Mixed Tile Grout – Professional Quality, Excellent …
Zep Neutral PH Industrial Floor Cleaner – 1 Gallon – ZUNEUT128 – Concent…
14. Textured 3D Panels for Depth

Want depth in a white kitchen without crowding the space? Textured 3D panels as a backsplash bring real depth and tactile interest. They catch light in different ways, so the wall reads differently as you move. The result is a standout feature that stays calm next to your white cabinets.
Materials you can choose from:
– Ceramic panels for easy cleaning and a smooth finish.
– Metal panels for a crisp, modern vibe.
– Bamboo or other sustainable options for warmth and eco style.
Some designs imitate stone or glass, while others show bold textures and patterns. Pick what fits your room vibe and your cleanup routine.
Where to place them for the best effect:
– Behind the stove or the sink, where texture can be a focal point.
– On a long run to create a strong wall statement.
– In a small kitchen, use texture to add character without overwhelming the space.
How to use textured panels well:
– Keep other decor simple so the texture can shine.
– Choose neutral or soft colors to keep balance with white cabinets.
– Add soft ambient lighting to highlight the depth in the panels.
– Think about thickness and grout lines to avoid busy seams.
– Make sure the area behind the stove is heat and moisture friendly.
Maintenance and practical care:
– Wipe with a soft cloth and mild soap; most panels resist stains easily.
– Check heat resistance where the panel sits behind the stove.
– Seal edges if needed to prevent moisture from seeping into gaps.
Installation and planning tips:
– Measure the space carefully and decide on panel size and layout.
– Decide if you will mount panels with adhesive or use a frame system.
– Use a waterproof sealant around edges to keep moisture out.
– Consider hiring a pro for precise cuts and a clean finish, especially around outlets and corners.
What to expect in real life:
– Texture adds depth, not bulk. Your kitchen looks layered yet simple.
– Costs are higher than flat backsplashes, but the visual payoff can be big.
– Seams will show; plan a layout that minimizes their visibility.
Next steps you can take today:
– Gather samples in your room’s lighting to see how they shift with time.
– Compare ceramic, metal, and bamboo options side by side.
– Sketch a quick layout for behind the stove and the sink, noting where lighting can play on the texture.
A textured 3D panel isn’t just a backsplash; it’s a conversation starter! Elevate your kitchen with depth and interest while keeping it serene next to your white cabinets. Let light play its magic!
14. Textured 3D Panels for Depth
Editor’s Choice

100 Pieces Peel and Stick Backsplash for Kitchen, 3″ x 6″ PVC Subway Til…

15 Pack (4″x12″) Peel & Stick Aluminum Backsplash Tiles – 4mm Heavy-Duty…

Art3d 48 x 96 Inch Natural Bamboo Wall Panel for Interior Wall Decor, Fl…
15. Iridescent Tiles for a Touch of Glam
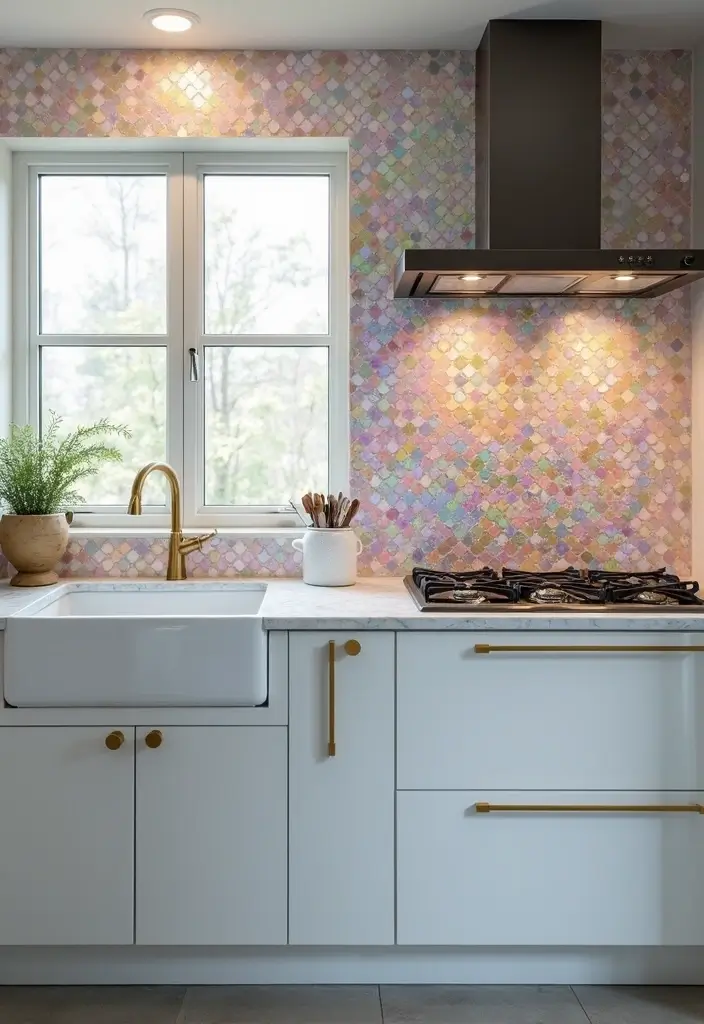
Here is why iridescent tiles work with white cabinets. They catch light and shift color as you move. That small change turns a plain backsplash into a focal point without crowding the room.
What you get with iridescent tiles
– A subtle glow A soft glow in daylight and brighter hints under lamps. You feel the room wake up as you walk in.
– Color play The tiles reveal a quick spectrum from cool blues to warm pinks as the angle shifts. It stays calm, not loud.
– Easy pairing White cabinets stay clean and bright while the tiles add a touch of sparkle. It looks intentional, not busy.
Where to put them for the best effect
– Use a narrow band behind the sink or stove as an accent strip. This creates a spark where you use the most heat and water.
– Create a small panel about 18 by 36 inches. A contained patch keeps the glaze from taking over.
– Try a backsplash around an island or breakfast bar for a quick punch of shine. It makes the center of the kitchen feel special.
Practical tips to get it right
– Keep the tile design simple Choose a clean grid or a quiet, small pattern. Let the shimmer speak.
– Pair with metallic touches Think brushed nickel, chrome, or warm brass. Metals frame the glow well.
– Choose grout carefully Light gray or white grout keeps lines tidy and hides small smudges.
– Use the right lighting Under-cabinet LEDs show the colors best and light up work zones.
– Pick materials that fit daily life Glass or mother-of-pearl tiles wipe clean easily and resist stains.
– Plan for professional help A pro can lay sheets evenly and trim around outlets for a neat finish.
Common questions you might have
– Do these tiles really change color with light Yes. The shift is gentle and pretty, not flashy.
– Are they hard to care for Not at all. A soft cloth and mild cleaner do the job.
– Will they fit any kitchen style They work with modern and classic looks if you keep the rest calm.
Next steps to plan your glam touch
– Get a sample set Compare how they look in day and night light.
– Decide where the accent will live Map the size of the panel before you buy.
– Talk with a tile pro About laying sheets and sealing edges for a clean finish.
15. Iridescent Tiles for a Touch of Glam
Editor’s Choice

Youway Style Iridescent Glass Mosaic Tiles for Crafts Bulk,454g Broken M…

Gritin 10.2inch Under Cabinet Lighting Rechargeable -84 LED Super Bright…
16. Geometric Patterns for a Modern Edge
Are you chasing a modern vibe for your white cabinets? Geometric patterns can give your kitchen a sharp, fresh look without overwhelming the space. They bring order, structure, and a dash of personality.
Here is why geometric tiles work well with white cabinets
– They create a clear, modern edge. Clean lines and bold angles stand out against white backgrounds.
– You can go bold or stay subtle. Shapes alone can do the talking or you can mix colors to suit your style.
– The tile pattern defines the room. A geometric backsplash becomes a featured element that sets the mood.
Popular geometric tile shapes
– Hexagon tiles: A honeycomb effect that adds texture without shouting.
– Chevron or herringbone: Classic zig lines that feel timeless and chic.
– Square grids with a twist: Slightly offset squares add visual interest.
– Lattice and lattice-inspired mosaics: Delicate lines that read as soft geometry.
– Mixed shapes: Combining diamonds, triangles, and hexagons for a dynamic look.
Here is how to use color and contrast to your advantage
– Dark grout makes the pattern pop. It creates crisp outlines that highlight each shape.
– A bold tile color against white cabinets works too. Think charcoal, navy, or deep green.
– Light gray or warm tones give a softer, more casual vibe.
– Keep the countertop and hardware simple to let the pattern breathe.
Layout ideas to fit your space
– Full-height backsplash with one bold tile pattern for a strong statement.
– A band of pattern above the counter with plain tiles below for balance.
– A diagonal or staircase layout to add movement in small kitchens.
– A gradual approach: start with a small inset panel, then expand if you love the look.
Next steps to bring this to life
1) Pick 1–2 shapes you actually like. Decide if you want high contrast or a more subtle look.
2) Measure the backsplash area and choose tile size that matches your space. Larger tiles feel calmer; small mosaics feel lively.
3) Get color and grout samples. See how real light changes the pattern.
4) Prepare the wall, lay out a mock grid, and plan the edge finishes near outlets and corners.
Practical tips for smooth installation
– Use a quality primer if the wall is uneven. A flat base helps the pattern read clearly.
– Align patterns with cabinet lines. Stay consistent to avoid jagged edges at corners.
– Seal the tile and grout after installation to keep colors bright longer.
– Clean with a mild soap solution; avoid harsh cleaners that dull the finish.
Maintenance and care
– Wipe spills quickly to stop staining on light grout.
– Re-seal grout as recommended by the tile maker to keep the contrast sharp.
– If a tile chip happens, replace only the affected piece to avoid a full redo.
Common questions you might have
– Will a bold geometric backsplash clash with white cabinets? Not if you scale the pattern and pick a calm grout. Pair big shapes with simple counters for balance.
– What grout color is best? Dark grout creates the strongest line; light grout softens the pattern.
– How do I choose between patterns? Start with one focal tile, then test two options in a portable sample. See how they look in your kitchen’s light.
If you want a modern edge that still stays timeless, geometric patterns are a smart move with white cabinets. They offer structure, style, and a touch of personality you can refine over time.
16. Geometric Patterns for a Modern Edge
Editor’s Choice

16 Pcs (6×6 in) Mandala Style Decorative Tile Stickers, Peel and Stick S…
Miracle Sealants 511 Impregnator Advanced Penetrating Sealer for Counter…

Vevor 24 Inch/600mm Tile Cutter Double Rails & Brackets Manual Tile Cutt…
17. Bold Black Accents for Dramatic Contrast
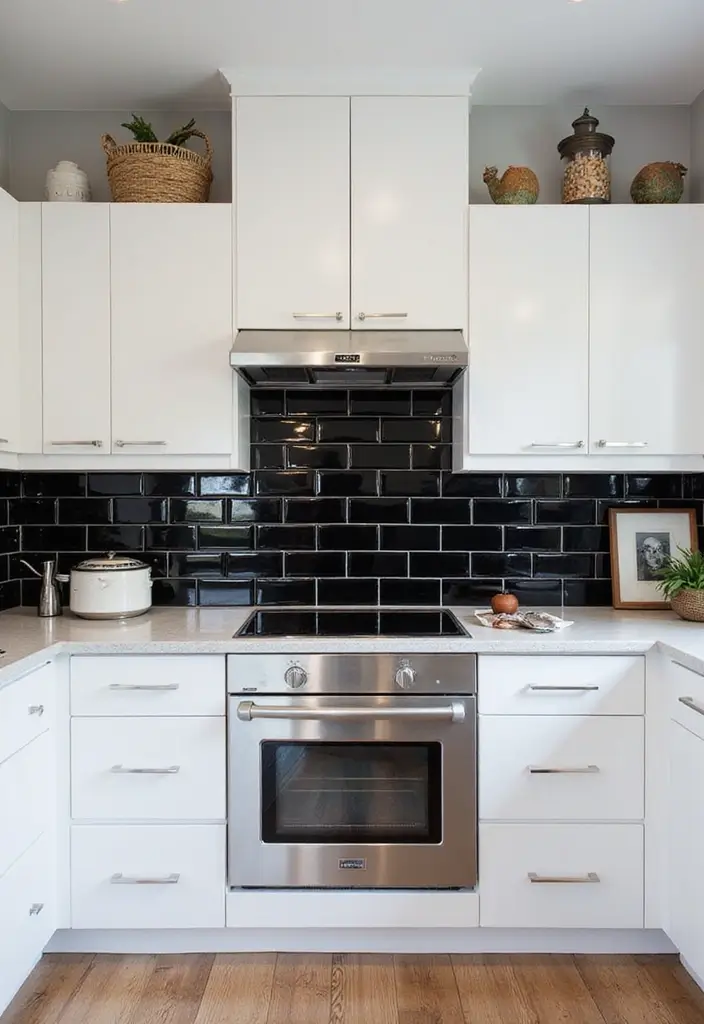
You want a backsplash that makes white cabinets stand out without crowding the room. Bold black accents can do this well. Black adds depth and a sense of confidence. It helps the white look brighter. Here is why this works: you get a strong anchor that draws the eye. The contrast feels clean and modern. It also gives you a canvas to play with textures and shapes.
Finish ideas
– Mix matte and glossy black tiles to create a layered look. This combo catches light and adds depth.
– Add a touch of texture. A stone look, ceramic with a tiny grain, or a pebble surface makes the backsplash feel tactile.
– Keep grout dark. Black grout ties pieces together and hides small smudges.
– Use a thin metal trim in black to frame the edge and keep lines clean.
– Consider a black glass tile for a reflective surface.
– A matte finish with a tiny mica sparkle can hide soap scum.
Pattern and layout options
– Subway tiles in a straightforward grid offer a timeless base.
– A herringbone or chevron pattern brings movement while staying bold.
– A stacked bond or basketweave gives a strong modern edge.
– Small tiles with a large pattern create a focal stripe without overwhelming the room.
– Use a large format tile in black to give a bold, uninterrupted look.
Balance and lighting tips
– Let the rest of the kitchen stay light to avoid a heavy feel.
– Add brighter countertops or pale walls to bounce light around.
– Install under-cabinet lights to spotlight the backsplash.
– If you like metal, add black fixtures like faucets, handles, or shelves to tie the look together.
– Paint the ceiling a light shade to keep the space airy.
Practical steps to implement
– Start with a small sample board to see how black looks with white and steel.
– Pick two finishes at most to keep things calm.
– Plan your layout on paper or with a tile app before buying.
– Order some extra tiles for repairs later.
– If you are hiring help, ask for tile that is easy to trim and fit in corners.
Common questions
– Will a black backsplash be hard to keep clean? Choose good grout and wipe spills quickly.
– Do I need black countertops? No. Light stone or white counters work well with a black backsplash.
– How long does the install take? It depends on the size. A small kitchen can be done in a weekend.
– Can I mix black with white marble? It works if the marble has light veins that keep the look fresh.
Next steps. Take time to plan, test, and then install. Your white cabinets will pop with bold black accents.
17. Bold Black Accents for Dramatic Contrast
Editor’s Choice

Black Glass Subway Tile 4 x 12 Inch for Kitchen Backsplash Bathroom Show…
Red Devil 042260 Pre-Mixed Tile Grout – Professional Quality, Excellent …
Gritin 10.2inch Under Cabinet Lighting Rechargeable -84 LED Super Bright…
18. Elegant Marble for a Luxurious Vibe
You want a kitchen that looks upscale but stays easy to live with. A marble backsplash with white cabinets can give you that timeless, cafe-inspired vibe. The veining in natural marble catches the light and adds a touch of drama without shouting. When you walk into the room, you feel washed in calm luxury.
Here is why marble works well with white cabinets. Marble is a classic material that never goes out of style. It reflects soft light and keeps the space feeling bright. A honed finish gives a smooth, matte look that hides tiny stains better than a shiny surface. The right marble makes cooking feel like a small indulgence.
Let’s break down your options and how they fit your kitchen.
– Marble types: Calacatta for bold, pronounced veining; Carrara for gentler lines; Statuary for a dramatic look. Choose based on how much contrast you want against white cabinets.
– Finish styles: Honed marble offers a subtle, everyday glow. Polished marble shines more and shows veins clearly. For busy kitchens, honed is often easier to love long term.
– Vein patterns: Subtle swirls create a quiet backdrop. Heavy veining adds personality and becomes a focal point.
Practical tips you can use now
– Go with honed marble for a forgiving, low-maintenance vibe. It hides fingerprints and minor spills better than a glossy surface.
– Seal the marble before install and re-seal as recommended. A good seal keeps stains at bay and makes cleanup simpler.
– Pair with stainless steel or matte black finishes. This combo feels modern without clashing with the marble’s warmth.
– Add warm lighting above the backsplash. Soft amber or warm white light enhances the marble’s natural color and depth.
– Think about layout: full-height behind the stove can create a striking, cohesive wall. A shorter strip behind the sink or countertop edge can echo the lines of your cabinets nicely.
What to expect in daily use
– Marble is durable but not stain-proof. Clean spills quickly, especially acids like lemon or tomato.
– Wipe with a soft cloth and mild soap. Avoid harsh scrubs that scratch the surface.
– Plan for periodic maintenance. A reseal every couple of years helps keep the look fresh.
Next steps you can take
– Decide on the marble family and finish you prefer. This guides your color and lighting choices.
– Sketch a simple layout: where the backsplash ends and any stone cuts happen near outlets or the range.
– Talk with a pro about edge detail and installation. A clean edge and proper mastic help marble stay beautiful longer.
With the right marble and careful care, your white cabinets can glow with quiet luxury. You’ll gain a kitchen that feels elegant every day, ready for both casual meals and special occasions.
18. Elegant Marble for a Luxurious Vibe
Editor’s Choice

Diflart Marble Mosaic Tile, Gold Calacatta, 5/8 Inch Square, Honed, Marb…
Weiman Granite & Stone Sealer Spray – Protects Kitchen Countertops, Sink…

LAFULIT Under Cabinet Lighting Kit – 8 PCS 20 Inch Pre-Cut Strips, 2700K…
You Might Also Like
19. Vibrant Colored Tiles for a Fun Kitchen
Bold Color Tiles for a Playful Kitchen
You want a kitchen that feels lively but stays clean next to white cabinets. A splash of color on the backsplash can do it. Colorful tiles catch the eye and set a warm mood for family meals and quick breakfasts.
Why color matters
– A bold tile draws the eye and frames your white cabinets.
– It reflects light and makes the room feel bigger.
– It sets a tone you can build on with decor.
– It hides small smudges better than plain white.
Color families that work with white cabinets
– Sunny yellows add warmth and cheer. Pair them with white and light wood for a bright, welcoming look.
– Soft blues create a calm, coastal feel. Add a hint of brass or copper for a subtle glow.
– Fresh greens give a garden-like glow. Think sage or mint against white for a fresh finish.
– Bright pinks or oranges punch up energy. Use them as a narrow band or a small panel to avoid overload.
Keep your palette simple. Pick one main color and one or two accents. This keeps the kitchen from looking crowded.
Tile shapes and finishes
– Hexagon tiles look modern without shouting too loud.
– Triangle or diamond shapes add a playful touch.
– Subway tiles with a tinted glaze feel timeless and easy to pair.
– Glass or ceramic finishes sparkle in daylight and under task lights.
– A touch of iridescent glass can add depth without stealing the show. Start with a small section if you are unsure.
Finish choices affect how the color reads. Glossy tiles brighten a small space. Matte tiles give a softer, cozier feel. Use glossy for the back wall or splash to catch light. Use matte where you want a calm backdrop.
Design tips to pair colors
– Decide on a dominant color and use it most of the time.
– Pick a contrasting shade for accents like a thin row or a small panel.
– Choose grout carefully. Lighter grout blends in; darker grout adds depth.
– Test with samples next to your cabinets in morning and evening light.
– Keep the countertop and cabinets in balance so the color does not overwhelm.
Implementation steps you can follow
– Gather tile samples in ceramic or glass.
– Compare them against your cabinet and countertop hues.
– Create a simple mockup board to see the look in real life.
– Talk with a tile shop about edge details and trims.
Common questions
– Will color clash with white cabinets? It can work if you repeat a color in decor.
– How much color is enough? Start with a small strip and grow if you love it.
– How do I clean colored tiles? Use a gentle cleaner and a soft cloth.
Next steps
– Decide on a color family and tile shape you love.
– Get samples and test in your space.
– Plan the grout color and where to place the accent tiles.
– Visit a tile shop to feel textures and see trims in person.
19. Vibrant Colored Tiles for a Fun Kitchen
Editor’s Choice

Creative Hobbies 12 Pack of Glossy White Glazed Ceramic Tiles for Alcoho…

Art3d 4 Sq Ft Glass Backsplash Tiles, 32-Piece Glass Peel and Stick for …

MAPEI UltraCare Grout Refresh, Universal Grout Colorant & Sealer, 8 oz B…
20. Unique Recycled Material Backsplashes for Sustainability

You want a kitchen that looks great and helps the planet. A backsplash made from recycled materials can do both. It adds character and a story to your space. White cabinets shine with these options.
Here is why they work:
– Recycled glass tiles catch the light. They add color and sparkle. They wipe clean easily.
– Reclaimed wood brings warmth. It ages well when sealed properly.
– Terrazzo made from recycled chips shows a speckled pattern. It hides small marks and wears nicely.
– Recycled metal mosaics give a modern, reflective finish. They pair well with white.
– Recycled brick tile adds texture and a rustic touch. It cleans up with a quick wipe.
Other good options:
– Recycled ceramic or porcelain tiles with chips. They come in many colors and stay durable.
– Cork tiles give a soft, warm feel. Seal well to stand up to kitchen moisture.
– Bottle cap mosaics offer bold color and a playful vibe. They work best as a small accent wall.
Design ideas to try:
– Choose one hero material and add a slim second material for an accent line.
– Install glass behind the sink with a thin metal border for a crisp edge.
– Use terrazzo as a bold wall behind the stove to draw the eye.
– Mix in cork or brick in a band for texture without overwhelming white cabinets.
Sourcing and safety tips:
– Look for local shops that carry eco-friendly options.
– Ask for proof that the material is recycled or reclaimed.
– Check how tough the surface is and how you clean it.
– Confirm any sealing needs for wood or cork areas.
Care and upkeep:
– Clean with mild soap and warm water. Dry with a soft cloth.
– Seal wood or cork as recommended by the maker.
– Avoid strong cleaners that dull color or finish.
– Wipe up spills quickly to prevent stains.
Limits to plan for:
– Prices vary by material and pattern; expect some premium options.
– Availability can be limited for rare recycled choices.
– Some designs need a pro for precise seams or curved walls.
Next steps:
– Set a budget and pick a hero material.
– Gather samples and compare with your white cabinets.
– Talk with a kitchen installer about layout and sealing.
With a recycled material backsplash, you add style and a friendly footprint. Your kitchen becomes warmer and more thoughtful.
20. Unique Recycled Material Backsplashes for S…
Editor’s Choice
1 LB 5x20mm Glass Strips Mosaic Tiles for Home Decoration, Mini Recycled…
Teak 3D Wall Panels – Wood Planks – Teak Accent Wall Panels – Wall Panel…

WESTICK Waterproof Terrazzo Peel and Stick Floor Tile 20 PCS Bathroom Ma…
21. Peel-and-Stick Tiles for Easy Updates
Are you craving a fresh look for your kitchen but want to skip a messy tile job? Peel-and-stick tiles offer a budget-friendly, weekend-friendly update that works great with white cabinets. They give you room to experiment with color, texture, and pattern without tearing out walls.
– Why this idea fits white cabinets
White cabinets make any color pop. Peel-and-stick tiles create a clean, modern backdrop that lets bold grout lines, soft neutrals, or vintage patterns shine. It’s easy to switch from a subtle brick look to a bright geometric design if you crave a quick change.
– What you’ll find in peel-and-stick options
These tiles come in many textures and styles. You can mimic subway, mosaic, stone, or ceramic finishes. They’re usually made from vinyl or a similar flexible material with a strong adhesive. Some look glossy and new; others have a matte, natural feel. Pick patterns that can blend into other areas like a dining nook or breakfast bar for a cohesive look.
– How to install in a few simple steps
1) Clean the wall thoroughly. Wipe away grease and dust until the surface is dry and smooth.
2) Measure the area. Mark a straight starting line to keep everything aligned.
3) Cut with care. Use scissors or a utility knife for precise sections, especially around outlets and corners.
4) Peel and place. Start at the center or from a corner, then press the tile firmly into place.
5) Press again. Run a roller or a firm flat object over the tile to push out air bubbles.
6) Finish edges. If you have gaps, trim carefully and use edge trim or a compatible caulk to seal the seam.
– Tips for lasting results
Choose a higher-quality tile. Cheaper options peel sooner, especially in busy kitchens. Make sure the wall is clean and dry before sticking. Apply in a calm, dry window to avoid humidity. If you’re unsure, test a small patch first. For busy splash zones, look for water-resistant varieties and check heat resistance specs.
– What to know before you buy
– Wall prep matters: smooth, clean surfaces stick best.
– Look for a durable adhesive and a water-resistant finish.
– Consider a cohesive pattern that can extend to other walls or nearby spaces.
– Edge details help: decide if you want corners trimmed with a matching trim strip.
– Who should try peel-and-stick tiles
This is ideal for renters or anyone who wants a reversible update. It’s perfect for a quick change after a big kitchen reface, or when you’re testing a color or pattern before committing to real tile.
– Common questions you might have
Can I put peel-and-stick behind the sink or stove? Check the product specs. Some are fine behind a sink, others are not recommended near direct heat or splatter. Do they peel off easily? Yes, but more so with low-quality materials. Prep well and you’ll get a solid update that lasts.
– Next steps
Walk through your space, note wall prep needs, and choose a tile style that echoes the look you want with your white cabinets. Then plan a weekend install and enjoy a fresh new kitchen without the mess.
Transform your kitchen effortlessly! With peel-and-stick tiles, you can experiment with color and pattern, giving your white cabinets the stunning backdrop they deserve – no messy renovations needed!
21. Peel-and-Stick Tiles for Easy Updates
Editor’s Choice
Achim Home Furnishings FTVMA40220 Nexus 12-Inch Vinyl Tile, Marble Class…

WORKPRO Premium Utility Knife, Retractable All Metal Heavy Duty Box Cutt…

POWERTEC Extendable Floor and Wall Roller for Vinyl Flooring, Tile & Lin…
22. Stainless Steel for a Modern Industrial Feel
Why stainless steel backsplashes work with white cabinets
You want a kitchen that feels clean and useful. Stainless steel reflects light, making a white kitchen look brighter. It stands up to heat and splashes, so you won’t worry during busy mornings. It stays easy to wipe clean.
Installation styles
Backsplashes in stainless steel come as sheets or as tiles. Sheets give a smooth, uninterrupted wall. Tiles create a grid pattern that is simple to install and replace if needed. Both fit a modern white kitchen and keep the room feeling open.
Finish choices to shape the look
Brushed steel hides fingerprints and small scratches. Polished steel reads bright and adds a bold shine. Textured finishes add depth and cut glare. Textured options like satin or micro-brushed give a softer feel and hide dust.
How to pair with white cabinets
Keep lines clean and even. Let the steel act as a hero piece against the white. Match with simple hardware and calm lighting. A bright under-cabinet light helps the steel pop without washing out the room.
Care tips that keep the shine
Use a soft cloth and a cleaner made for stainless steel. Rinse, then dry to avoid water marks. Avoid harsh abrasives that scratch the surface. Wipe up spills quickly to maintain the glow. A microfiber cloth works best for a streak-free finish.
Practical setup notes
Measure the width and height of the area. Decide between sheets for a seamless wall or tiles for easy replacement. Plan seams around outlets and corners. Consider hiring a pro for a precise fit, or study a DIY guide if you take the job on.
Common concerns
Polished steel shows fingerprints more than brushed finishes. You can choose brushed if you want a low-maintenance look. It handles heat well and cleans fast, but plan for occasional touch-ups.
Next steps
Start with sample finishes in your kitchen light. Compare sheet versus tile options. Sketch a plan for outlets and trim. Then pick a finish and book a simple install.
22. Stainless Steel for a Modern Industrial Feel
Editor’s Choice

Stainless Steel Backsplash for Stove 24″x30″ Stove Backsplash Protector …

30-Pack of 12 x 4″ Brushed Aluminum Peel-and-Stick Tile Backsplash Panel…

Weiman Stainless Steel Cleaner and Polish – 2 Pack – Removes Fingerprint…
23. Chalkboard Paint for a Fun, Interactive Space
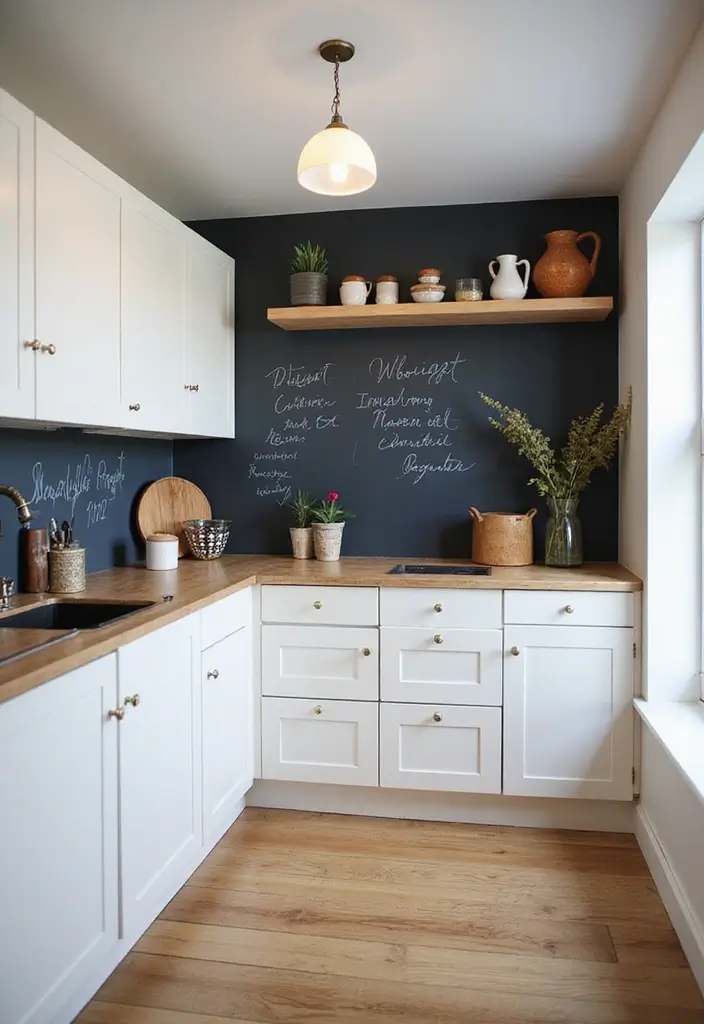
Do you want a kitchen that invites notes, ideas, and small art? Chalkboard paint on a backsplash can give you that. It pairs well with white cabinets by adding a writable surface without losing brightness. You get a place to plan meals, leave reminders, and let family members express themselves.
Here is why it works for white cabinets:
– It creates a clear, usable writing space right where you cook.
– It adds a touch of playfulness without clutter if you keep the area small.
– It becomes a warm, inviting contrast against the clean lines of white.
Let’s break it down with practical steps you can use this weekend.
– Choose a small, practical patch – Aim for about 18 to 24 inches wide and 12 to 18 inches high. Place it where you cook or prep, not where you wash dishes, to reduce splash and wear.
– Prep the wall – Clean the surface well to remove grease. Lightly rough up a glossy spot so the paint grabs. A smooth base helps you write and wipe with ease.
– Apply the chalkboard paint – Use two to three thin coats. Let each coat dry fully before the next. Thick coats smear and wear faster.
– Season the surface – After the last coat dries, rub the area with white chalk, then wipe it clean. This primes the surface so chalk writes smoothly from the first use.
– Keep the look practical – Start with a single patch. You can expand later if you love it, but a small area stays neat and easy to manage.
Smart tips to keep it tidy
– Use normal chalk for clean writing and easy erasing. Colored chalk can brighten the space but keep a small palette handy.
– Write in short notes, recipes, or lists. Long blocks of text feel messy on a small backsplash.
– Wipe with a damp cloth regularly. Avoid harsh cleaners that can dull the finish.
Maintenance and what to expect
– Chalkboard surfaces can wear where you touch most. They can be affected by heat and water near the sink. If you notice chalk showing through, re-season the area with chalk and wipe clean.
– Keep the section modest. A big, full-wall chalkboard may steal attention from your white cabinets.
Alternatives if you want less upkeep
– Chalkboard vinyl strips you can apply and remove easily.
– Chalkboard tiles that give a defined grid.
– A glass panel painted with a chalk-friendly marker that you wipe clean.
Next steps
– Measure your chosen patch.
– Pick a chalkboard paint color or finish.
– Plan a simple layout for recipes, notes, and doodles.
23. Chalkboard Paint for a Fun, Interactive Space
Editor’s Choice

Rust-Oleum 206540 Chalkboard Brush-On Paint, 30 oz, Black
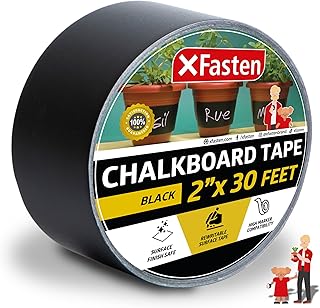
XFasten Black Chalkboard Tape Removable, 2-Inch x 30-Foot, Black, Smudge…

Crayola Non-Toxic White Chalk(12 ct box)and Colored Chalk(12 ct box) Bundle
24. High-Gloss Finishes for a Contemporary Look
You want a kitchen that looks fresh and feels bigger. A high-gloss backsplash on white cabinets can do that fast. It adds shine and a clean, modern vibe you can see and feel.
Here is why high-gloss backsplashes work well with white cabinets.
– The reflective surface bounces light around the room. This makes the space feel brighter.
– The white base stays crisp and clean with less effort. Smudges show, but a quick wipe helps every time.
– The glossy finish adds a polished, contemporary touch without heavy design work.
– Cleaning is simple. Wipe with a soft cloth and mild soap if needed.
How to choose color and tone for your gloss tile
– Clear glass keeps the focus on the cabinets. It creates a seamless, almost seamless look.
– Tinted glass adds a hint of color without overpowering the white. Think pale blue, soft gray, or seafoam green.
– Solid colors in a high-gloss glaze can punch up the room. Consider navy, emerald, or charcoal as accents.
– If you want a busy pattern, pick a color that echoes your cabinet doors to keep balance.
Shapes and patterns that pair with white cabinets
– Hexagon tiles offer a modern twist without shouting for attention.
– Large squares keep things simple and bold.
– A brick or stacked pattern adds texture while still staying clean.
– A subway tile in a glossy finish always feels timeless with white cabinetry.
Lighting that makes the gloss pop
– Under-cabinet LEDs brighten the work areas and highlight the tile’s shine.
– Strip lighting along the top edge helps the backsplash glow softly in the evening.
– White or cool-toned bulbs show the true color of the glaze rather than yellowing it.
Care and maintenance you can rely on
– Clean regularly to keep the shine. A damp cloth works in most cases.
– Avoid abrasive pads that scratch the surface.
– Use mild soap or a gentle cleaner for stubborn spots. Rinse and dry to prevent streaks.
– Wipe in the same direction when cleaning us to avoid smudges.
Next steps to get this look in your kitchen
– Gather samples of clear glass and a few bold gloss colors.
– Check tile shapes you like: hexagon, square, or brick.
– Plan under-cabinet lighting before you install.
– Measure the backsplash area and budget for a gloss finish.
– Talk with a pro about grout color and sealing options.
With the right high-gloss backsplash, your white cabinets will look bright, modern, and ready for daily life.
24. High-Gloss Finishes for a Contemporary Look
Editor’s Choice

Glass Subway Tile 3 x 6 Inch White for Kitchen Backsplash Bathroom Wall …
Nicor 18” LED Direct Wire Under Cabinet Light – Dimmable Undercounter LE…
Zep Neutral PH Industrial Floor Cleaner – 1 Gallon – ZUNEUT128 – Concent…
25. Customizable Backsplashes for a Unique Look
You want a kitchen that fits your style without losing the clean look of white cabinets. A customizable backsplash can give you that personal touch. It lets you pick a design that speaks for you while keeping the room bright and easy to live in.
What customizable backsplashes can be
– Hand painted tiles with simple shapes or a small motif. They feel like art you can live with.
– Custom tile mosaics that form a tiny scene or a repeating pattern you love.
– Tile murals sized to fit behind the sink or stove for a bold moment.
– Glass or metal sheets cut to fit, adding shine or a touch of industrial style.
– Textured ceramic or stone tiles that catch the light in a new way.
Here is why it helps your white cabinets
– It creates a focal point you notice every day.
– It lets you express your taste without changing the whole kitchen.
– It stays easy to clean if you choose durable materials and proper finishes.
Let’s break it down into steps you can act on
– Define your vibe Decide if you want calm, bold, vintage, or modern. Write down a few keywords like warm, graphic, or classic.
– Pick the material For kitchens, consider ceramic or porcelain for value and ease. Glass adds shine. Natural stone gives texture but needs sealing. Metal brings a sleek edge.
– Choose color and pattern With white cabinets, you can go high-contrast with deep blue or black. Or stay soft with warm creams and grays. Pattern ideas include herringbone, subway tile, or a tiny geometric.
– Work with a pro An artist or tile designer can craft a one‑of‑a‑kind piece. You can also buy customizable tile sets that feel custom but cost less.
– Plan the installation Measure the area, pick grout color, and decide on a tile layout. Talk about a sealing plan if you use stone or porous tiles.
– Set a budget and timeline Custom pieces take time. Ask for a written estimate and a clear schedule.
Practical ideas you can use now
– Start with a small accent area, like a strip behind the stove. It gives you a test run without a big commitment.
– Try a simple hand painted tile border for a personal touch that isn’t loud.
– Mix two materials, such as a glass panel with ceramic tiles around the edges. It adds depth without overpowering white cabinets.
Care and limits to know
– Stone and some glass need sealing and mild cleaners. Harsh cleaners can wear color and shine.
– Custom work may cost more and take longer. If you plan to move soon, think about a reversible option like a removable panel.
Common questions
– What material best fits white cabinets? Ceramic or porcelain is reliable. Glass adds light. Stone gives texture but needs care.
– How do I keep it clean? Wipe with a soft cloth and a gentle cleaner. Rinse and dry to prevent streaks.
Next steps
– Gather a few ideas from magazines or online shops.
– Visit tile shops to see finishes in person.
– Get quotes and lead times from artists or designers.
– Start a simple board of your top color and pattern options to share with a pro.
With the right customizable backsplash, your white cabinets stay bright while your space shows your true style.
25. Customizable Backsplashes for a Unique Look
Editor’s Choice

DYARI Set of 9 Decorative Ceramic Tiles – Hand Painted Indoor & Outdoor …
Art3d 4 Sq Ft Glass Backsplash Tiles, 32-Piece Glass Peel and Stick for …

4 Sets DIY Glass Mosaic Tiles for Crafts,Mixed Color Mosaic Kits with Wo…
Conclusion

With these 25 stunning kitchen backsplash ideas, you’re equipped to create a space that reflects your style while beautifully complementing your white cabinets.
Whether you prefer timeless elegance, bold colors, or a unique personal touch, there’s an option for every taste.
Now it’s your turn to get inspired and start designing a kitchen that will leave everyone speechless!
Note: We aim to provide accurate product links, but some may occasionally expire or become unavailable. If this happens, please search directly on Amazon for the product or a suitable alternative.
This post contains Amazon affiliate links, meaning I may earn a small commission if you purchase through my links, at no extra cost to you.
Frequently Asked Questions
What Are Some Popular Kitchen Backsplash Ideas for White Cabinets?
If you’re looking to enhance your white cabinets, there are plenty of stylish options! Consider classic subway tiles for a timeless look or bold mosaic designs for a pop of color. If you prefer a more rustic feel, elegant natural stone or unique vintage tin tiles can add charm. There’s truly something for everyone!
How Do I Choose the Right Backsplash Material for My Kitchen?
Choosing the right backsplash material largely depends on your style and maintenance preferences. For a sleek and modern design, glossy glass panels or high-gloss finishes work beautifully. If you want something more cozy, consider natural wood elements or soft subtle textures. Don’t forget to think about how much cleaning you’ll be doing, as some materials are easier to maintain than others!
Can I Use Peel-and-Stick Backsplashes with White Cabinets?
Absolutely! Peel-and-stick tiles are a fantastic option for updating your kitchen without the mess of a traditional tile job. They come in various designs, from modern to vintage, and can easily complement your white cabinets. Plus, they’re budget-friendly and perfect for DIY enthusiasts looking for a quick transformation!
What Colors Work Best for Grout with White Cabinets?
When it comes to grout, the color can make a big difference in the overall look. For a classic feel, stick with white or light gray. If you want a fun twist, consider using colored grout to highlight your tiles and add personality. Just make sure it complements the backsplash design and enhances the clean look of your white cabinets!
How Can I Incorporate Sustainability into My Kitchen Backsplash Design?
Sustainability is a fantastic consideration when designing your kitchen! Look for backsplashes made from recycled materials or eco-friendly options like natural stone. These materials not only add character to your space but also reflect your commitment to the environment, all while beautifully complementing your white cabinets.
Related Topics
kitchen backsplash ideas
white cabinets
modern design
vintage style
DIY backsplash
easy updates
bold patterns
natural materials
minimalist design
colorful tiles
sustainable decor
home decor trends

")


")
These backsplash ideas are amazing! I love how they can really make white cabinets pop. Have you tried any of these in your kitchen?
I can’t believe how beautiful some of these backsplashes are! I tried to install one myself once, and let’s just say I ended up with more glue on my hands than on the tiles! 😂