

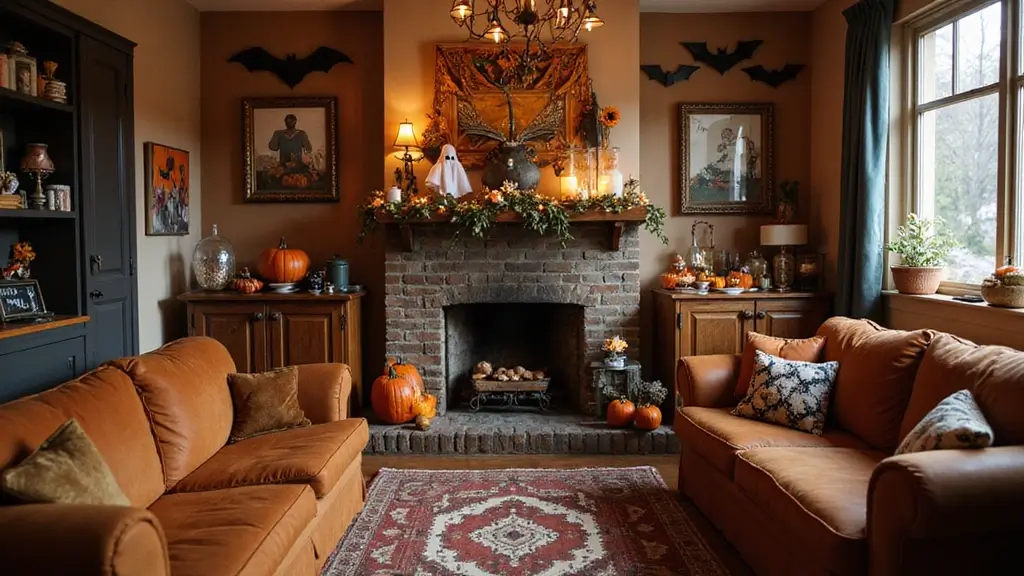
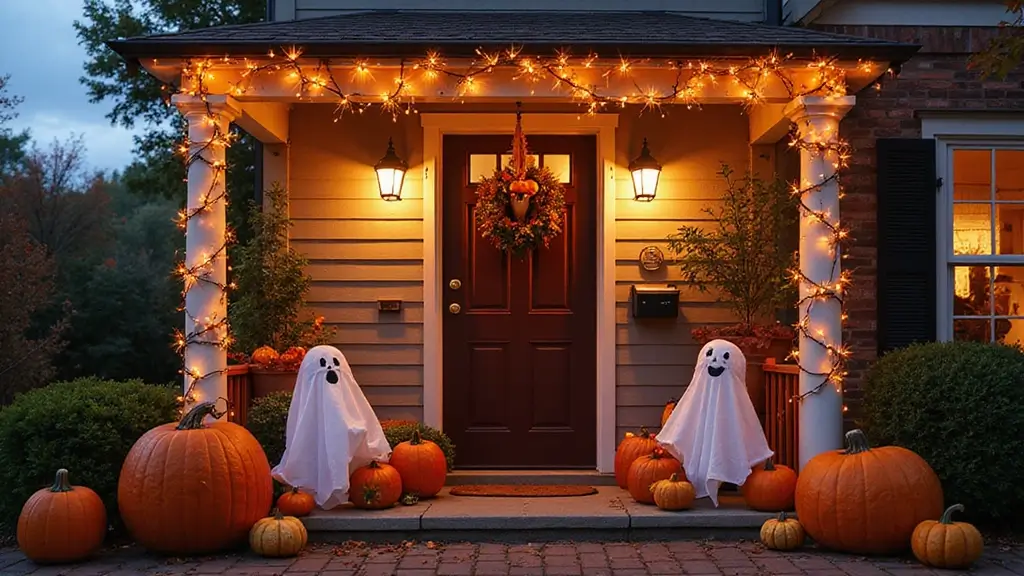
Why I made this post This season makes me crave outdoor Halloween setups that are fun and doable. I want decorations that don’t drain your wallet or your time. I love the moment when a neighbor or kid stops, grins, and points at a scene that feels real but is easy to pull together.
Who it’s for If you love DIY projects and a good spooky vibe, this post is for you. If you decorate for Halloween on a tight budget or in a small yard, you’ll find ideas that fit. If you want simple steps you can do this weekend, you’re in the right place.
What you’ll get You’ll get 25 DIY outdoor Halloween decorations that mix scary with practical. These ideas are designed to terrify your neighbors in a fun, safe way. Each idea uses common materials and clear steps. These ideas cover light scares, shadow plays, and yard scenes that look big but cost little.
How to use these ideas Start with a plan and a small budget. Pick one project to test first to see how it reads at dusk. Use LED lights, weatherproof tape, and cheap fabric to keep it simple and safe. These tips help you stage a scare without a big mess or big cost.
What to expect this season The ideas cover eerie silhouettes, glow effects, and small scenes that fit most yards. Think a fluttering ghost on a wire, a shadow figure in the hedge, or a lantern that casts moving shapes on the wall. And wait until you see #5—it’s the one that will have your neighbors talking. Most setups use common items you already have or can buy cheap.
Ready to start Pick an idea, tweak it for your space, and test it at dusk. The guide is flexible and fun, not a rigid plan. Take your time, enjoy the process, and share your results with friends and neighbors.
Contents
- 1. Creepy Ghost Lanterns
- 2. Sinister Silhouettes
- 3. Graveyard Ghouls
- 4. Spooky Spider Webs
- 5. Animated Zombie Lawn
- 6. Haunted Hay Bales
- 7. Terrifying Tombstone Trio
- 8. Boogeyman in the Bushes
- 9. Pumpkin Patch of Horrors
- 10. Scary Scarecrow
- 11. Cauldron of Bubbles
- 12. Scare-tastic Window Displays
- 13. Mysterious Message Boards
- 14. Haunted Mirror
- 15. Wailing Witches
- 16. Chilling Candy Dispenser
- 17. Eerie Eyes in the Bushes
- 18. Cursed Crows
- 19. Chilling Chains
- 20. Haunted Pathway
- 21. Gory Handprints
- 22. Ghostly Table Setting
- 23. Frightening Fencing
- 24. Scary Skeletons
- 25. Frightening Fog Machine
1. Creepy Ghost Lanterns
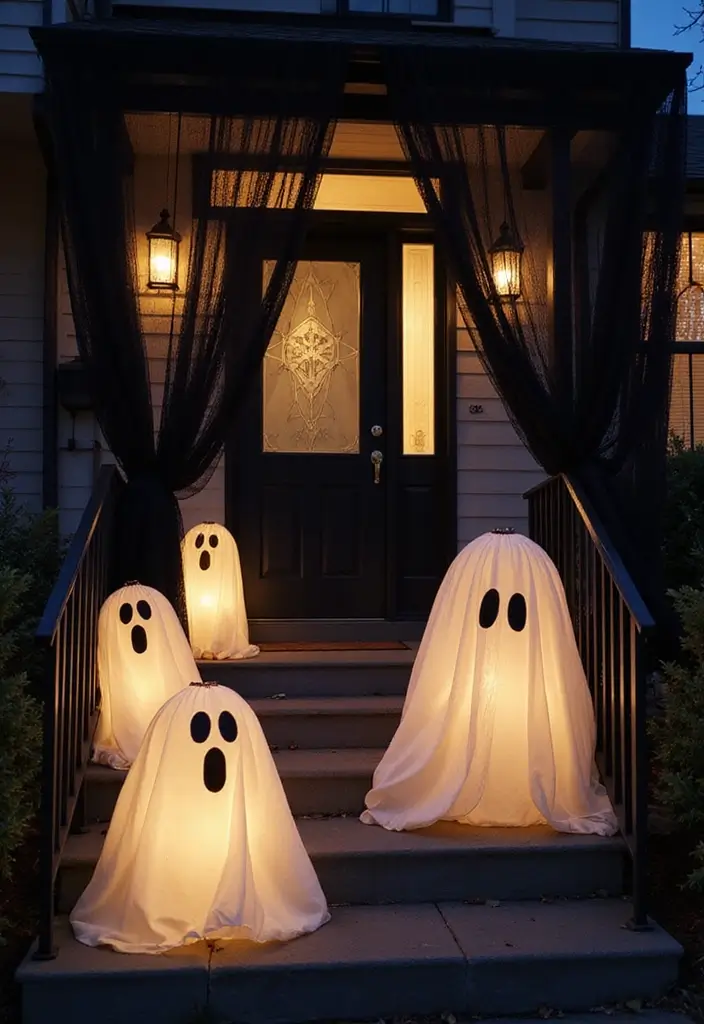
If you want a spooky glow on your porch with almost no work, try Creepy Ghost Lanterns. They throw a soft, floaty light that makes neighbors do a double take. You’ll use simple items like white balloons, LED lights, and white fabric to create floating spirits.
Materials
– Choose white balloons in a mix of sizes.
– Use battery-powered LED lights or string lights.
– Use white fabric, tulle, or old sheets.
– Grab a black permanent marker.
– Have clear tape or hot glue on hand.
– Get fishing line or sturdy string.
– Keep scissors handy.
1) Inflate the balloons to different sizes.
2) Drape each balloon with white fabric so it looks like a wispy body.
3) Put LEDs inside each balloon and seal the opening so the fabric glows.
4) Tie a string to the top and hang from porch beams or tree limbs. Space them so they look like a small ghost parade.
Tips
– Draw spooky faces on the fabric with a marker for extra character.
– Vary sizes to make a ghost family that sways at night.
– Use weatherproof LEDs so the lights stay bright through wind and rain.
Unique Insight
Ghost lanterns work well for parties too. They set a haunting mood without loud noises or scary props. Place them at porch corners for a guiding glow. They’re quiet, dramatic, and safe for kids.
1. Creepy Ghost Lanterns
Editor’s Choice

Brightown 12 Pack LED Fairy Lights Battery Operated String Lights – 7ft …

RUBFAC 87pcs White Balloons Different Sizes 18 12 10 5 Inches for Garlan…

White Tulle Fabric Rolls, 54 Inch by 10 Yards (30 ft) Tulle Ribbon for W…
2. Sinister Silhouettes

Silhouettes offer a quick, budget-friendly way to scare your neighbors at dusk. They are simple, bold shapes that cast big shadows and grab attention. Cutouts from black cardboard or plywood work best for clear figures like ghouls, witches, or classic monsters. Place them around your yard to form a chilling scene your guests will remember. Let the wind move them; the slight sways add a living, lurking feel for anyone passing by. Hang some from trees and anchor others on stakes in the ground to build height and depth. Vary distances and heights so the silhouettes loom at different angles as people walk by.
Tips:
– Add shredded fabric on the edges for a torn, ragged look.
– Use glow-in-the-dark paint or a solar LED behind the cutouts to create eerie outlines at night.
– Weatherproof your materials or seal plywood so they last through a few storms.
Unique Insight: Pick silhouettes inspired by your favorite horror films or characters to spark conversations while keeping it fun.
2. Sinister Silhouettes
Editor’s Choice

25 Sheets Black Cardstock Paper 8.5 x 11 inches, 250 GSM/92 lb Thick Car…

ABEIER Glow in the Dark Acrylic Paint – 10 Bright Colors (60ml/2oz) Long…

btfarm 16 Pack Solar Ground Lights Outdoor, 8 LED Solar Disc Lights IP65…
3. Graveyard Ghouls
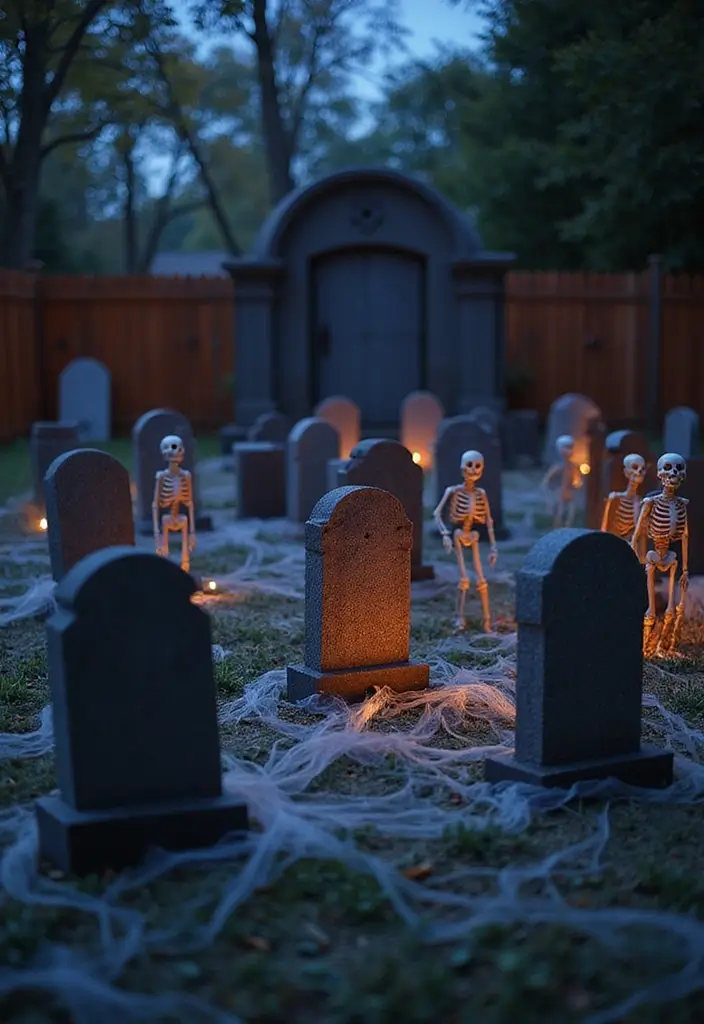
Looking to create a graveyard scene that chills neighbors but stays friendly? You can do it with sturdy materials and a plan.
– Materials and basics
– Craft tombstones from foam sheets or wood. Cut simple shapes and paint them gray. Add names, dates, and playful epitaphs to keep the mood fun.
– Gather faux cobwebs, a few plastic skeletons, and LED lights for a soft glow.
– Build and design
– Vary the sizes and shapes of the stones. Taller stones at the back, shorter ones in front. Dry brush lighter gray for a weathered look.
– Attach stakes or weights so the stones stand steady in wind. Place on mulch or the lawn edge to feel natural.
– Setting the mood
– Arrange in a loose cluster with gaps between stones. Drape webs around and between them. Tuck skeletons into spots guests will notice.
– Add motion-activated sound or a gentle wind chime for extra shivers, but test before guests arrive.
– Finishing touches
– Use low, cool lights to cast eerie shadows after dark. Keep paths clear so guests can walk safely.
– Tips: Mix sizes, watch the lighting, and keep paths easy to follow.
– Unique Insight: Invite friends to contribute tombstone ideas for a collaborative twist tonight together.
Create a graveyard that’s spooky yet inviting! With a little creativity and DIY magic, your outdoor Halloween decor can make even the fiercest ghouls smile.
3. Graveyard Ghouls
Editor’s Choice

Better Office Products 100 Pack EVA Foam Sheets, 5.5 x 8.5 Inch, Assorte…

Minetom Fairy Lights Plug in, 33Ft 100 LEDs Waterproof Silver Wire Firef…

36″ Skeleton Halloween Decorations, 3FT Realistic Full Body Movable Posa…
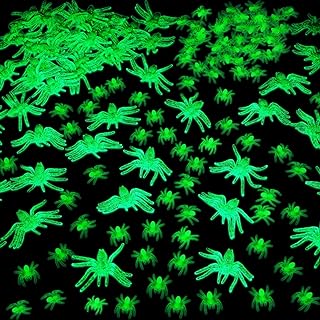
4. Spooky Spider Webs

You want a quick, scary look that makes neighbors do a double take. Giant spider webs stretched across your porch, in front of bushes, and across the entryway do the trick. Use black yarn or store-bought webbing. Drape the strands loosely so they feel tangled and real. Tuck plastic spiders into the net where they’ll glow in the right light. A flickering lantern or candle behind the web creates moving shadows that creep up the walls.
Tips: Vary the density of the webbing. Build thick clusters and open gaps to mimic real webs. Place glow-in-the-dark spiders in dark corners to surprise visitors after dark. For extra drama, set a small fog or mist near the ground so the web seems to float in a thin veil. Safety note: keep flames away from dry fibers; use LED lights or safe lanterns instead of real candles where possible.
Unique Insight: These webs are not one-season decor. They can be repurposed for Christmas by swapping to white yarn and adding fake snow. Stored carefully, they’ll be ready next year.
– Pick spots: porch rails, shrub branches, and the doorway arch.
– Anchor edges: tape, zip ties, or garden clips hold the web in place.
– Layer the webs: set a couple of large, loose webs at different heights.
– Add the creepy touch: place several spiders at the center or along a strand.
– Light it right: place a lantern or LED behind the web to cast eerie shadows.
– Check and adjust: windy nights can loosen strands; retighten as needed.
4. Spooky Spider Webs
Editor’s Choice

Lion Brand Yarn Lightweight 24/7 Cotton Yarn for Knitting, Crocheting, a…
150 Pieces Glow in The Dark Large Spiders 3.15″ and 1.3″ Fake Plastic Sp…

Lichamp LED Camping Lantern, 4 Pack Battery Powered Flashlight for Power…
5. Animated Zombie Lawn
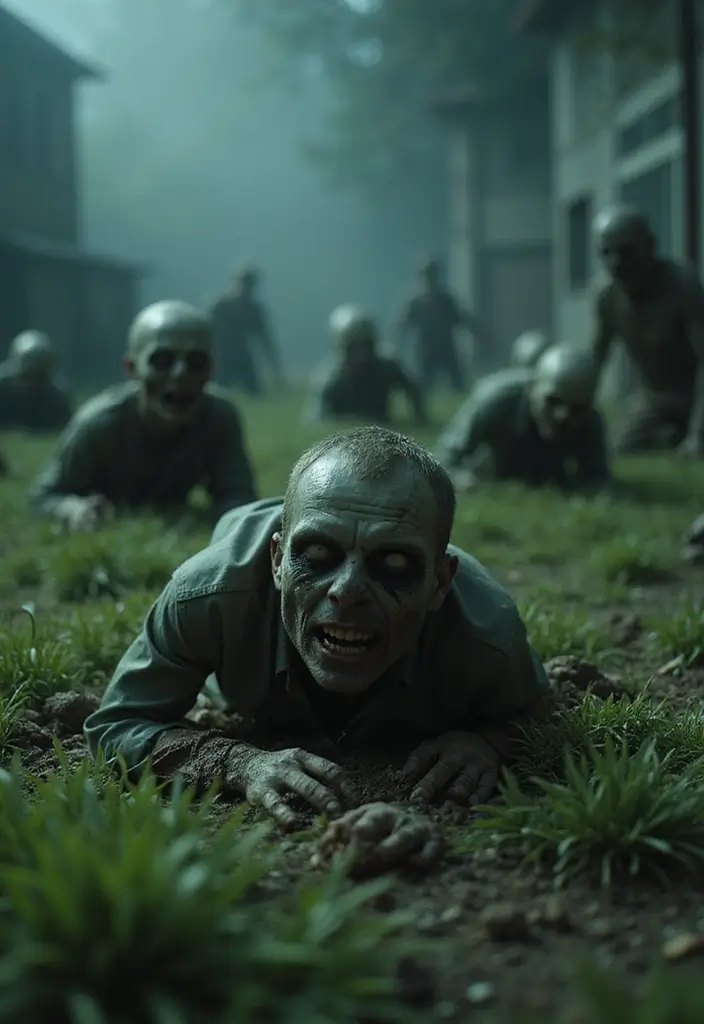
You want a yard that scares but stays doable. An animated zombie lawn fits. You can buy zombie props that shake or move, or build one with PVC piping and fabric. Start simple. Let a zombie seem to crawl from a shallow grave filled with fake dirt and a patch of real-looking grass. Hide the mechanism so it looks sudden.
How to set it up: Build a small frame under the dirt mound with PVC pipes. Bend a limb that pushes a fabric hand up. Anchor with stakes so it stays steady in wind. Use torn fabric and a gray wash to add color. Put it where guests slow down, not in a busy path.
– PVC piping
– Fabric scraps
– Fake dirt
– Stakes
– Small speaker
Tips: Add sound. A tiny speaker hidden in the mound can play moaning or rattling chains. Time the noises to when guests get close. Keep the volume spooky but neighbor-friendly.
Unique Insight: This can be a fun family project. Everyone can add a bit, from digging the dirt to painting the fabric. It teaches teamwork and gives you a memorable scare.
Quick notes: Test before Halloween. Check for cords and tripping hazards. Weatherproof the electronics. Use battery power where possible.
5. Animated Zombie Lawn
Editor’s Choice

Sawysine 102 Pcs DIY PVC Projects Set Included 60 Pcs 24 Inch PVC Pipe a…

150Pcs 4″ x 4″ (10cm x 10cm) Cotton Craft Fabric Bundle Squares,Squares …

JBL Go 3 – Portable Mini Bluetooth Speaker, big audio and punchy bass, I…
6. Haunted Hay Bales

Need a quick outdoor scene that looks spooky but stays kid-friendly? Haunted hay bales can do it. They add height and shape to your yard.
Stack bales to build levels, then rest a carved pumpkin on the top for a quick scare. Drape fake spider webs over the bales to add texture. Keep the look playful, not too scary, so families feel welcome.
Tips: Use mums and pumpkins around them to create a warm, eerie glow.
Unique Insight: The hay bales can double as seating for a small Halloween gathering.
How to set it up:
– Pick sturdy, clean bales and place them on a flat, safe area.
– Stack two or three high in a staggered pattern for stability.
– Carve a friendly face on a pumpkin and set it on the top bale.
– Weave in fake webs between bales and around the pumpkin.
– Add LED lights or a solar lantern to illuminate at dusk.
Decoration ideas to boost the look:
– Surround with orange or burgundy mums and a few gourds.
– Line a simple path with small hay stalks or corn husks.
– Add a crow prop or a dried corn bundle for texture.
Safety note: use battery-powered lighting only; no open flames.
This setup works as a simple outdoor party backdrop.
6. Haunted Hay Bales
Editor’s Choice

Happy Hippo Halloween Spider Web Decoration, 200 Sqare Feet & Plastic Sp…
Minetom Fairy Lights Plug in, 33Ft 100 LEDs Waterproof Silver Wire Firef…

Pumpkin Carving Kit Tools for Halloween – 13Pcs Professional Heavy Duty …
7. Terrifying Tombstone Trio
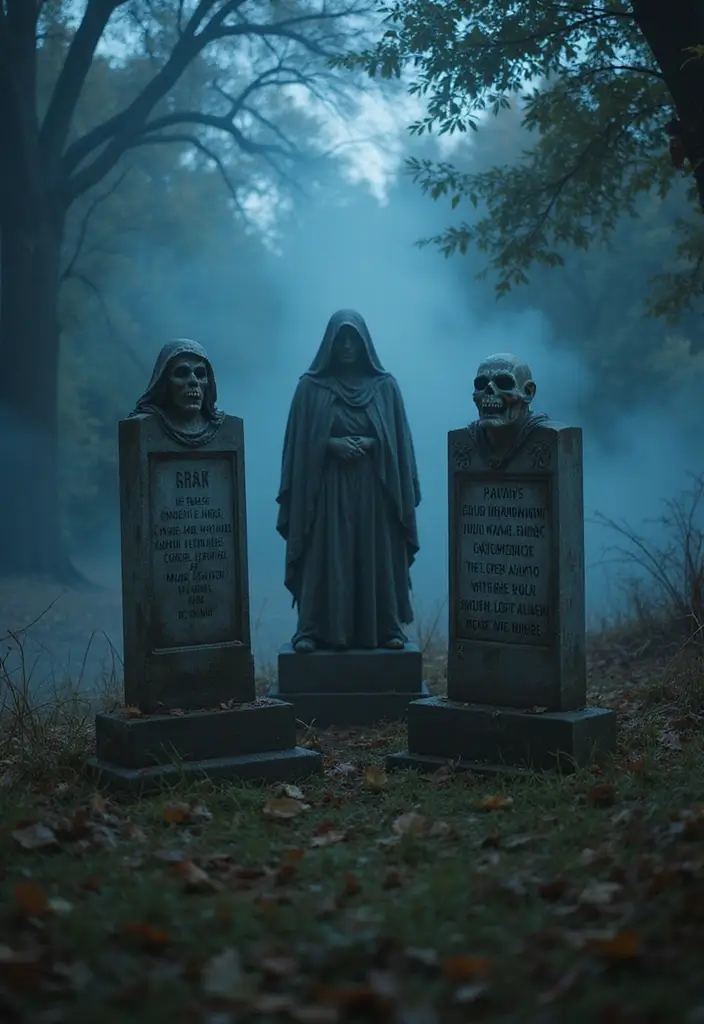
What you’ll build
Want a Halloween centerpiece that sparks stories, not just scares? A terrifying tombstone trio can do that. Three stones tell a tiny tale about a haunted character. Choose figures your neighbors recognize. A vampire, a ghost, and a witch read well from the curb.
How to build
Use simple, light materials. Start with foam or weatherproof wood, cut into tombstones. Carve plain details. Seal the surface and paint with outdoor-safe colors. Add cracks and moss for texture.
Placement and mood
Arrange the stones as a small group so people read a story as they pass. Keep them linked but varied in height and shape for depth. Add mood with props like skeletal hands at the base or a cloak near a corner. A fog machine or mist helps after dark, but keep paths clear.
Lighting tips
Light helps the scene. Use warm LEDs behind each stone for a soft glow, or choose a cool blue glow around the trio for a ghostly vibe.
Local flavor
Tie the trio to local lore. Name the characters after a regional legend or add a small plaque with a backstory. It keeps your display connected and invites neighbors to chat.
Practical notes
Anchor stones well, pick weatherproof paints, and store pieces dry after the season.
7. Terrifying Tombstone Trio
Editor’s Choice

20 Pack White Foam Board 12″ x 16.5″, 3/16″ Thickness Foam Core Baking B…

DecoArt Crafter’s Acrylic Patio Paint 24 Color Starter Paint Set, Outdoo…

JMEXSUSS Connectable Warm White String Lights Indoor Bedroom, 8 Modes Ch…
8. Boogeyman in the Bushes
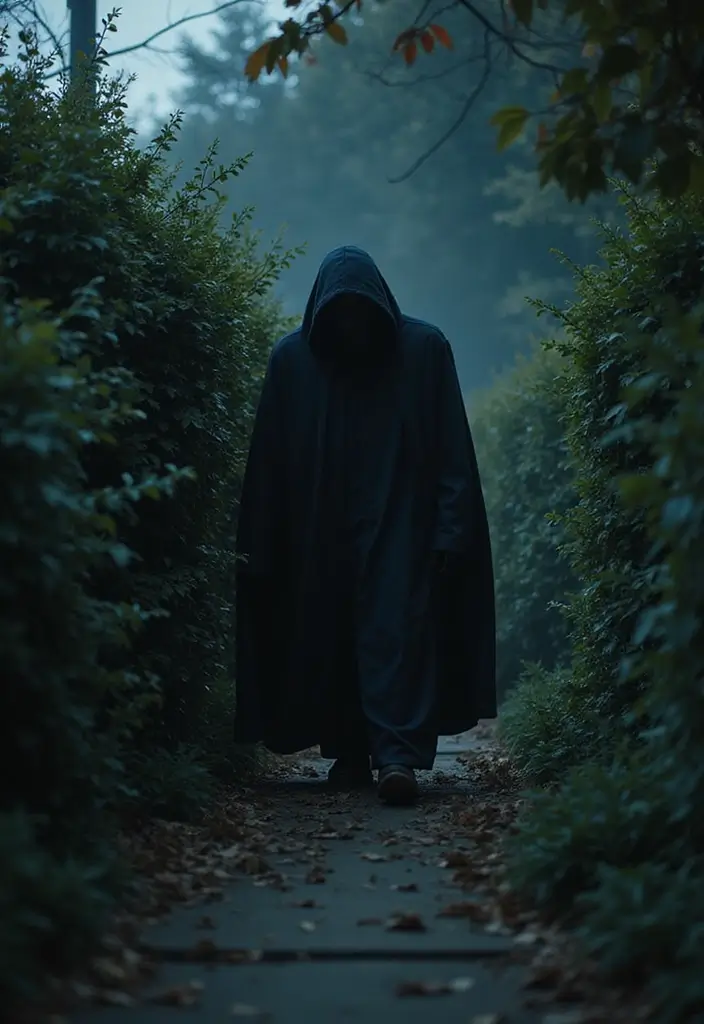
Want a quick scare that feels smart and stays under control? A Boogeyman hiding in the bushes does it well.
1) Choose a figure you like that fits your yard and comfort level, considering size, visibility at night, and cost.
2) Use an old mannequin or cheap store prop you can easily dress and tweak to look like a real, frightened figure.
3) Dress it in torn clothes to look worn and scary, using scraps you already have.
4) Camouflage it with leaves and twigs so it blends into the shrubbery rather than standing out in daylight.
5) Hide a small speaker or wind-up device to create a soft creak or rustle, but keep the sound subtle.
6) Tips: Secure the figure with zip ties, stakes, or weights so it won’t blow away even on windy days.
7) Position it behind a thick thicket so passersby see the reveal only when they lean in.
Unique Insight: Rotate the figure’s position throughout October to keep things fresh.
This setup delivers a big scare with little work. When dusk settles, the shadows boost the illusion. Add a second prop in a nearby bush for extra drama. Move the Boogeyman monthly to keep neighbors guessing.
8. Boogeyman in the Bushes
Editor’s Choice

FDW Manikin 60”-67”Height Adjustable Female Dress Model Display Torso Bo…

Speakers Bluetooth Wireless: 80W(Peak) Loud Speaker with Bass, 20H Playt…

Cable Zip Ties,400 Pack Black Assorted Sizes 12+8+6+4 Inch,Multi-Purpose…
9. Pumpkin Patch of Horrors
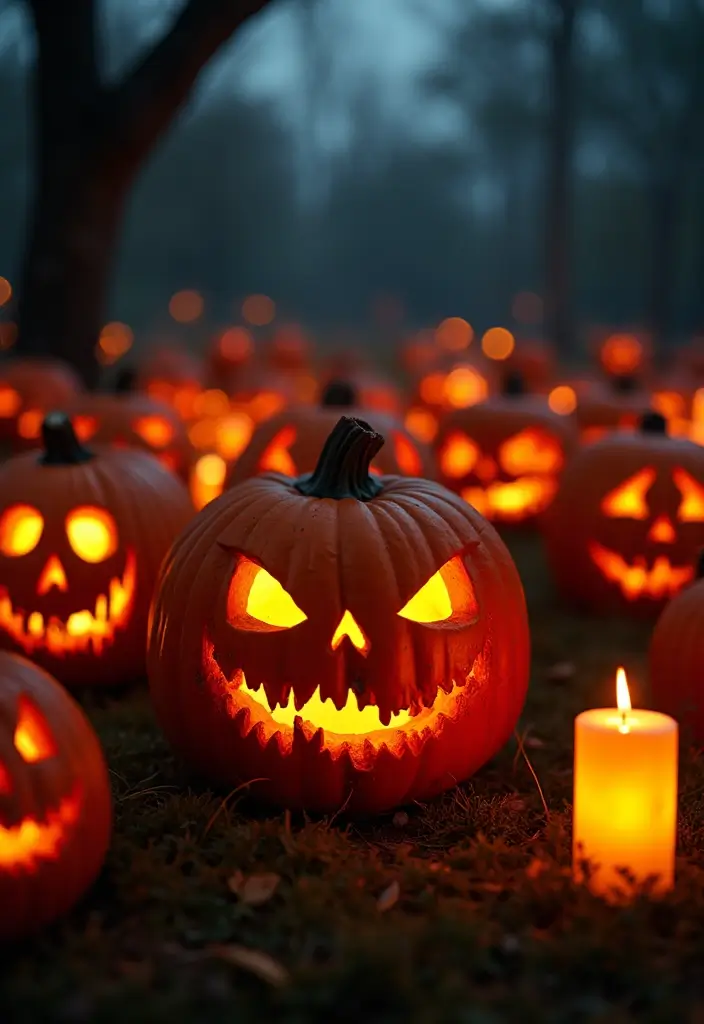
Want a spooky yard that wows neighbors without breaking the bank? Build a Pumpkin Patch of Horrors by mixing carved jack-o’-lanterns with pumpkins painted to show monsters or creepy creatures. Use color and texture to add depth and interest.
Choose pumpkins of different colors—orange, white, even green or black accents. Mix smooth surfaces with rough textures to catch the eye. Paint some pumpkins with bold faces or eerie figures, and leave others carved with jagged edges. Add hay or leaves around the bases for a patch look.
Plan your layout first. Group pumpkins by theme to tell a short story. Raise some on hay bales or crates to create height differences. Line a path through the display so visitors follow.
Lighting matters. Use LED candles or battery tea lights inside every pumpkin. They glow with a steady, safer light than real flames. Choose warm amber tones for a haunted glow.
Tips: LED candles inside pumpkins keep faces lit safely.
Unique Insight: A pumpkin-carving night with family or friends is a fun way to collect fresh designs.
Steps to build your patch:
– Gather supplies: pumpkins, paints, brushes, tools, LED lights, hay, and sealant.
– Prep the display area with a tarp and clear space.
– Design each pumpkin first, then carve or paint.
– Arrange pumpkins in clusters and at different heights.
– Light them with LEDs and seal painted surfaces.
9. Pumpkin Patch of Horrors
Editor’s Choice

Homemory 24Pcs Flickering Flameless Candle Battery Operated, 200+Hours F…
Pumpkin Carving Kit Tools for Halloween – 13Pcs Professional Heavy Duty …

Acrylic Paint Set, 24 Colors (2 oz/Bottle) with 12 Art Brushes, Art Supp…
10. Scary Scarecrow

You want a yard that greets guests with a chill and a thrill. A scary scarecrow can do that with a simple build. It stays spooky without turning into a wall of fright.
Materials
– Old clothes stuffed with hay
– A creepy mask or a carved pumpkin head
– A sturdy stake or broom handle
– Tattered fabric and rags
– A pitchfork or old tools prop
– Paint in pale, dark, and red shades
– Fishing line or clear thread
– A small battery light or lantern
Steps
– Stuff the clothes with hay and fix them to the stake to make a tall, upright figure.
– Attach the head by tying the mask or pumpkin securely to the top.
– Add torn sleeves, a ragged cloak, and a hood for a ghostly look.
– Place the pitchfork or tools in one hand and lay other props at the feet.
– Create subtle motion by tying a line from the arm to a tree branch so it sways in the breeze.
– Paint the face with pale skin, dark eyes, and a red mouth to look menacing yet human.
– Set the scarecrow facing the entry path so it “welcomes” guests with a growl-like stare.
– Light it at night with a small lamp under the hat or at the base for spooky glow.
– Do a quick safety check: keep paths clear, avoid sharp edges near walkways, and secure the setup against wind.
Creative twist
– Try a horror-movie character look. A simple piece—like a hat, scarf, or jacket—can turn your scarecrow into a famous villain while staying budget-friendly.
Tips
– Let the breeze do the work: a gentle sway looks more real than a fixed pose.
– Weatherproof fabrics and spray sealant help it last through rain and wind.
10. Scary Scarecrow
Editor’s Choice

Scary Halloween Mask Smiling Demons Horror Scariest Creepy White Masks w…

LED Camping Lantern, Consciot Battery Powered Camping Lights, 1000LM, 4 …

Scotchgard Fabric Water Shield, 13.5 Ounces, Repels Water, Ideal for Cou…
You might also like
11. Cauldron of Bubbles
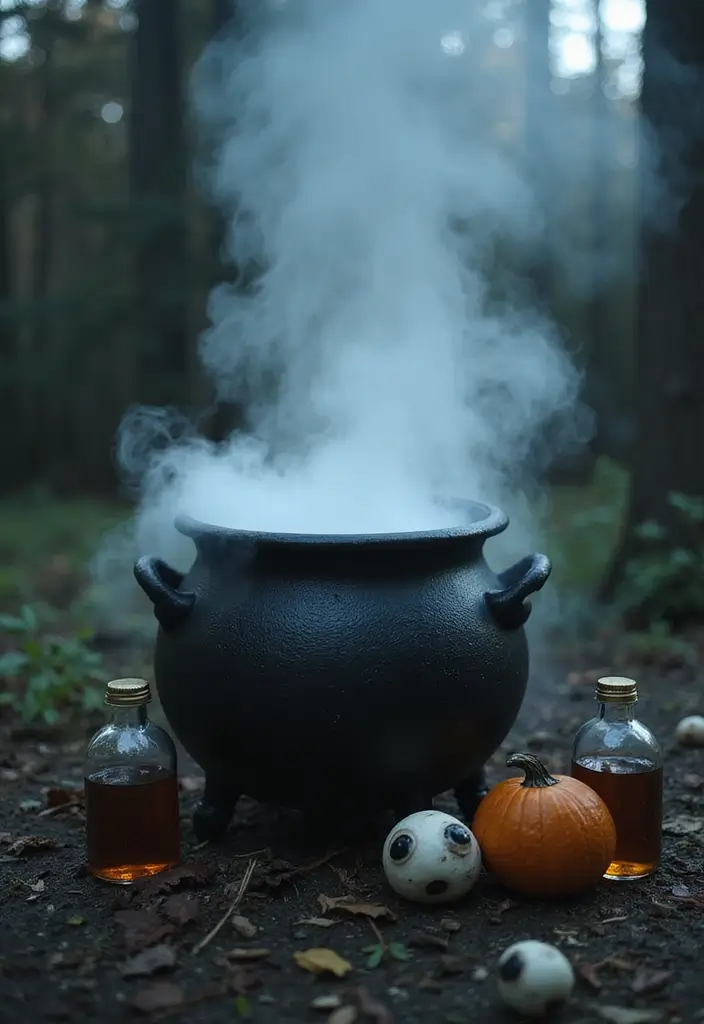
You want a spooky centerpiece that grabs attention and is easy to set up.
A bubbling cauldron fits that need.
It adds magic and menace without fuss, inviting curiosity.
Use a black cauldron or a large dark pot.
Fill it with water and drop in a small piece of dry ice for bubbling fog.
The fog rises and drifts over the rim, curling toward your guests.
If wind is light, the fog will spill gently onto the table for a ghostly glow.
Place the cauldron on a sturdy stand and light it from behind or underneath to glow.
Surround it with potion bottles, fake eyeballs, and faux rats.
A tattered cloak or scattered bones nearby can lift the scene.
A glow tube behind the pot adds color to the fog and depth.
Position the setup along a path or at an entry so guests notice it.
Safety matters: use tongs for dry ice and keep it away from children.
If you have pets, place it where they cannot reach the ice or cords.
Tips: Use tongs to handle dry ice and keep the ice away from curious hands.
Tips: Work in a ventilated area and place the setup on a non-slip surface.
Unique Insight: The cauldron can double as a punch bowl for Halloween gatherings when drinks stay safe.
Your guests will gasp.
11. Cauldron of Bubbles
Editor’s Choice
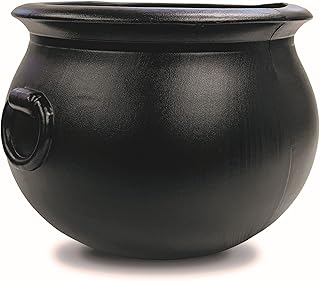
Union Products Black 16 Inch Spooky Witch Cauldron for Indoor and Outdoo…

Dry Ice Packs for Shipping – Long Lasting ice Packs – 24+ Hour Freeze Po…

24 Pack Glow Sticks Classroom Halloween Party Favors for Kids 4-8-12, Go…
12. Scare-tastic Window Displays

Windows can become a cheap, dramatic stage for fright.
You want this look with as little work as possible.
Two easy approaches work well.
– Dark fabric shadows — Measure the window, then cut simple shapes like ghosts or bats.
– Hang the fabric with removable tape so you can remove it without a mess.
– Place a lamp inside, low and to the side, to cast tall silhouettes on the glass.
– Secure the bottom edge with a lightweight weight or extra tape so the fabric stays put in a breeze.
– If you want more depth, layer a second piece of fabric for a foggy look.
– Glow-in-the-dark decals — Apply decals to the inside or outside of the glass where they glow best after sunset.
– Let them charge in daylight or bright room light, then watch them glow when night falls.
– They need almost no setup and stay put through wind.
– Choose a mix of ghosts, bats and moons, and place them at different heights for depth.
– Removable window clings — Stick clings to clean glass and adjust as needed.
– Peel them off easily when you want a fresh look or when Halloween ends.
– Keep a spare kit handy for quick changes, and store clings in a bag to prevent snagging.
Tip: For extra atmosphere, run a Halloween playlist from inside.
Soft whispers, creaky doors, and eerie wind amplify the scene.
Bonus: Maintain a few clings handy for fast changes on windy nights.
Transform your windows into a scare-tastic stage with simple shapes and clever lighting! Just a bit of fabric and a lamp can cast spine-chilling silhouettes that will leave your neighbors in awe.
12. Scare-tastic Window Displays
Editor’s Choice

173 Pieces Halloween Glow in The Dark Decorations Weird Moon Sticker Gre…

3 Sheets Glow in The Dark Halloween Window Clings Luminous Halloween Win…

6 Pack Halloween Black Creepy Cloth – Halloween Decorations Clearance – …
13. Mysterious Message Boards

Want a creepy candy-free way to wow your street? Mysterious Message Boards offer a quick, kid-friendly fright. They show Halloween vibe and are easy to update as the season changes.
– Choose your board. Pick a sturdy wooden board or a ready-made chalkboard. A larger size helps your message read from the sidewalk.
– Placement matters. Mount it on a porch rail, gate, or fence where guests will notice it best. Keep it at eye level for quick reading.
– Write eerie messages. Use bold, high-contrast chalk or markers. Short lines read faster from a distance.
– Style it. Drape faux vines or light spider webs around the edges. A small battery lantern can make the text glow at dusk.
– Weatherproofing tip: Seal wooden boards with outdoor varnish to resist rain and sun. Wipe the board clean and reapply the seal as needed.
– Keep it fresh. Rotate messages every week to stay surprising. Try lines like “Welcome to Our Haunted Home” or “Beware of the Ghosts”.
– Invite neighbors. Host a friendly message contest with a small prize. Display the winner for a night to boost fun and community.
Finally, snap photos and share your setup to inspire other homes.
Your neighbors will notice.
You will see smiles.
13. Mysterious Message Boards
Editor’s Choice

Pearhead Wooden Letterboard Set – Ideal Photo Sharing Prop for Baby Anno…

A Frame Chalkboard Sign, 40″x20″ Extra Large Sidewalk Chalk Board, Woode…
LED Camping Lantern, Consciot Battery Powered Camping Lights, 1000LM, 4 …
14. Haunted Mirror
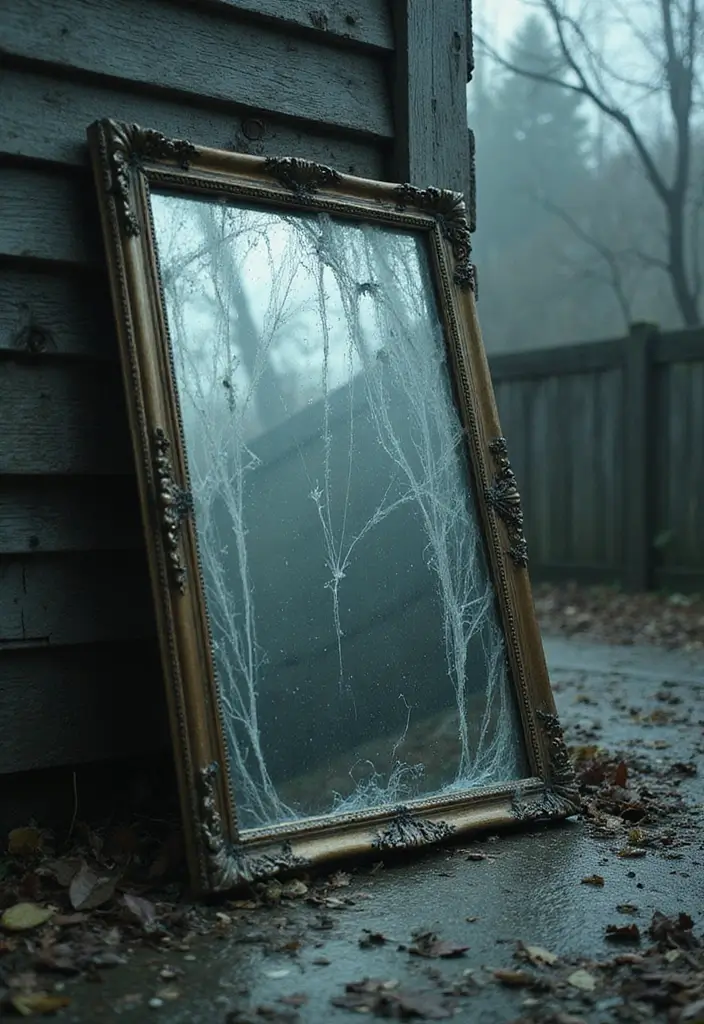
You want an outdoor Halloween touch that grabs attention without going over the top. A haunted mirror can do that. Find a vintage or distressed frame. Place it in a shady corner, maybe under a porch light, and drape it with fake cobwebs. Let the glass catch a touch of moonlight for a chill.
Make the reflection tell a story. Put a creepy figure behind the glass, a silhouette cut from cardboard works fine. Put it just beyond the mirror so it reflects in the glass but stays out of direct sight. The result is a peek into a haunted room you can’t enter. Add a soft yard light to keep the scene visible, not blazing.
Tips:
– Consider a two-way mirror or mirror film for a stronger double effect. Dim the light on your side to keep the other side mysterious.
– Use removable props behind the glass so you can adjust after the holiday.
Unique Insight: The haunted mirror also doubles as a photo booth backdrop. Set up a simple frame around the mirror, add a few warm lights, and place a prop chair or hat for guests to pose. A quick sign on the frame can invite photos. It works well on porches, fences, or garden walls.
A haunted mirror is the perfect mix of eerie and elegant! Transform a vintage frame into a chilling focal point that will leave your neighbors second-guessing their reflections this Halloween.
14. Haunted Mirror
Editor’s Choice

TWO WAY INFINITY MIRROR FILM 20″ WIDE x PER FOOT REFLECTIVE WINDOW TINT …
WINPLUS+ Vintage Picture Frame 5×7, Wall Mount and Tabletop Display, Art…

ProGreen 6000K Battery Motion Sensor Light Outdoor Waterproof Wireless L…
15. Wailing Witches
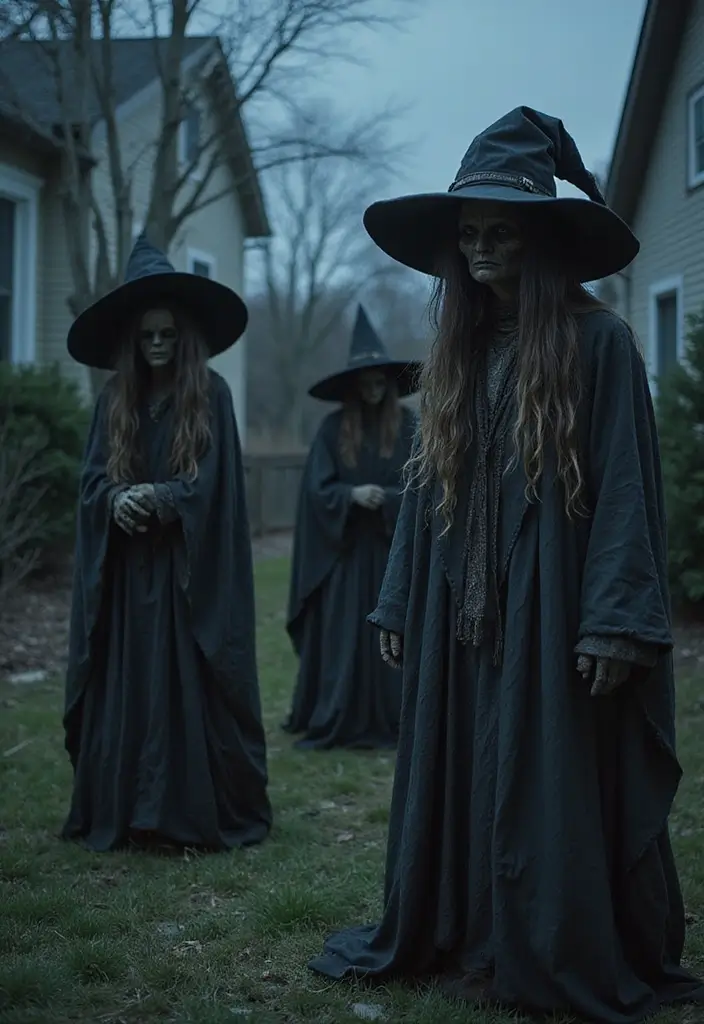
You want a Halloween display that makes neighbors pause and look twice. Wailing witches in life-size poses can do that with pure drama. You can buy ready-made figures or make your own. Dress a mannequin in ragged robes, add a tall hat, and a broom.
Place them where light can hit them clearly and safely. A porch light or lamp will throw shifting shadows across their tattered sleeves. Let the sound work for you with a small speaker tucked behind the robes. Test the setup in daylight first, so you know where to place the speaker for best reach.
Run a loop of moans, wails, and faint giggles for a creepy chorus. Mount the speaker high enough to stay hidden but still heard clearly outside. Keep the gear weatherproof and check batteries before dusk.
Tips: Choose waterproof fabrics to withstand rain, wind, and sun all season. Secure cords and fix loose parts so a windy night won’t topple a witch.
Unique Insight: Turn it into a mini contest by letting guests vote for their favorite witch. Add a simple voting box and a bright sign to guide the fun. Update the display each night with a new winner and a fresh sound cue.
15. Wailing Witches
Editor’s Choice

JOYIN 72” Hanging Witch Decor Halloween Decorations Outdoor, Flying Life…

Anker Soundcore 2 Portable Bluetooth Speaker with Stereo Sound, Bluetoot…

Waterproof Canvas Fabric by The Yard 600d Cordura Canvas Fabric 58 inch …
16. Chilling Candy Dispenser
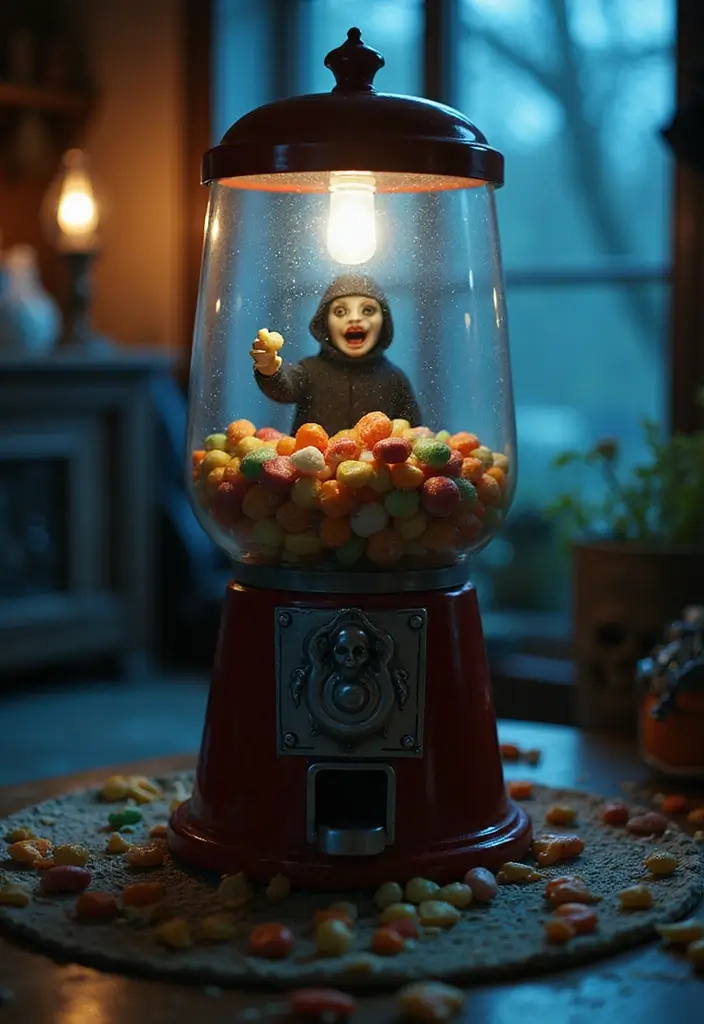
Want a candy moment that gives kids a thrill and a smile? Turn a plain candy bowl into a chilling candy dispenser. A ghost or skull figure hovers over the bowl and seems to spit out treats when someone reaches for them. It makes trick-or-treating feel like a mini scare and a big surprise.
To make it work, pick a prop you can trust. A friendly-looking ghost or a goofy skull works best. Mount the figure so its mouth points toward the bowl. Hide the mechanism behind a small haunted setup—a graveyard scene or a tiny haunted house helps sell the scare without looking clumsy.
You have two reliable ways to trigger the release. Use a motion sensor that spots a hand and sets off a little motor to flip a lid, or run a simple pulley that drops candy when a string is tugged by the lid. Keep cables and wiring tucked away out of sight to preserve the spooky effect.
Place the candy bowl inside a miniature haunted setting. Dim lights, a breeze from a fan, and creaky wood sounds add atmosphere. The effect should feel playful, not grim.
Tips: Use a mix of candies and treats to please different tastes. Keep candy sizes small so the mechanism runs smoothly. Test the setup before Halloween night to avoid jams.
Unique Insight: Create themed candy bags that match your decorations. When the dispenser spits treats into the bag, kids get a complete spooky moment from start to finish.
16. Chilling Candy Dispenser
Editor’s Choice
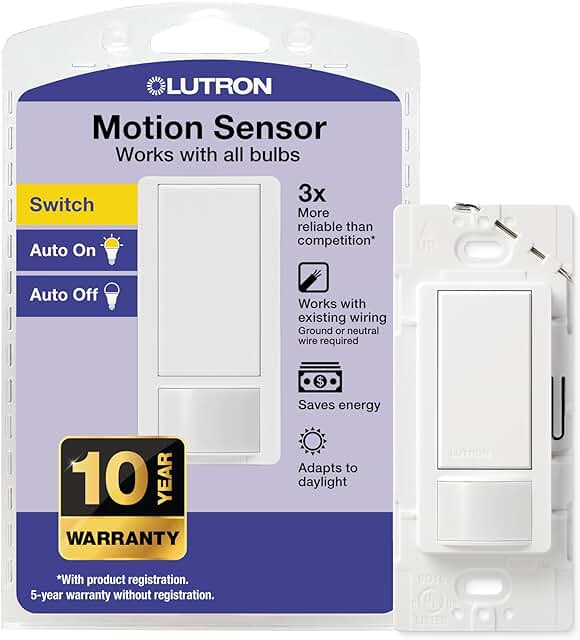
Lutron Maestro Motion Sensor Light Switch Indoor for Bathroom, Garage, L…

DIY Mini House Kit, Miniature Haunted House Kits with LED Accessories Fu…

Koonie Desk Fan, Ultra Quiet 2.5-11h Battery Operated Small USB Fan with…
17. Eerie Eyes in the Bushes
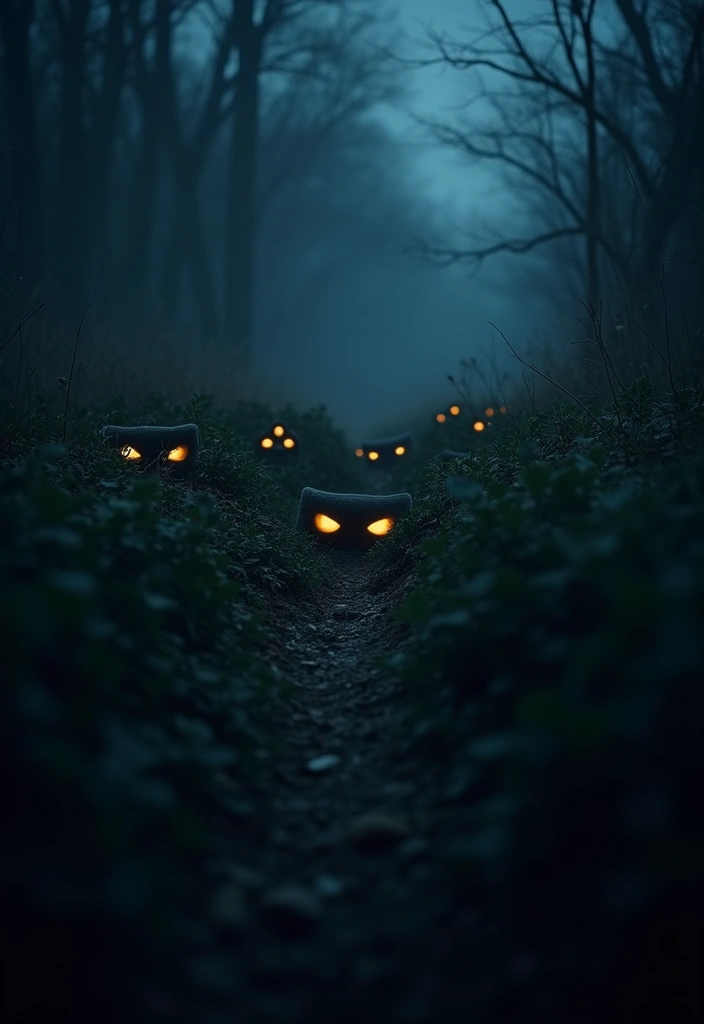
You want a quick scare that fits any budget. Eerie eyes in the bushes do that and keep neighbors on their toes. A few glowing peepers can feel real when placed right.
– How to set it up: Use battery-operated LED lights in green or red. Tuck each light at a different height among your shrubs. Point the glow toward the path so guests see the eyes first and then the shape of the plant.
– Add a creepy touch: Put small stuffed animals with reflective eyes near the bushes. Their eyes catch the light and seem to stare back. It’s simple, cheap, and raises the fright factor without loud sounds.
– Placement ideas: Mix heights—some eyes high, some low. Space them out so the glow looks scattered, not a line. This creates a sense of lurking creatures rather than a single glow.
– Color and motion: Tip Use more than one color for an otherworldly feel. Tip Try a slow blink or short flicker to mimic life. Tip Keep wires hidden and store battery packs in a small box under a plant pot.
– Longevity: Choose weatherproof LEDs and sturdy batteries. Check them after rain and replace batteries as needed. They can stay up year round, keeping the creepy vibe without much work.
Your yard will feel haunted, yet safe, with this simple setup all autumn and beyond.
17. Eerie Eyes in the Bushes
Editor’s Choice

Battery Powered LED Strip Lights, 3 Pack 40 Inch Cordless White LED Ligh…

Arrozon 12 Pcs Small Stuffed Animals Bulk, 4.5 Inch Mini Stuffed Animals…

(2-Pack) 12V LED Neon Battery Pack for Neon Signs & LED Decorations, 8-A…
18. Cursed Crows

You want a yard that chills guests without loud tricks. Cursed crows can do this with simple placement.
Place fake crows on branches, fence posts, or the edge of your roof. Let them seem to watch the scene, still and calm. This small setup creates a real sense of foreboding. It stays easy to change as the season shifts.
Tips:
– Use different sizes and postures to create a dynamic group.
– Mix perched birds with ones that look away or peek from leaves.
A little sound goes a long way.
– A small speaker tucked in the bushes can play crisp caws or soft wing flaps.
– Keep the volume low so it feels like a real moment, not a radio cue.
Glow at night.
– Spray a few crows with glow-in-the-dark or UV paint to make them pop in the dark.
– It catches eyes as people walk by.
Unique Insight:
– These crows aren’t just for Halloween.
– They work in autumn displays, too.
– Switch to autumn colors for a harvest vibe without changing the setup.
Setup basics:
– Use lightweight decoys or feathered silhouettes that are easy to move.
– Tie them with clear fishing line so they swing softly, not stiffly.
– If you have a fogger, place a crow near the mist for a ghostly effect.
– Store decoys in a dry box when not needed.
Cursed crows can elevate your DIY outdoor Halloween decorations from ordinary to eerie! A few strategically placed crows creates a spine-chilling atmosphere that your neighbors won’t forget.
18. Cursed Crows
Editor’s Choice
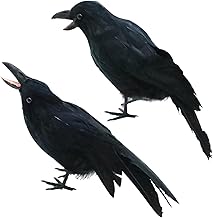
2Pcs Halloween Decor Realistic Crow 9.5″ & 9.8″ Large Black Feathered St…
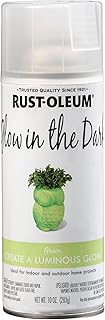
Rust-Oleum 342598 Glow in The Dark Spray Paint, 10 oz
Anker Soundcore 2 Portable Bluetooth Speaker with Stereo Sound, Bluetoot…
You Might Also Like
19. Chilling Chains

You want a spooky look for Halloween. Chains on fences or the porch can press the scare button fast. Use metal chains from a hardware store, or foam painted to look old. Drape them over doors, windows, or along the ground to build a haunted scene. The rattling sound helps, especially on windy nights.
Set them up so they stay put. Anchor at solid spots with screws or zip ties. If you use foam chains, add a few zip ties to keep shape. Test the setup on a windy night to see how it behaves and adjust.
Placement ideas. Hang chains across a railing, loop them around a porch post, or lay a line along the path to a door. Let a few links brush the ground to catch the eye. A chain that moves when someone passes adds fright. Let a few chains clink softly as people pass.
Tips:
– Secure chains so they won’t blow away.
– Use weather-safe hardware and keep edges safe.
– Put chains where pets or kids won’t trip.
Unique Insight: Chains aren’t just for Halloween. They work well for pirate or medieval themes too, and you can leave them up for other events with different lighting.
19. Chilling Chains
Editor’s Choice

2 Pack Halloween Chains,Plastic Chains Props Decoration,6 Feet Halloween…
2 Pack Halloween Chains,Plastic Chains Props Decoration,6 Feet Halloween…

PA66 Green Zip Ties, 200pcs 12+10+8+4 Inch with 22-55lb Strength, Premiu…
20. Haunted Pathway

You want a haunted pathway that draws guests toward your door with a spine-tingling welcome.
Start with lighting that sets mood before anyone reaches your steps.
Use solar path lights or lanterns and wrap them in fake cobwebs for an eerie glow that lasts all night.
Place a few tombstones or creepy figures along the sides to heighten suspense as guests approach, never block the path.
Add ghostly footprints that guide the way and spark curiosity.
Choose light colors that stand out in the dark to help visitors see the path clearly.
Keep cords hidden and use weatherproof decorations so the setup lasts through the night.
Position stakes and mounts so props stay secure even in wind or rain.
Test the setup at dusk and then again after the sun fully sets to check visibility and flow.
You can adapt this path for other holidays by swapping in themed pieces like pumpkins in October or lanterns and cloth ghosts for winter celebrations.
Tips: Use colors that pop against the darkness for better visibility.
Unique Insight: This haunted pathway design can be adjusted easily to fit different holidays and themes.
Let a faint breeze carry the sound of rustling leaves for extra chills.
20. Haunted Pathway
Editor’s Choice

Solar Lights Outdoor,12 Pack Waterproof Auto On/Off Solar Pathway Lights…

1000 sqft Spider Webs Halloween Decorations Bonus with 30 Fake Spiders, …

JOYIN 17” Halloween Decorations Outdoor Tombstones, 5 Pack Halloween Foa…
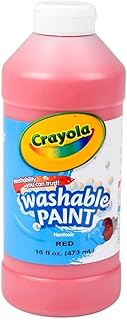
21. Gory Handprints
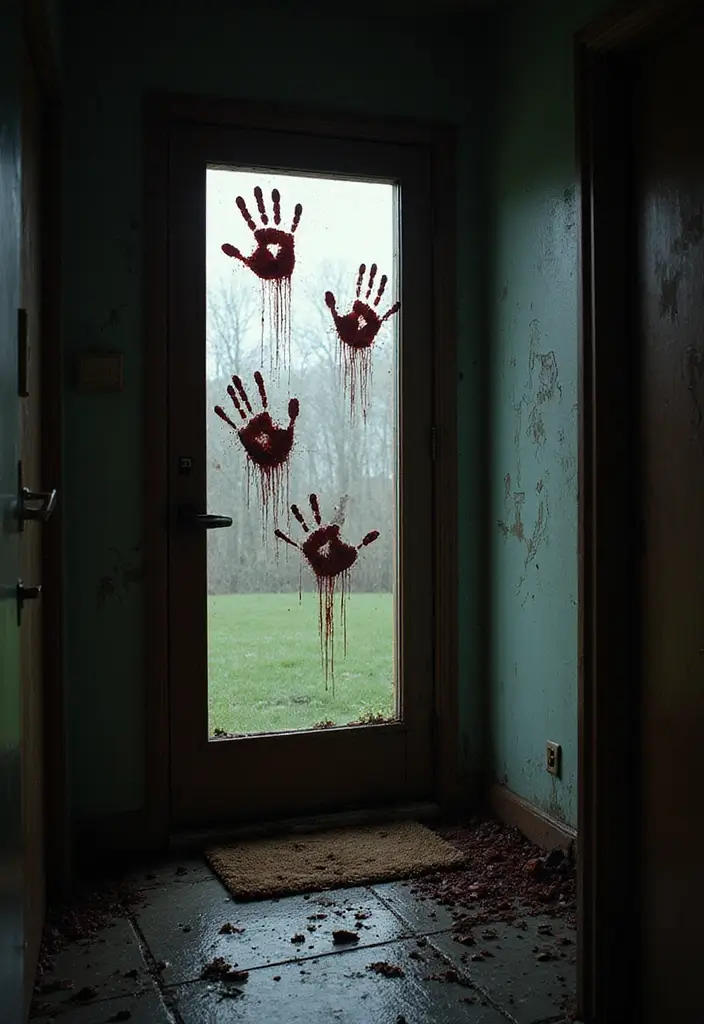
Want a quick fright at your front door? Gory handprints on windows or doors do the trick. Red paint or washable markers make prints that look like they just clawed inside.
This simple look fits any entry and invites curiosity as guests arrive. You can do it with family and add your own story to it.
What you need:
– red washable paint or kid-friendly markers
– a small sponge or rag
– paper towels and a water spray bottle
– rubber gloves (optional)
– a few extra prints for a cluster effect
How to do it:
1) Pick a pane or door and plan where prints will appear.
2) Test a tiny patch to be sure it rinses away easily.
3) Press a painted hand on the glass, then pull your fingers slightly for claw marks.
4) Add a handful of prints in a cluster, maybe two or three hands from different people.
5) Let it dry. If it’s windy or rainy, you can reapply.
Make it more fun with a backstory. Add a note near the prints that tells guests who left them and why.
Tips:
– A light red glow behind the scene makes the prints pop at night.
– For cleanup, soap and water lift paint from glass.
– This trick works with any window size.
21. Gory Handprints
Editor’s Choice

Crayola Ultra Clean Washable Markers for School (40ct), Essential Back t…
22. Ghostly Table Setting
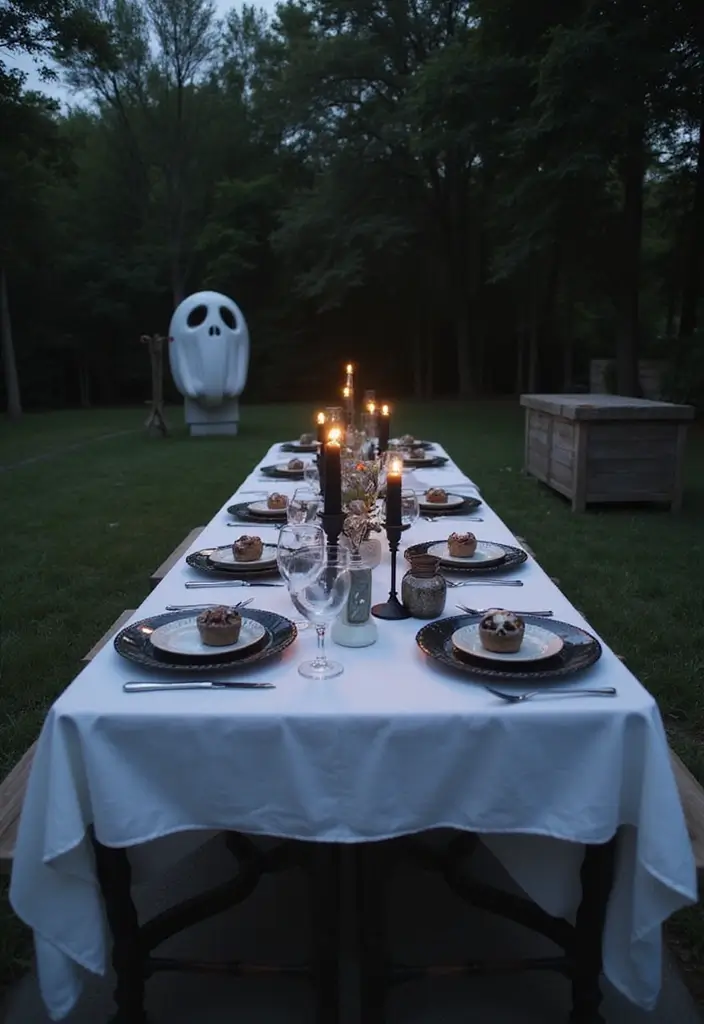
You want a table that feels haunted without a lot of fuss. Here’s a simple, effective ghostly setup you can do outdoors.
– Base layer: Drape a white tablecloth so it falls softly. Add a sheer runner to create a misty line down the center. Light colors pick up the yard shadows in a good way.
– Dinnerware and accents: Use skull-shaped plates if you have them, or stick with white dishes for a pale, eerie look. Place black candles at intervals to create striking contrast. Use LED candles for safety and a steady glow.
– Ghost centerpieces: Inflate white balloons and knot them to clear thread so they seem to float just above the table. Add bundles of white fabric around lanterns to imitate drifting spirits.
– Lighting and mood: Add a few warm LED candles and string lights along the table edge. The goal is soft moonlight vibes, not glare.
– Practical setup: Check wind direction and secure cloths with clips or weights. Keep cords away from seating and serving areas.
Tips: LED candles keep things safe and spooky at the same time.
Unique Insight: This look works for Halloween dinners or casual gatherings with friends and family.
22. Ghostly Table Setting
Editor’s Choice

Vinkor Flameless Candles Battery Operated Candles Real Wax Pillar LED Ca…

sancua 2 Pack White Tablecloth 60 x 102 Inch, Rectangle 6 Feet Table Clo…

40Pcs Skull Party Supplies 20 Plates + 20 Napkin Halloween Birthday Part…
23. Frightening Fencing
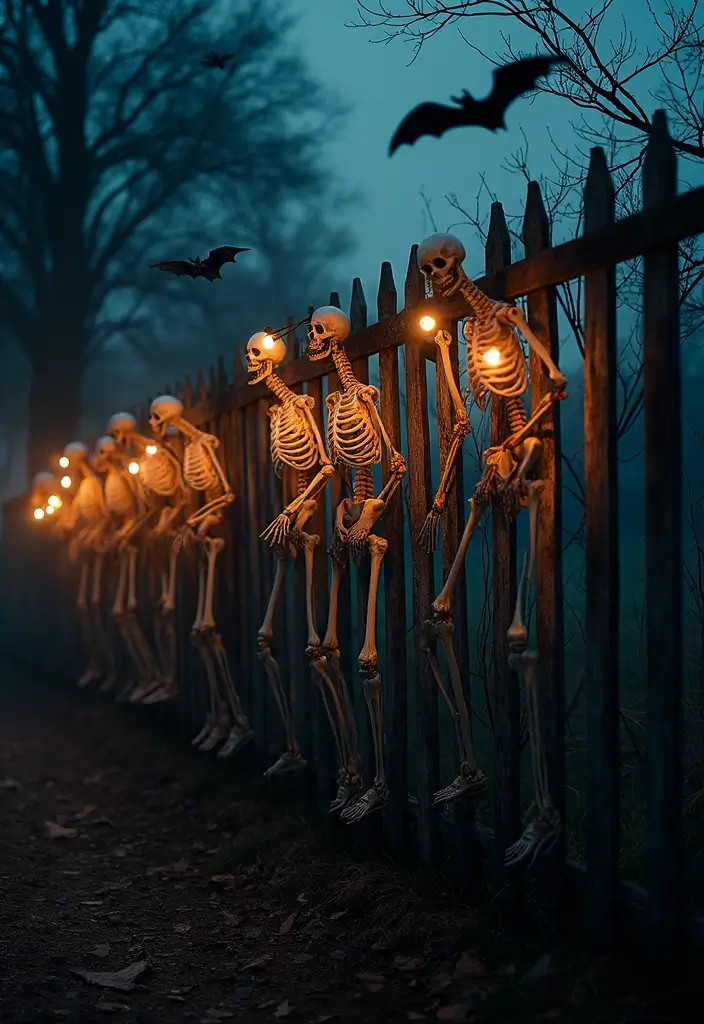
Your fence is a blank canvas. You want it to scare and wow. Plan a layered setup with different heights to make it feel alive. Hang a skeleton at the top, add a few bats mid-height, and drape faux chains near the ground. Your fence becomes a moving line of fright, not just a divider.
Choose materials that stand up outside. Lightweight plastic figures work best. Secure them with zip ties or strong fishing line, and keep spare hooks handy. If you prefer a quick takeover, use exterior-safe adhesive tabs that come off without damage.
Lights turn your fence into a focal point after dark. Try LED string lights or solar lanterns. Place lights behind props to cast eerie shadows, or above to wash the fence in a cool glow. Keep the colors cool—blue or white—for a spooky mood, not glare.
Tips: Secure every decoration well to survive wind, rain, and yard gusts. Check fasteners weekly and replace any worn pieces. Use weather-resistant materials and tidy lines so your scene reads clearly from the sidewalk.
Unique Insight: A fence setup is versatile. Swap in autumn leaves, banners, or seasonal silhouettes to fit other holidays. It stays useful long after Halloween and grows with your yard’s mood.
23. Frightening Fencing
Editor’s Choice
36″ Halloween Skeleton Decorations,Human Bones for Halloween Party with …

JMEXSUSS 100 LED Connectable Globe String Lights Indoor Bedroom, 33ft Wa…

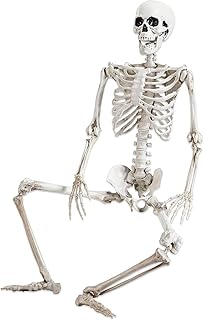
24. Scary Skeletons

You want outdoor Halloween decorations that grab attention. Skeletons are cheap, easy to find, and they deliver a punch of spook. Start by mapping a simple layout in your yard tonight.
– Put a life-sized skeleton at the edge to greet guests.
– Hang one from a tree to cast a big shadow on the grass.
– Create a tiny scene like a skeleton picnic on a blanket.
– Add a slow skeleton dance party by a flickering lantern.
Use string lights along fences to frame the figures. Spotlight a central skeleton to draw the eye at night. Solar or battery lights keep things bright without messy cords. Keep cords taped and out of walkways for safety. Tips: Test lights before nightfall and secure any loose wires.
Avoid heavy setups in high wind zones and secure loose parts. Use lightweight prop bones and weatherproof paint to resist rain. Check weather often and bring decorations inside during storms. Unique Insight: Dress skeletons in seasonal clothes to add humor and texture. Swap outfits for fall, winter, or sports themes to stay fresh.
With these ideas, your yard will glow and spark smiles all night. Start small and add more pieces as you love the look. Share photos online to show your scary skeleton setup.
24. Scary Skeletons
Editor’s Choice

Wocst 5.4Ft/165cm Halloween Skeleton Full Body Life Size Human Bones wit…
Brightown 12 Pack LED Fairy Lights Battery Operated String Lights – 7ft …

Magicfly Outdoor Acrylic Paint, Set of 30 Colors/Tubes (60 ml, 2 oz.) wi…
25. Frightening Fog Machine
You want your outdoor Halloween setup to feel eerie, not empty. A fog machine can wrap your yard in mist, making gravestones, ghosts, and lights look more mysterious. The fog adds depth and a subtle chill you can feel as you walk past.
Tips: Use water-based fog fluid for safety and easy cleanup. Place the unit near the base of your haunt so the mist hugs the ground and crawls around props. Have a timer or remote ready so you control when the fog starts.
1. Place the fog machine low, near the base of your haunt, so the mist hugs the ground and crawls around props.
2. Aim the nozzle toward areas you want to highlight, like a tomb or a fence, and test the distance.
3. Check the forecast and test wind direction before guests arrive. A breeze can push fog away or pile it up in one corner.
4. Pair fog with lighting. Cool blues, purples, or amber shadows make the mist look alive and frame your scenes.
5. Use a timer or remote so the fog rolls in at the perfect moment during your show or as people approach.
Unique Insight: Fog machines aren’t just for Halloween. You can reuse the setup for other seasonal scenes, from spring chills to winter mood, keeping the mood alive all year.
25. Frightening Fog Machine
Editor’s Choice

AGPTEK Fog Machine, Smoke Machine with 13 Colorful LED Lights Effect, Au…
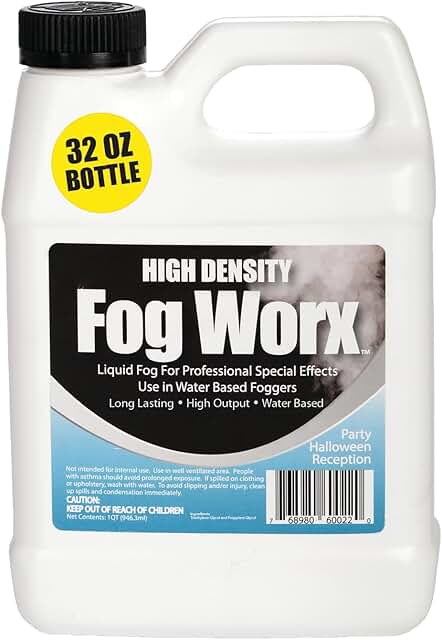
FogWorx Extreme High Density Fog Juice – Quart – 32 Fluid Ounces of Long…

BN-LINK Wireless Remote Control Electrical Outlet Switch for Lights, Fan…
Conclusion

This Halloween, let your creativity shine with these DIY outdoor decorations that promise to terrify and delight all who pass by.
Whether you go for cutesy or creepy, the key is to have fun and get crafty! Take inspiration from the ideas here to personalize your scare tactics and make your outdoor space the talk of the neighborhood. Happy haunting!
Note: We aim to provide accurate product links, but some may occasionally expire or become unavailable. If this happens, please search directly on Amazon for the product or a suitable alternative.
This post contains Amazon affiliate links, meaning I may earn a small commission if you purchase through my links, at no extra cost to you.
Frequently Asked Questions
What are some easy DIY outdoor Halloween decorations that can scare my neighbors?
If you’re looking to terrify your neighbors without spending a fortune, consider decorations like Creepy Ghost Lanterns or Sinister Silhouettes. Both are simple to create using common materials, and they can create an eerie atmosphere without requiring a lot of time or effort.
For instance, you can use white balloons and LED lights for ghost lanterns, or black cardboard cutouts for striking silhouettes that cast spooky shadows as night falls.
How can I create a haunted graveyard scene in my yard?
Creating a graveyard scene is easier than you think! Start by crafting tombstones from foam sheets or wood, and make them look weathered by painting them gray or adding faux moss. You can also incorporate props like Graveyard Ghouls or even a few fake skeletons scattered around for added fright. Stack hay bales for height and place carved pumpkins for a chilling yet friendly look that kids will love too!
What are some budget-friendly ideas for outdoor Halloween decor?
Absolutely! You can create a spooky vibe without breaking the bank by using items you already have at home. For example, Haunted Hay Bales can be stacked and decorated with pumpkins, while Spooky Spider Webs can be made with inexpensive black yarn or store-bought webbing. Additionally, Eerie Eyes in the Bushes can be made using glow-in-the-dark paint on rocks or plastic eyes for a fun and frightful touch.
What DIY projects will give my outdoor Halloween setup an animated touch?
To add some animation to your Halloween decorations, consider creating an Animated Zombie Lawn using props that shake or move. You can easily make this with PVC piping and some fabric to simulate a zombie trying to crawl out of the ground. Another fun project is the Cauldron of Bubbles, where you can create bubbling effects using a simple bubble machine or dry ice for a magical yet eerie look!
How do I ensure my Halloween decorations are kid-friendly but still spooky?
It’s definitely possible to strike a balance between spooky and kid-friendly! Focus on decorations like Haunted Hay Bales or Ghostly Table Settings that evoke a Halloween spirit without being too frightening. Use friendly ghost figures and colorful pumpkins instead of gory props. You can also create fun displays, like a Chilling Candy Dispenser, to engage kids while still keeping the spooky atmosphere intact!
Related Topics
DIY outdoor decor
scary decorations
Halloween crafts
budget friendly
easy projects
creepy decor
outdoor Halloween
family friendly
Halloween ideas
spooky decorations
quick setups
seasonal decor


")

These DIY decorations are amazing! I can just picture my neighbors’ faces when they see my ghostly creations. Have you tried any of these ideas yourself?
I love the idea of using old sheets for spooky ghosts! Just make sure the wind doesn’t turn them into a flying kite—trust me, it happened to me once, and it was hilarious!
Did you know that pumpkins are actually a fruit? I never thought about it until I started carving them! These ideas are so creative, I can’t wait to try them.