

I put this together because a bright, welcoming kitchen can lift your whole home, but a full remodel can feel out of reach. This post shows you that a refreshed look is possible with small, smart upgrades. If you crave a kitchen that feels new without blowing your budget, you’re in the right place.
This post is for homeowners and renters who want style without stress. If you care about durability, easy updates, and a space that fits real life, this is for you. You’ll see ideas that are practical, affordable, and doable on weekends or weeknights.
Inside you will find 20 budget friendly kitchen remodel ideas you can use now. From paint and lighting to hardware and clever storage tricks, these ideas are designed to be affordable and simple. Each one comes with clear steps you can follow and a quick cost idea so you can plan with confidence.
Number five is a real surprise. It costs little but changes the mood of a room in minutes, and it doesn’t require fancy tools. You may see a bold note, a soft update, or a small swap that makes the whole kitchen feel new.
Here is how to use the guide. Pick a budget range and two or three ideas that fit your space. Test paint swatches on a wall, compare cabinet hardware, and map out a weekend plan. Look for sales, consider second hand pieces, and keep a simple list of what you need.
Ready to start? Save this post, share it with a friend, or comment which idea you want to try first. Read the full list to pick ideas that match your kitchen shape and your daily routine. Let’s make a small, smart update that shines.
Contents
- 1. Paint Your Cabinets
- 2. Install Open Shelving
- 3. Update Fixtures
- 4. Revamp Your Backsplash
- 5. Transform Your Countertops
- 6. Add a Kitchen Island
- 7. Incorporate Smart Storage Solutions
- 8. Use Wallpaper or Wall Decals
- 9. Upgrade Your Lighting
- 10. Create a Breakfast Nook
- 11. Use Area Rugs
- 12. Go for Eco-Friendly Options
- 13. Use Colorful Dishware
- 14. Stylish Wall Art
- 15. Refresh with Plants
- 16. Create a Coffee Corner
- 17. Install a New Sink
- 18. Repurpose Old Furniture
- 19. Consider DIY Art Projects
- 20. Make a Statement with a Feature Wall
1. Paint Your Cabinets

If your kitchen looks tired and your budget is tight, painting the cabinets is a smart fix. It changes the whole room without tearing things apart. A clean, fresh look can lift your mood every day.
Here is why it works. It costs far less than new cabinets. It takes a weekend or two, not months. You decide the color and the finish. A solid paint job can last for years with good prep.
Next, choose colors that fit your space.
– Light colors brighten a dark kitchen. Soft whites, eggshells, and pale pastels bounce light around the room.
– Deep tones add drama. Navy, forest green, and charcoal make the room feel bold and chic.
If you want balance, pair cabinet color with warm or cool accents. Match the tile, countertop, and hardware to your chosen palette.
Finish choices. The finish affects how the space looks and how easy it is to clean. A semi-gloss gives a tiny shine and fights fingerprints. A satin finish hides small marks but stays smooth. For a modern, matte look, chalk paint is a popular budget option. It’s light on the wallet if you skip an expensive sealer.
Prep and process. A clean start saves you time and trouble. Remove doors and drawers, then label each piece so it rehangs the same way. Lightly sand surfaces to help paint grip. Wipe away dust with a damp cloth. Use a stain-blocking primer on wood with a lot of stain or old varnish. Apply two even coats of paint, letting each coat dry completely before the next one.
Next steps: take your time and stay organized.
Tools and materials you will need:
– Soap and warm water or a gentle cleaner
– Sandpaper or a sanding block
– Painter’s tape and drop cloths
– A roller kit and angled brushes
– Primer and cabinet paint
– Screwdriver and a small tray for brushes
Tips you can use:
– Tip: Chalk paint delivers a modern look at a lower cost if you already own brushes.
– Insight: A matte finish hides marks better in a busy kitchen.
– Trick: Remove doors and drawers first for clean edges and easier painting.
Common mistakes to avoid:
– Skipping cleaning and sanding before painting.
– Applying paint too thick in one coat.
– Forgetting to prime on stained or slick wood.
– Leaving hardware on while painting; it can cause smudges.
Maintenance and final touches:
– Wipe spills quickly to prevent staining.
– If edges wear, touch up with a small brush to keep the surface even.
– Consider new knobs or pulls to finish the refreshed look.
With careful prep and steady hands, you can revitalize your kitchen on a tight budget. The payoff is quick, and the space feels brighter and more you.
1. Paint Your Cabinets
Editor’s Choice

FolkArt Home Décor Chalk Finish Acrylic Paint, 8oz, 8 ounce, Milk Jug


Bates – Paint Tray Set, Paint Rollers, Paint Brushes for Wall, Tray, Rol…
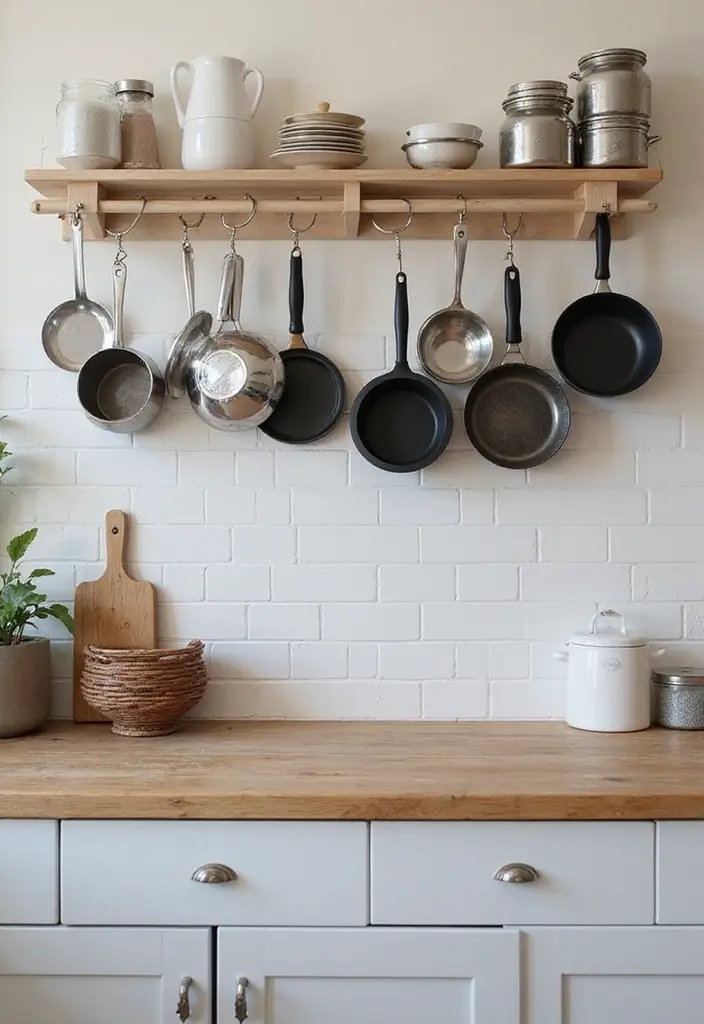
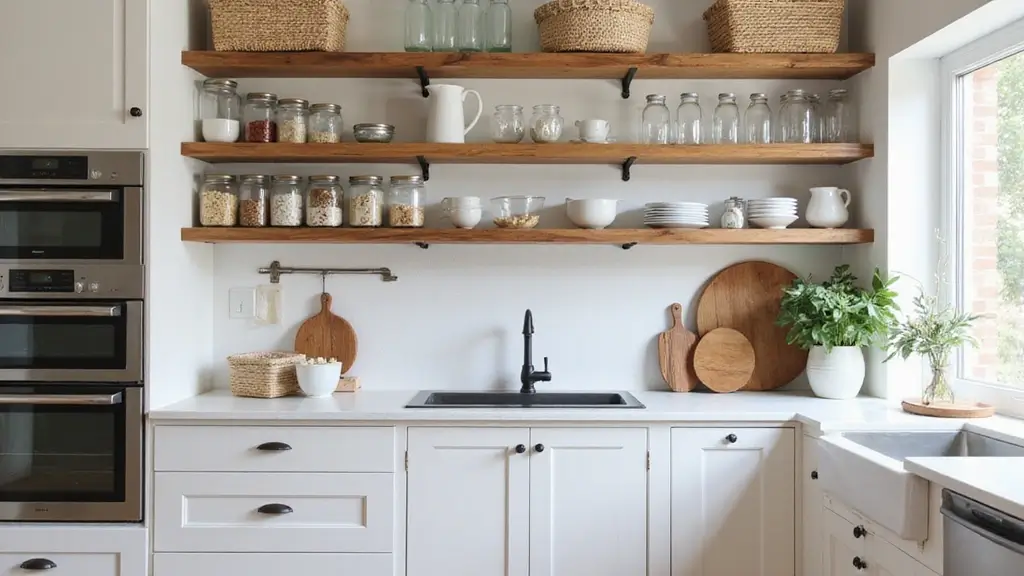
2. Install Open Shelving
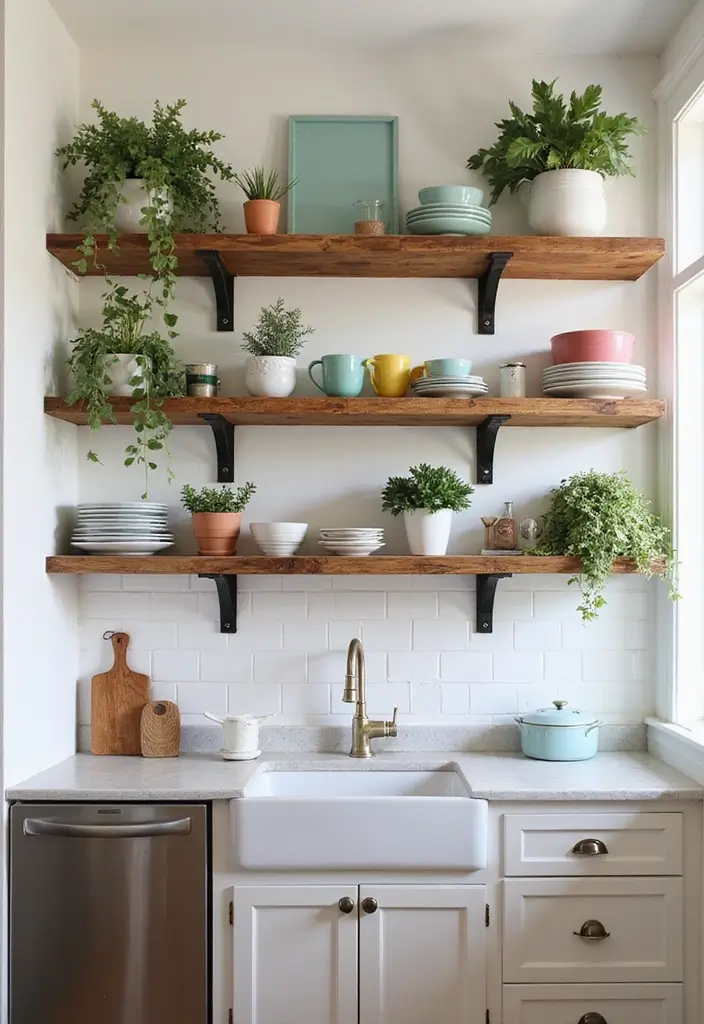
2. Open Shelving on a Budget
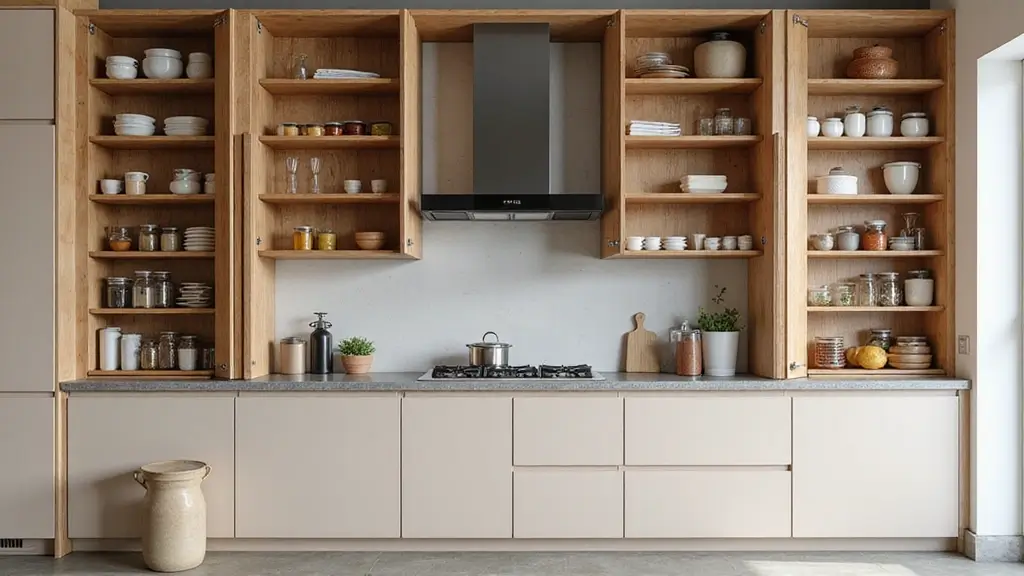
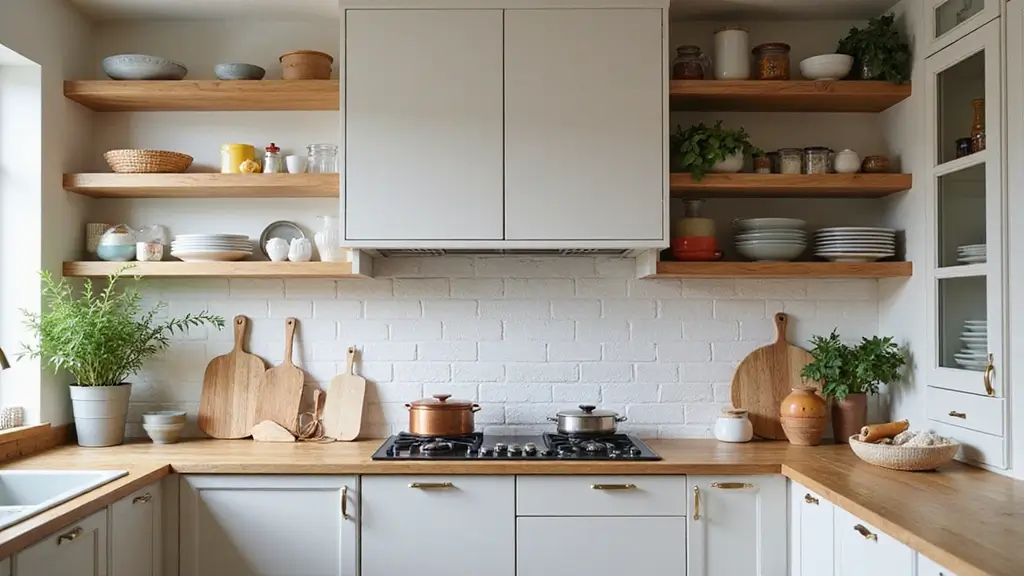
Open shelves can cut costs and brighten your kitchen. They free up wall space and make the room feel bigger. You’ll see what you use daily at a glance. It’s easy to change the look by swapping items.
Here is why this idea fits a budget remodel. Start small to test the vibe before you commit a lot of wall space.
– Materials that fit your budget Pick simple boards like pine or standard plywood. If you want warmth, a clear stain helps. Reclaimed wood adds character and saves money, but seal it so moisture won’t hurt it.
– Placement and mounting Plan how many shelves you need and where they should go. Find wall studs and use sturdy brackets. A single long shelf can work, but two or three shorter shelves balance the space and make loading easier.
– Depth and height Aim for 8 to 12 inches deep. Leave 12 to 18 inches between shelves. That space fits plates, cups, and tall glassware without crowding.
– Display ideas that work Group items by color or use. Put often used pieces on the lower shelves. Mix white dishes with clear glass for sparkle. Add a small plant or a decorative piece to bring life to the display.
– Maintenance and safety Put heavy items on the lower shelves or on extra supports. Check screws after a week or two and tighten if needed. Wipe the shelves with a damp cloth to keep dust away.
– Finishing touches Use a protective seal on wood to resist moisture. Choose a simple finish so the shelves fit many styles. If you want a quick update, swap a few color accents rather than a full overhaul.
Next steps and quick checks: Measure your space carefully. Sketch a simple layout before you cut. Gather boards, brackets, screws, and a level. Start with one wall to see how it feels. If you rent or want to avoid wall damage, use removable brackets and lighter boards.
Open shelving gives you cost control and a fresh, airy vibe. It helps your kitchen feel bigger and more inviting while keeping essentials within reach.
2. Install Open Shelving
Editor’s Choice

Edge-glued Board by Walnut Hollow, Pine, 12″ x 16″ x 3/4″, (Pack of 1), …

4-Pack 12 Inch Heavy Duty Shelf Brackets, Large Wall Bracket for Garage …

SEAL-ONCE MARINE – 1 Gallon Penetrating Wood Sealer, Waterproofer & Stai…
3. Update Fixtures
Update Fixtures
If your kitchen looks tired but you don’t want a full reno, updating fixtures is a smart move. A few small changes can wake up the space. You’ll notice brighter light, cleaner lines, and a more practical layout. And you can finish it in a weekend.
What to swap and why
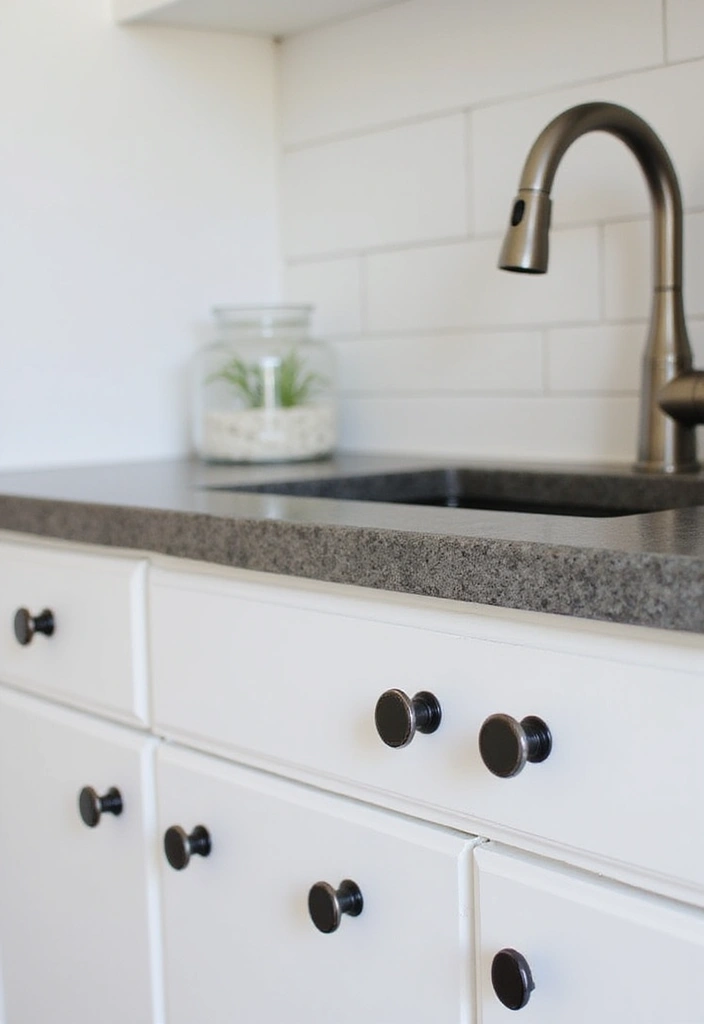
Start with cabinet knobs, drawer pulls, and the faucet. These parts show every time you reach to open a door or wash your hands. Fresh, simple pieces make the whole room feel newer.
– Mix it up Mismatched hardware adds a playful, eclectic vibe.
– Shop smart Look for vintage finds at flea markets or thrift stores for real character.
– Choose a finish Matte black or brass finishes bring a hint of luxury to basic cabinets.
– Keep the flow Pick finishes that echo your faucet or lighting for a smooth, unified look.
How to pick finishes that live well together
Two or three tones work best. Too many metals can feel busy. If your appliances are stainless, go with matte black, brass, or bronze for hardware. If your wood is warm, brass or oil-rubbed bronze can feel right at home. This helps the eye move through the space instead of fighting with it.
Practical steps to do the upgrade
– Measure first Check the hole spacing on your doors and drawers so you buy the right size knobs and pulls.
– Choose and pair Pick two finishes that match your style and keep the same shape family for a unified look.
– Prep the area Turn off the water if you are swapping the faucet. Lay cloth to catch screws and small parts.
– Install with care Take your time lining up screws and rows. Tighten evenly and wipe away fingerprints.
– Test and enjoy Open and close many times to ensure smooth operation and a clean finish.
Budget-friendly notes
Hardware updates usually cost far less than a full remodel. If you add a new faucet, plan for a little extra time for plumbing basics. Small upgrades can lift the mood of your kitchen without a big price tag.
Next steps
Grab a tape measure, pick two finishes you love, and hunt for a few pieces this weekend. You’ll be surprised how fast your kitchen feels new.
3. Update Fixtures
Editor’s Choice
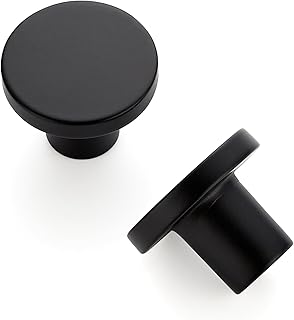
Ravinte 10 Pack Cabinet Knobs Black Kitchen Cabinet Knobs Round Dresser …

Havin Gold Kitchen Faucet with Pull Down Sprayer, High Arc Stainless Ste…

Zorfeter 6Pcs Antique Brass Ring Pulls Vintage Cabinet Small Ring Pulls …
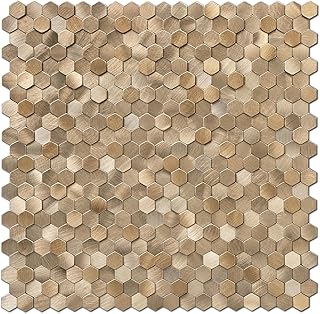
4. Revamp Your Backsplash
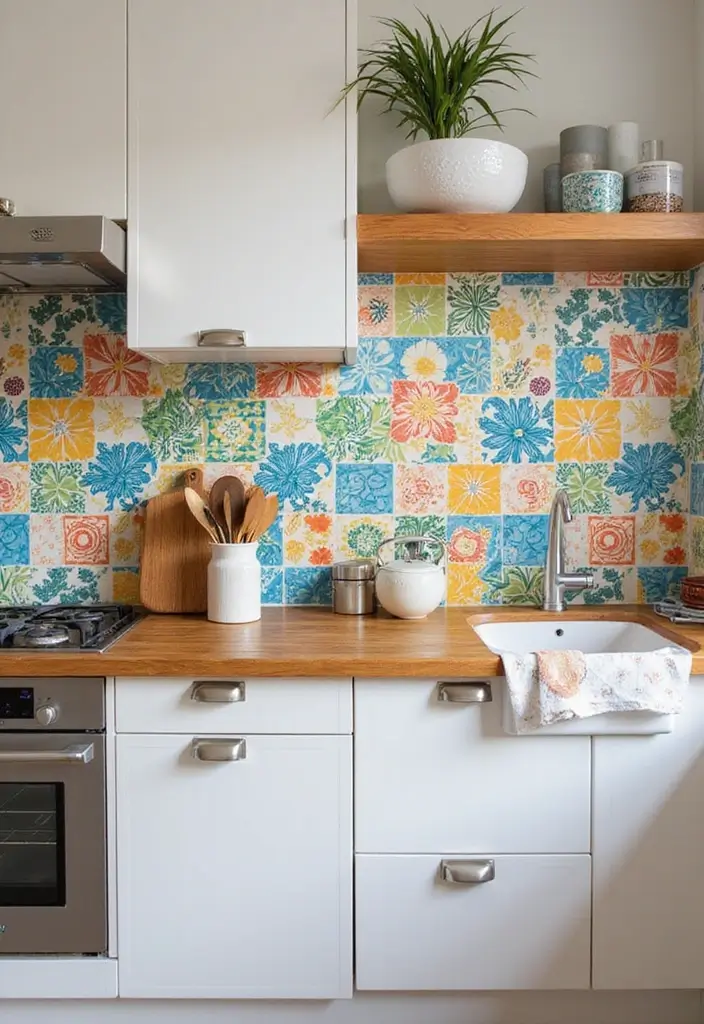
You want a kitchen splash that shines without draining your pockets. You can get a bold look with smart, affordable choices. Here is how to revamp your backsplash on a budget and still love the result.
– Option 1: Peel-and-stick tiles
Peel-and-stick tiles are easy to install. They come in many colors and patterns. Measure the area first, then cut with scissors where needed. Clean the wall smooth and dry before you start. Press the tile firmly for a strong hold. You’ll see instant color and texture right where you cook. This is a quick upgrade that fits tight schedules and tight budgets. Think copper tones, deep blues, or bright whites to brighten the room. The finish can mimic real tile without the cost. If you ever want a refresh, it’s simple to peel off and swap.
– Option 2: Metallic or colorful accents
Metallic or bold colors make your kitchen pop. Look for metal-look sheets or foil tiles you can attach with the same peel-and-stick method. The light will bounce off the surface and give the room a new feel. For small kitchens, a strip along the stove or around the island can define the space. If you choose color, pick a shade that ties into your cabinet or countertop. A little shimmer or a bright hue can create drama without a big price tag.
– Option 3: Subway tile on a budget
Subway tiles look clean and timeless. You can buy real ceramic tiles or use stick-on subway tiles for easier DIY. White, gray, or pale cream tiles reflect light and make the room feel larger. Lay them in a classic brick pattern for a simple look. Use a traditional grout color if you want a crisp finish. If you are short on time, go with a ready-made panel that snaps into place. Either way, you get the familiar, tidy backsplash that lasts.
– Option 4: Painted accent wall
A painted panel can feel like a true backsplash without tile costs. Tape off a border around the area you want to cover. Pick a color that complements your cabinets and countertop. For a fun twist, use chalkboard paint on a small section for notes or recipes. Or try a stucco or textured finish for depth. Paint is forgiving and easy to update later.
– Option 5: Mix, match, and texture
You can blend a few ideas. Pair a painted strip with a small tile accent to add depth. A glass mosaic insert near the sink can catch light and appear vibrant. Keep grout colors simple to avoid busy looks. This approach gives you a custom feel without a big budget.
Here is why these ideas work. They let you tailor the look to your space. They fit tight budgets and busy schedules. They are easy to update in the future if you want a new style.
Next steps:
– Measure the area and pick your favorite option.
– Gather tools and do a quick prep clean.
– Install the chosen backsplash and step back to admire your work.
4. Revamp Your Backsplash
Editor’s Choice

Art3d Smoothing Tool Kit for Applying Peel and Stick Wallpaper, Vinyl Ba…
STICKGOO Peel and Stick Backsplash Tiles, Stick on Mosaic Self Adhesive …

100 Pieces Peel and Stick Backsplash for Kitchen, 3″ x 6″ PVC Subway Til…
5. Transform Your Countertops

Is your kitchen begging for a fresh look, but your budget won’t bend? You can redo the counters without burning a hole in your wallet. The right surface can boost the room’s feel and stay easy on your cash. Here is how to get big impact with small spend.
– Laminate countertops
Laminate is a smart choice when you want color, pattern, and a smooth surface. It can imitate stone, marble, or wood without the high price. Look for thicker laminate and tight seams. Snap it on over your old top, or have a pro trim and edge it for a cleaner finish. The result? A clean, modern look that’s easy to wipe down.
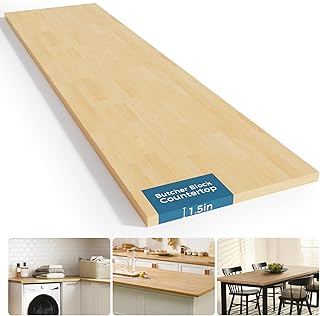
– Butcher block countertops
Wood brings warmth and a friendly touch to a kitchen. Pair butcher block with white cabinets for a classic vibe. You can buy blocks ready to install or use a butcher-block sheet over your existing top. Sand lightly, seal well, and oil or wax every few months to keep the wood from drying out. It warms the room and invites you to prepare meals with a smile.
– Epoxy coatings on current counters
Glossy epoxy coats can give you that stone or concrete feeling without replacing the top. It’s a fast upgrade that adds a durable, wipe-clean surface. Prep is key: clean, sand, and remove old finishes. Apply the epoxy in thin layers, add color chips if you like, then seal with a clear top coat. The shine is striking, and repairs are simpler if you nick a corner.
– Painted or faux stone finishes
You can transform a plain surface by painting with a tough, alkyd or enamel paint. Finish with a durable topcoat to resist heat and moisture. Painted countertops work best on laminate or wood with good prep. You can mimic stone, concrete, or a solid color that fits your cabinet tone. It’s a fast, friendly option for a bold change.
Here is why these ideas fit a tight budget: you choose the material that matches your needs, you do most of the work yourself, and you avoid costly removals. Each method lets you refresh the kitchen’s look without a full remodel.
Next steps to make this come true:
– Pick one option that matches your daily use and style.
– Measure your existing counters and decide if you’ll cover the top or replace a small section.
– Gather the right supplies with clear instructions.
– Do a small test patch first to see how the finish holds up.
With a little planning, your counters can shine. You’ll notice the room feels bigger, cleaner, and more inviting. Your family will notice, too, every time you cook or prep a quick snack.
5. Transform Your Countertops
Editor’s Choice

VEELIKE Grey Granite Kitchen Countertop Peel and Stick Waterproof Marble…

Bme Hevea Solid Wood Butcher Block Countertop, Unfinished Butcher Block …

Giani Marble Easy Epoxy Countertop Paint Kit (Carrara White)
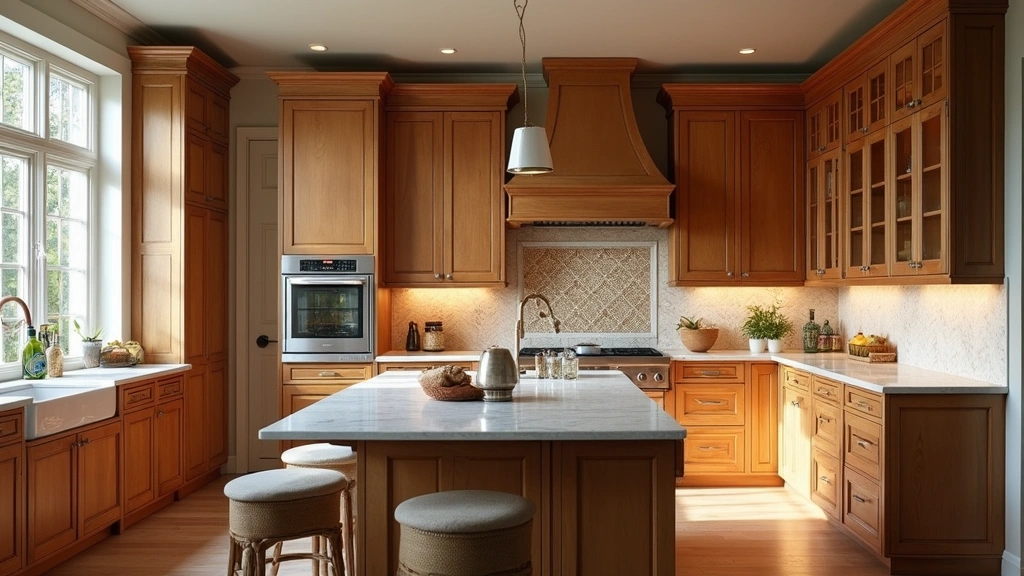
6. Add a Kitchen Island
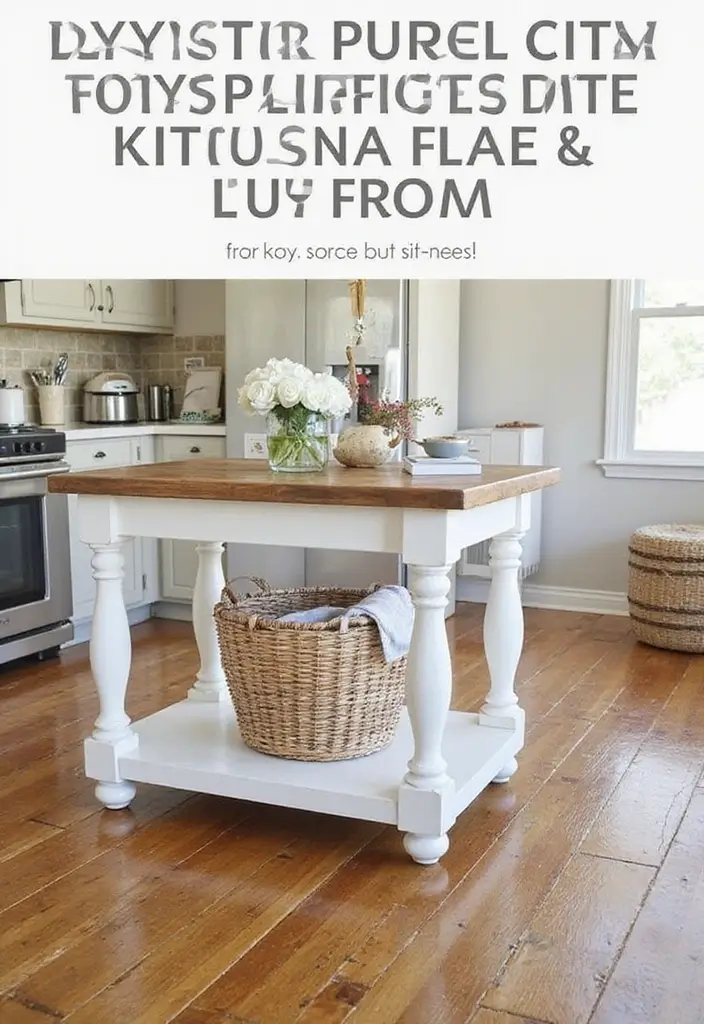
Are you trying to add more space in your kitchen without blowing your budget? A kitchen island can be the solution you want. It adds prep room, style, and a place to gather.
Here is why a DIY island works for real homes. You get extra counter space for chopping, mixing, and cooling. You also gain extra storage with shelves or drawers below the top. Best of all, you can tailor it to what you already own. No need to buy a store‑bought unit if your budget is tight.
Next steps to build a makeshift island that fits your space. Start with a solid base, like a sturdy table, a workbench, or a repurposed dresser. Make sure the legs are stable and the height is about 34 to 36 inches. A steady base keeps you safe when you work or lean in for a quick chop. Add a durable top that’s easy to clean. A butcher block or a sealed laminate works well. The top should overhang the base slightly for seating and easier prep.
– Mobility matters: use a scuffed cart or a small mobile island on wheels. You can move it for cleaning, parties, or to open up floor space when you cook alone.
– Storage on a budget: tuck in a few baskets, bins, or open shelves under the top. It keeps odds and ends handy without clutter.
– Surface that lasts: choose a finish that resists water and stains. A simple seal or clear coat keeps the wood or laminate looking fresh.
Here is a simple style plan you can follow. Pick a look that matches your kitchen to keep the whole room feeling connected. A natural wood top with a light painted base reads calm and classic. A bold color on the base makes the island stand out as a focal point. If you want a more industrial vibe, go with metal accents and a dark finish. If you love a cozy vibe, try soft neutrals and warm wood tones.
Next steps to make it work in your day to day. Measure your space before you buy or borrow items. Decide if you need wheels, extra storage, or a seating edge. Gather a few tools and materials you already have. Take your time and test the height by standing at the island and reaching across it. Fine tune the setup so you have room to move and room to set down hot pans.
A personalized island boosts how your kitchen feels. It makes cooking easier and adds everyday charm to your space.
6. Add a Kitchen Island
Editor’s Choice
Solid Wood Butcher Block Countertop – Unfinished Birch Slab Counter Top …

Shintenchi Kitchen Island Cart with Storage,Rolling Kitchen Island Side …

6 Pack Wire Baskets for Pantry Organization and Storage, Kitchen Organiz…
7. Incorporate Smart Storage Solutions
If you feel your kitchen sits on top of clutter, you’re not alone. You want space that feels calm and items you can grab fast. Smart storage can deliver that without big changes or big costs. Here is a practical path you can take today.
– Let walls work for you. Use slim shelves or rails along empty wall spots. A high rail next to the stove holds pots and pans, while a small shelf above the fridge keeps rarely used tools in reach without crowding counters.
– Lines you can feel. Hooks and racks make lids, ladles, and oven mitts easy to grab. Install a row of hooks on the inside of a cabinet door or on a kitchen island. Items hang within arm reach and stay off the counter.
– Magnetic and metal helpers. A magnetic strip on the wall or the side of a cabinet holds knives and spice tins. It frees drawer space and keeps everyday items visible. If metal strips feel cold, add a warm wood trim to blend with your style.
– Inside the cabinet, smart organizers. Look for pull-out shelves, slim roll-out trays, and adjustable dividers. These keep cans, bottles, and snack bags organized. With one pull, you see what you need.
– Repurpose old furniture. A sturdy bookcase or a small buffet can become a pantry station. Use baskets for snacks and jars for grains. It adds character and extra storage without buying new furniture.
– Clear containers plus simple labels. Glass or clear plastic jars let you see contents at a glance. Keep pantry items together by category—grains, beans, snacks. Labels in chalk or tape make it easy to return items to place.
– Create zones for real use. Put cooking items near the range, prep gear beside the counter, and cleaning supplies under the sink or in a nearby cabinet. Zones cut down on trips and keep the flow natural.
Here is why these ideas work. They use the space you already have, not just more boxes and bins. They mix fast fixes with small upgrades, so you finish a project in a weekend.
Next steps
– Step 1: list what you use most and what slows you down.
– Step 2: pick two ideas that fit your space and budget.
– Step 3: install one new storage helper this week, then reassess.
– Step 4: label jars and zones to keep the system neat.
With a clear plan, your kitchen stays tidy, costs stay low, and you enjoy every step you take at the counter.
7. Incorporate Smart Storage Solutions
Editor’s Choice

SONGMICS Cabinet Organizer Shelf, Set of 2 Kitchen Counter Shelves, Kitc…
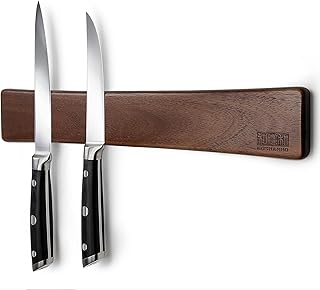
Magnetic Knife Strips, Magnetic Knife Holder for Wall 16 Inch, Acacia Wo…
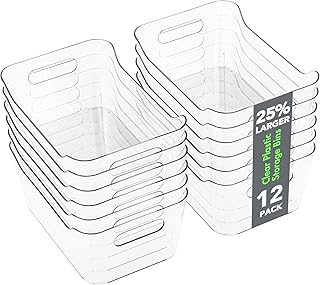
Tiawudi 12 Pack Plastic Storage Bins, Multi-Use Organizer Bins, Pantry O…
8. Use Wallpaper or Wall Decals

If you want a fresh kitchen without a big renovation, wallpaper or wall decals can be a real game changer. This is a quick, low-cost way to add your own voice to the room. Peel-and-stick options make it simple to try a look and change it later.
Here is why this approach fits a budget kitchen remodel. It costs much less than a full paint job or new finishes. It is flexible, so you can test patterns and colors without feeling stuck. Best of all, you can remove it when you want a new vibe.
– Feature wall idea: put wallpaper on just one wall to create a focal point. A bold geometric or soft floral can set the mood for the whole room.
– Decal twist: try wall decals on cabinets or even on a fridge or oven panel for a playful touch.
– Change with the seasons: removable options let you switch styles the moment you tire of the look.
Choosing the right pattern is easy if you keep a few rules in mind. If your kitchen is bright and open, go with light, airy patterns. For a cozier space, look at warmer tones and smaller repeats. Think about how easy the design is to clean. Washable vinyl is a smart pick for kitchens. Consider color schemes that tie to your countertops and hardware. If you want a calm feel, pick soft florals or subtle textures. If you crave energy, bold geometrics or high-contrast colors can wake up the room.
Here is how to install and care for your wall decor. First, make sure the surface is clean, smooth, and dry. Second, measure and plan the layout. Third, cut wallpaper or decals with room for trimming. Fourth, peel away backing and press from the center outward to push out air bubbles. Fifth, run a smoothing tool along edges and seams. Sixth, wipe away any excess adhesive with a damp cloth before it dries. Finally, avoid placing wallpaper in direct heat near the stove or in very humid corners.
What to watch for before you commit. Peeling works best on smooth, flat walls. If your walls have texture, you may need a skim coat first. In kitchens with high steam, choose vinyl, washable options so cleaning stays easy. Remember, removal should be easy if you pick the right product, but take your time to plan and measure. With a little care, your kitchen can feel new without breaking the bank.
Next steps: decide where you want the feature wall, pick a pattern, and give removable wallpaper a try. You might discover a look you love enough to keep long after the price tag is forgotten.
Transform your kitchen without breaking the bank! A pop of wallpaper or clever wall decals can breathe life into your space without the hefty price tag of a full remodel.
8. Use Wallpaper or Wall Decals
Editor’s Choice
Art3d Smoothing Tool Kit for Applying Peel and Stick Wallpaper, Vinyl Ba…

Green Plants Leaves Wall Decals Peel and Stick, Large Floral Flowers Wal…

ROMAN’s Wallpaper Smoothing Tool for Home Improvement, Wallpaper Smoothe…
You might also like
9. Upgrade Your Lighting

Your kitchen deserves better light. It makes hearts feel warmer and tasks feel easier. If you want a brighter cooking space without a big price tag, you are in the right spot. Here is why lighting matters: it helps you see when you chop, it sets the mood for meals, and it can make a small kitchen feel bigger. Let’s break it down into simple layers you can add this weekend.
– Three lighting layers. Plan for ambient, task, and accent light. Ambient fills the room with even brightness. Task lights focus on counters and islands. Accent lights add warmth and style.
– Ambient lighting options. Start with a ceiling fixture or recessed LED cans. Choose a clean, low profile look if you want a modern feel. Pick a color temperature around 2700 to 3000 Kelvin for a warm glow. This makes mornings calm and dinners cozy.
– Task lighting that helps you cook. Under-cabinet lights brighten the work surface. Add lights on the island or near the stove. Use LED strips or puck lights that sit close to the counter edge. Avoid glare by aiming lights downward.
– Accent lighting for style. Add a small wall sconce or a pendant that draws the eye. Highlight a glass cabinet, a brick wall, or a tile splash. A little glow behind the rim of a shelf can add depth.
– Fixtures that fit your style. Mix metal tones or choose a bold pendant for the island. For a retro vibe, use vintage style bulbs in a modern fixture. For a clean look, pick satin nickel or black finishes.
– Bulbs and controls. LED bulbs save energy and last long. Aim for 2700K to 3000K for warmth. Install a dimmer switch to adjust brightness for cooking and for cozy dinners. A smart bulb is handy but not required.
– Budget-friendly steps to start. Swap a couple of fixtures first. Add under-cabinet lights later if needed. Look for affordable LED kits that snap in place. Many options are plug-in and easy to install yourself.
– Practical tips for easy setup. Check your ceiling box and plan where wiring runs. Measure your island to choose pendant size. Leave room to upgrade later if you want more light.
– What to expect and limits. Good lighting changes the feel a lot, but it won’t fix a cramped layout or bad color choices. Pair lighting with cheerful wall colors and cabinets for best results.
Next steps. Sketch a simple plan on paper. Decide where each lighting layer will go. Buy a few key pieces to try first and test the look before adding more.
Good lighting can turn an ordinary kitchen into an extraordinary space! Layer your lights for a brighter, more inviting cooking haven—because every meal deserves a little magic!
9. Upgrade Your Lighting
Editor’s Choice

Gritin 10.2inch Under Cabinet Lighting Rechargeable -84 LED Super Bright…

Brightever 4Pack LED Flush Mount Ceiling Light Fixture, 12 Inch 24W, Sup…

Govee Smart Light Bulbs, Color Changing Light Bulb, Work with Alexa and …
10. Create a Breakfast Nook
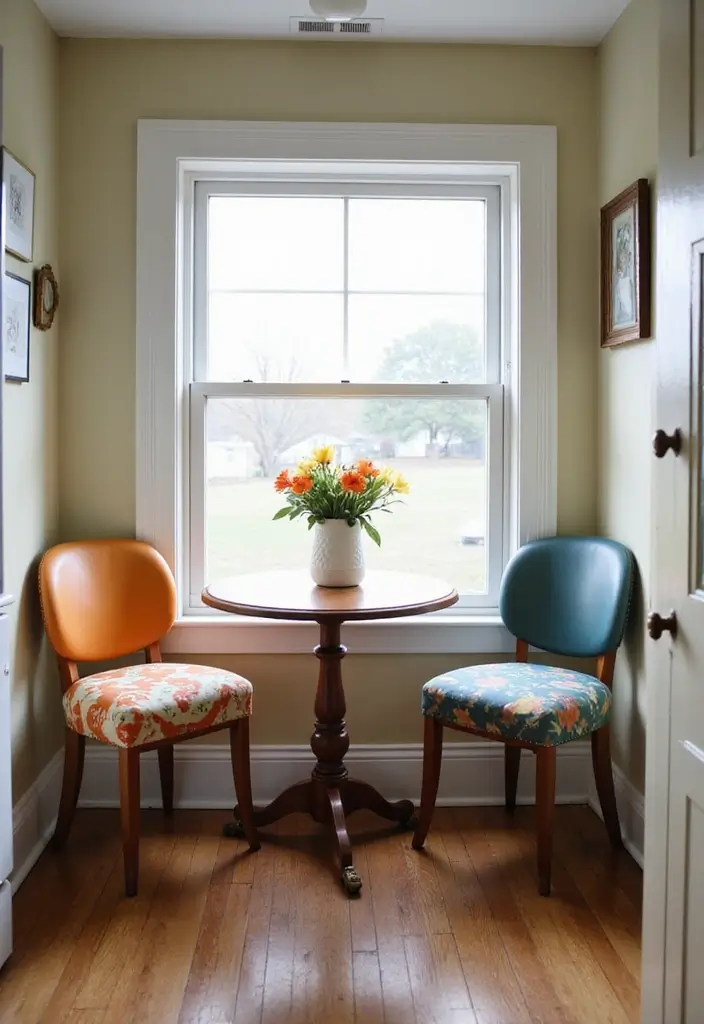
You want a cozy breakfast nook but fear your kitchen is too small. You can create a warm dining spot in a tight corner. It adds charm and makes mealtimes feel special without a major remodel.
Here is how to build a kitchen breakfast nook that works in a small space.
– Choose a compact table: Pick a round or square table about 24 to 30 inches wide. A small footprint keeps flow clear. If you can, use a pedestal base so legs don’t get in the way. A fold-down leaf or drop side helps when guests drop by.
– Two slim chairs or a bench: Two armless chairs fit under the table and feel light in a small room. A slim bench is even kinder to space and can slide under neatly. Look for low backs so you don’t crowd the room.
– Thrift for character: Check thrift shops or online marketplaces for stylish finds. A vintage wood table or painted chairs add personality. A quick refresh—sand, prime, and a fresh coat of paint—can make mismatched pieces look intentional.
– Pillows and color pops: Add cushions to boost comfort. Pick colors that echo your cabinets, rug, or tile. A bright pillow or two gives a friendly, welcoming vibe. A small rug under the nook softens the floor and anchors the setup.
– Personal touch: Hang a tiny piece of art or a chalkboard nearby. Write today’s specials, a family motto, or a playful note. It personalizes the space without big costs.
– Layer in the light: Choose warm light to invite people to sit. A small pendant or wall sconce keeps the area bright without glare. If wiring is tough, a plug-in pendant with a tidy cord works well.
– Smart storage: Add a narrow wall shelf for mugs or a couple of cookbooks. A small basket under the table can hold napkins, placemats, or kid-friendly toys. Hooks on the wall give you quick spots for bags or aprons.
– Plan and budget: Set a clear limit and shop with a list. You can assemble a great nook with thrift finds and simple upgrades. Expect a weekend to set it up, not a month.
This breakfast nook in your kitchen offers a warm hub for mornings and a cozy corner for chats. It makes daily meals feel special and invites the whole family to gather. It’s practical, affordable, and easy to customize as trends shift.
10. Create a Breakfast Nook
Editor’s Choice

Unovivy 31.5″ Small Round Dining Table for 2-4, Space Saving Circle Kitc…
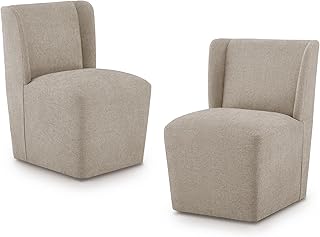
Upholstered Dining Chair with Casters Wingback Modern Side Armless Deskc…

Plug in Pendant Light, 15FT Hanging Lights with Plug in Cord, On/Off Swi…
11. Use Area Rugs
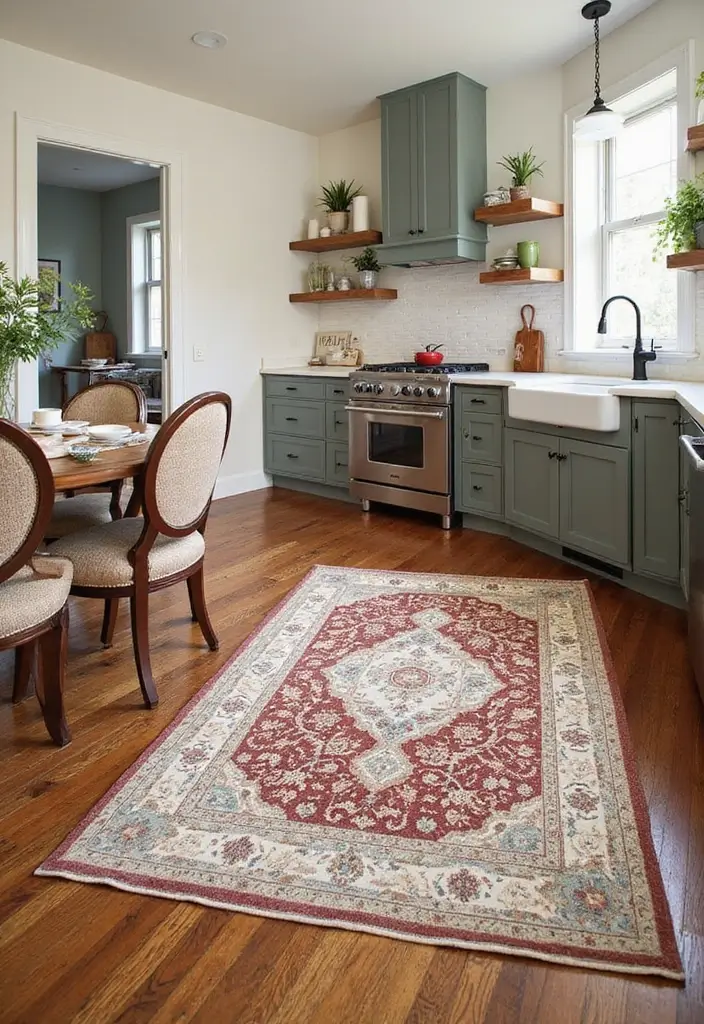
Here is why an area rug can transform your kitchen. It adds warmth and texture that make the space feel inviting. You’ll notice a softer step underfoot and a quieter room when you cook or dine.
Choose the right rug for busy kitchens
Pick a rug that is durable and easy to clean. Look for materials that handle spills and heavy foot traffic. Polypropylene, nylon, and cotton blends are good options. Flat weave and low pile rugs are easiest to dry and vacuum. A washable rug is a smart choice if you bake often or have kids.
Safety first with non-slip options
Next, check for a non-slip backing or add a rug pad. A pad keeps the rug from sliding and helps prevent slips. It also protects the floor from scratches. Keep the pad under the rug the moment you set it down. Simple safety steps keep you moving with confidence.
Where to place rugs in a kitchen
Place a rug in high-traffic zones like the sink area or in front of the fridge. A long runner works great along the kitchen’s main work aisle. Put a small mat by the stove or dishwasher for comfort when you’re standing. If you have a dining nook, a rug under the table can anchor the space.
Color, patterns and style tips
Use color to tie the room together. A bright rug can wake up neutral floors and cabinets. Textured or patterned rugs add character without loud décor changes. Stripes or simple geometric designs work in most kitchens. If your floor is busy, pick a rug with calmer tones. If your floor is plain, a bold rug can be the star.
Care and maintenance you can handle
Spot clean spills quickly with a mild soap and water. Vacuum regularly but avoid high heat or harsh brushes on delicate fibers. Lift the rug to shake out crumbs every now and then. Dry spills thoroughly to prevent mold.
Budget and security tips
Don’t overspend on a kitchen rug. Look for durable, washable options that fit your space. Check discount outlets or secondhand shops for good finds in clean condition. A well cared for rug lasts longer than it seems.
Things to watch out for
Rugs can trap crumbs and moisture if placed in the wrong spot. Don’t put a rug where water splashes are heavy or the rug won’t dry. In kitchens with lots of humidity, choose quick-drying fabrics.
Next steps
Measure your kitchen area before buying. Aim for a rug size that leaves a border around the edges. Read care labels to know cleaning steps. Add a thin, grippy rug pad for safety. With these tips, you can get a stylish, practical rug that fits your budget and taste.
11. Use Area Rugs
Editor’s Choice

2×6 Hallway Washable Runner Rug : Vintage Soft Kitchen Laundry Runner wi…

Rabenda 12 Pcs Rug Tape, Non Slip Rug Pads Grippers for Hardwood Floors …

nuLOOM Kerry Textured Geometric Tasseled Area Rug – 4×6 Area Rug Transit…
12. Go for Eco-Friendly Options

You want a kitchen that looks fresh and costs less to run. Eco friendly choices help the planet and can save you money over time. Here is why green picks fit a budget remodel.
Here is why you should consider eco options in your kitchen:
– Bamboo flooring is durable, warm, and easy to clean.
– Recycled glass tiles create bright backsplashes that turn waste into art.
– Low-VOC paints keep indoor air cleaner for you and your family.
– Reclaimed wood cabinets or shelves add character and save resources.
– Upcycling old furniture is stylish and cuts your costs.
– Local sources help cut transport and carbon.
Next steps: plan with a simple checklist and a small budget.
Here is a practical plan to start today:
– Decide which areas to upgrade first, like the floor or the backsplash.
– Pick one eco material for each area, for example bamboo for the floor and glass tile for the wall.
– Check products for low-VOC labels and safe finishes.
– Look for local shops, salvage yards, and good online listings for deals.
– If you can, refinish cabinets or stain old wood instead of buying new.
Here are tips you can use right away:
– Mix new eco products with upcycled pieces for a fresh look.
– Compare prices and read reviews before buying.
– Small changes add up, like switching to LED lights and a water saving faucet.
Common questions:
– Are eco options pricey? Not always. Basic bamboo and reused materials can keep costs down.
– Do I need a pro to install them? Some tasks, like painting, can be DIY. Bigger jobs, like flooring, may need a pro.
Next steps:
– Start with one small eco upgrade this weekend.
– Gather a few sample boards, paint swatches, and price quotes.
– Create a simple plan and a rough budget.
Choosing eco-friendly options shows your style and care for the planet.
12. Go for Eco-Friendly Options
Editor’s Choice
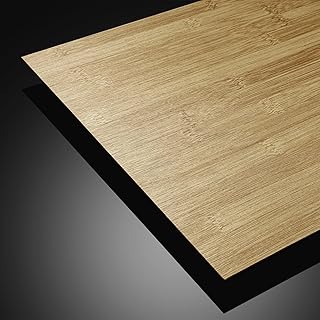
Stickyart Bamboo Flooring Tiles Peel and Stick Vinyl Flooring Tiles 12″x…
1 LB Mixed Shapes Glass Mosaic Tiles for Crafts Bulk, Colorful Opaque Re…

Rodda Paint CASCADIA ZERO Interior Satin Low VOC Paint & Primer in One, …
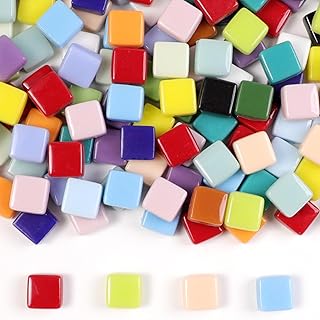
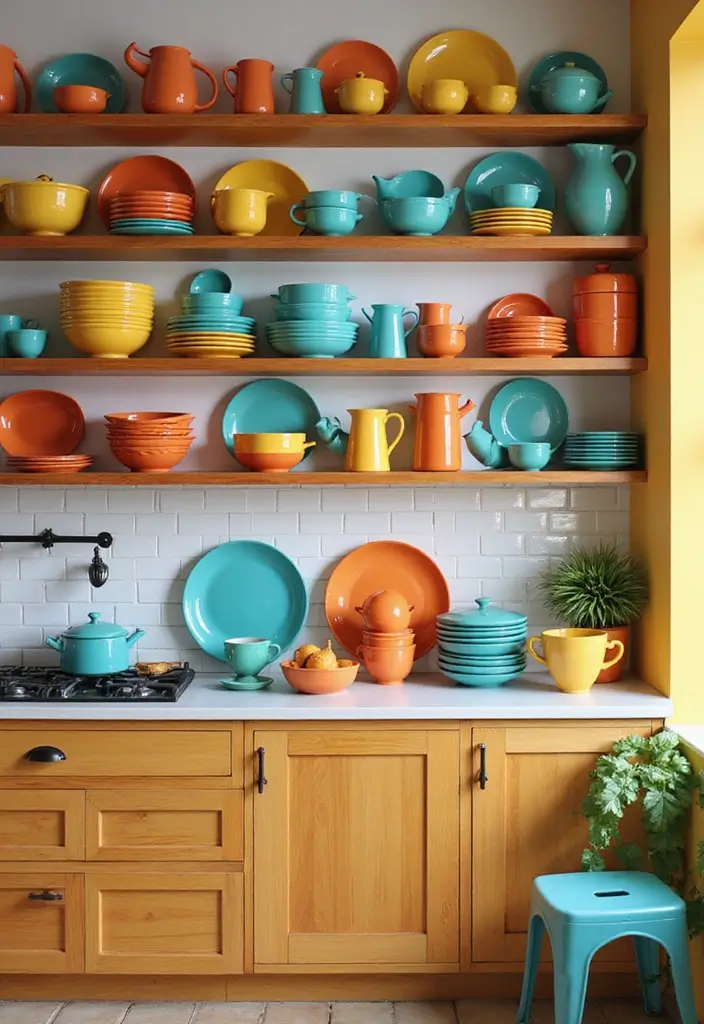
13. Use Colorful Dishware
If you want your kitchen to feel brighter without blowing your budget, color can do the heavy lifting. Colorful dishware is small, but it changes how you see the room. It adds life, light, and a friendly vibe every day.
Here is why color dishware works
– It wakes up plain walls and neutral cabinets without any repaint. A pop of color is all you need.
– It creates a focal point you can enjoy every time you cook or set the table.
– It reflects light. White or light plates mixed with bright bowls can make the space feel bigger.
– It’s easy to change later. Swap a few pieces to refresh the look for a new season.
Practical ways to use colored dishware
– Start with a color story. Pick two or three hues you love and stick to them across bowls, plates, and cups. This keeps the display cohesive.
– Show it off. Put open shelves or a glass-front cabinet where the dishes can be seen. Let the colors become art.
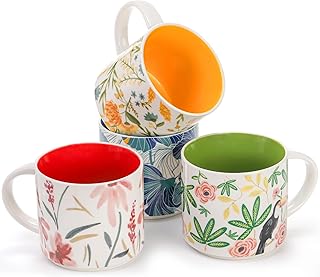
– Mix styles on purpose. Pair solid, modern pieces with a few vintage finds. A bright mug beside a white plate can look intentional, not cluttered.
– Choose durable materials. Look for stoneware or porcelain with a strong glaze. They hold color well and can handle daily use.
– Use thrift finds smartly. Vintage plates or bowls add character at low cost. Inspect for chips, cracks, or fading glaze before you buy.
– Keep it practical. While the display looks good, you still need enough everyday dishes. Reserve a small set for daily meals and keep the rest in a cupboard.
Simple display tips you can try this weekend
– Arrange by color blocks on one shelf. A row of red, then blue, then white gives a clean, vibrant look.
– Create rhythm with patterns. Alternate patterns with solid colors to avoid busy chaos.
– Add glassware nearby. Clear glasses or bowls catch light and echo the colors on your plates.
Common questions, simple answers
– Will it clash with wall color? No. Neutral walls let the dishware shine.
– Can I use it every day? Yes. Pick durable pieces and mix in everyday plates so you still have enough for meals.
– How many pieces do I need? Start with a core set of 4–6 bowls, 4–6 plates, and 4 mugs. Add a few standout pieces over time.
Next steps
– Take stock of what you already own. Pick two favorite colors.
– Visit thrift shops or discount stores this weekend. Look for sturdy glaze and interesting patterns.
– Set up a small display on one shelf. Move pieces around until it feels balanced.
With these easy moves, colorful dishware becomes your best ally in a budget-friendly kitchen refresh.
13. Use Colorful Dishware
Editor’s Choice

vancasso Bonita Dinnerware Sets 24 Pieces, Stoneware Dishes Set for 6, D…
Frcctre Set of 4 Ceramic Coffee Mug Set, Large 15 Ounce Ceramic Tea Cup …

YIHONG 6 Piece Plastic Mixing Bowls Set, Colorful Serving Bowl for Kitch…
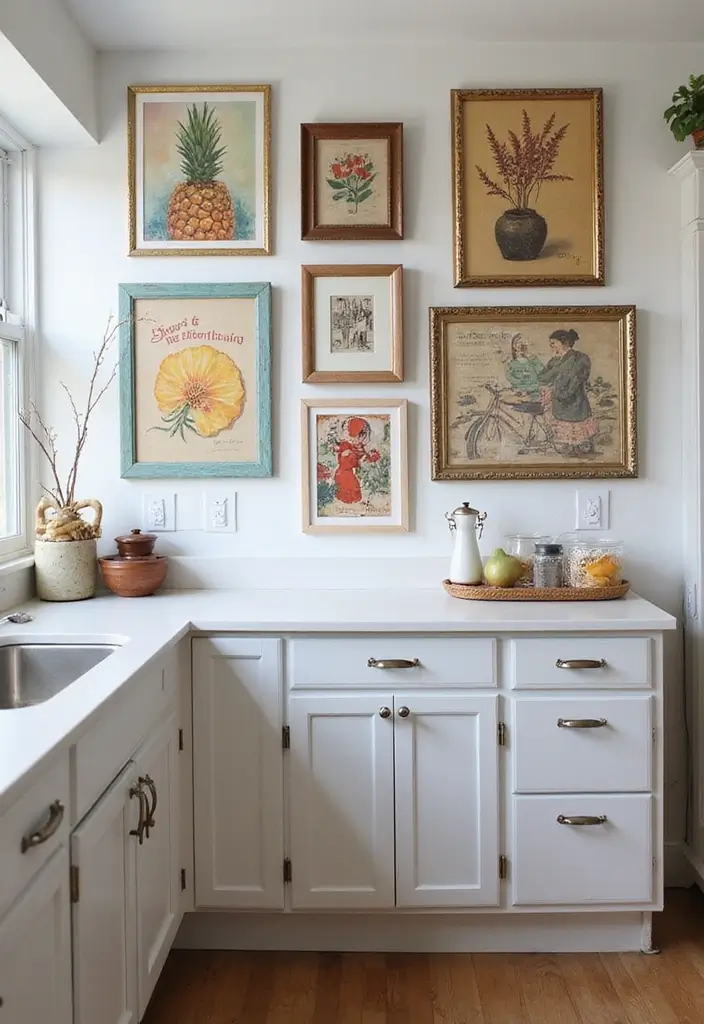
14. Stylish Wall Art
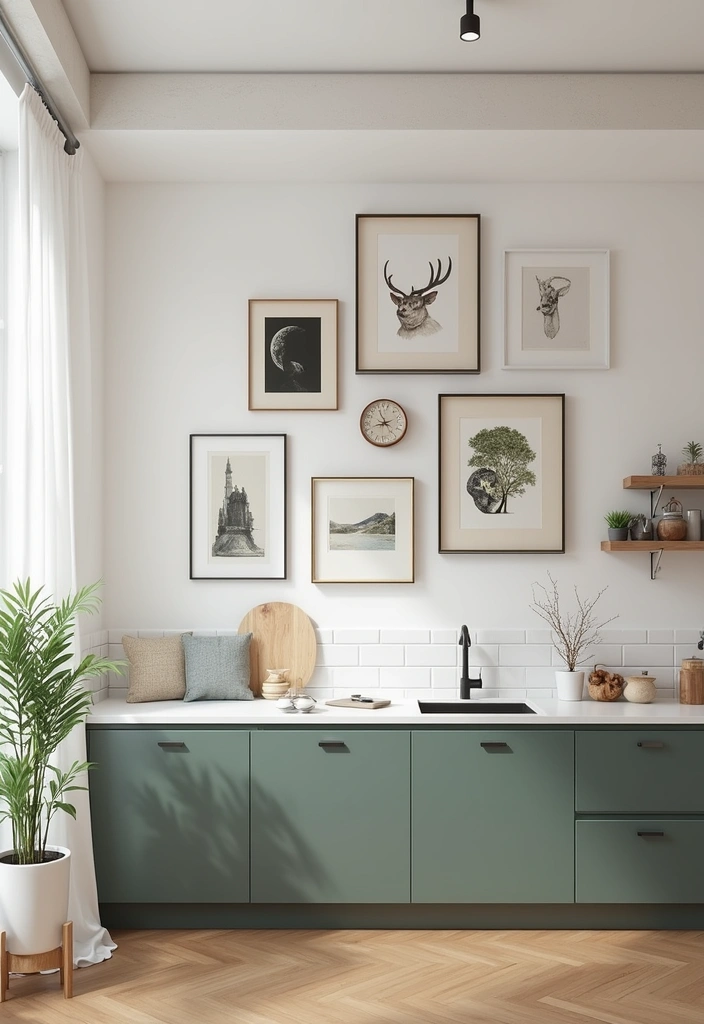
You want a kitchen that feels warm without draining your wallet. Wall art is an easy, low-cost move that changes the whole room. It adds color, life, and a story to your mornings. You can pick art that fits your meals, your routine, and your taste. Here is why it works: it reflects you and makes the space feel finished.
Here is a simple plan to get started.
Choose a clear theme. Pick a small, reachable idea like bright fruit prints, cozy cooking quotes, or vintage kitchen scenes. Let that one idea guide what colors you pick and where you place things. If your cabinets are light, a bold print can wake them up. If they’re dark, softer tones keep the room calm.
Mix pieces you love. Don’t feel you must buy all at once. Start with one large focal piece, then add 1–2 smaller items. A single framed print and a couple of lightweight decals can do a lot. Look for variety in materials too—canvas prints, metal signs, and wood frames mix well.
Look for affordable sources. Check local shops for small prints from artists nearby. Explore thrift stores for frames that can be updated with fresh mats. Try online galleries that offer limited-edition prints. If you’re on a tight budget, consider removable wall decals or chalkboard panels you can change with the season.
Here are practical display options.
– Gallery wall with frames: Build a mini art wall over a sideboard or near the dining space. Use frames of different sizes but in a shared color to keep it cohesive. This creates a focal point without crowding the space.
– Removable wall decals: They’re easy to rearrange and don’t damage walls. Swap them out as you update decor or colors.
– Kitchen-themed signs: Wooden or metal signs add texture and a quick personality boost. Pair a sign with a small print for balance.
– Custom pieces: A commissioned sketch or photo print can feel personal without breaking the bank. Put it in a simple frame and place it at eye level.
Next, plan your layout. Lay out the arrangement on the floor first. Keep generous spacing between pieces. Aim for a balanced look that doesn’t overpower the counter space. Use painter’s tape to mark where each piece will hang.
Hanging tips and care.
– Use proper hardware for the wall type and weight of frames. Heavier items may need wall anchors.
– Create a grid or salon-style layout for a tidy, professional look. A grid works well on long walls; a salon style adds whimsy to a narrow space.
– Protect your art from sun and splashes. UV-protective glass helps, and place pieces away from direct sunlight.
– Dust regularly with a soft cloth. Avoid harsh cleaners that could harm prints.
Common questions you might have.
– How many pieces should I start with? Start with one large piece and two smaller ones. Add more as you grow your eye for the space.
– Do I need to frame everything? Framed pieces feel polished, but decals and signs can be just as effective.
– How do I avoid wall damage? Use damage-free hooks or removable strips. Plan a layout first, then hang with care.
With these steps, you can bring art into your kitchen on a budget. You’ll get a space that feels like you and stays easy to refresh. The right wall art makes the room feel finished, warm, and ready for your next meal or conversation.
14. Stylish Wall Art
Editor’s Choice
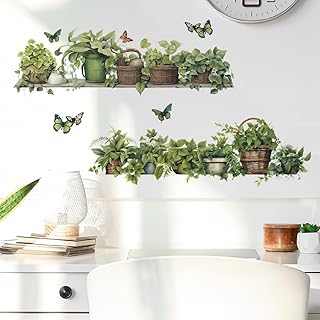
Green Plant Wall Decals 3D Bonsai Tropical Plant Betterfly Wall Sticker …

eletecpro 12×12 Picture Frames Set of 9 Classic Gallery Wall Frame Set D…

Maxdot Kitchen Metal Cutout Sign Word Wall Decor Farmhouse Kitchen Metal…
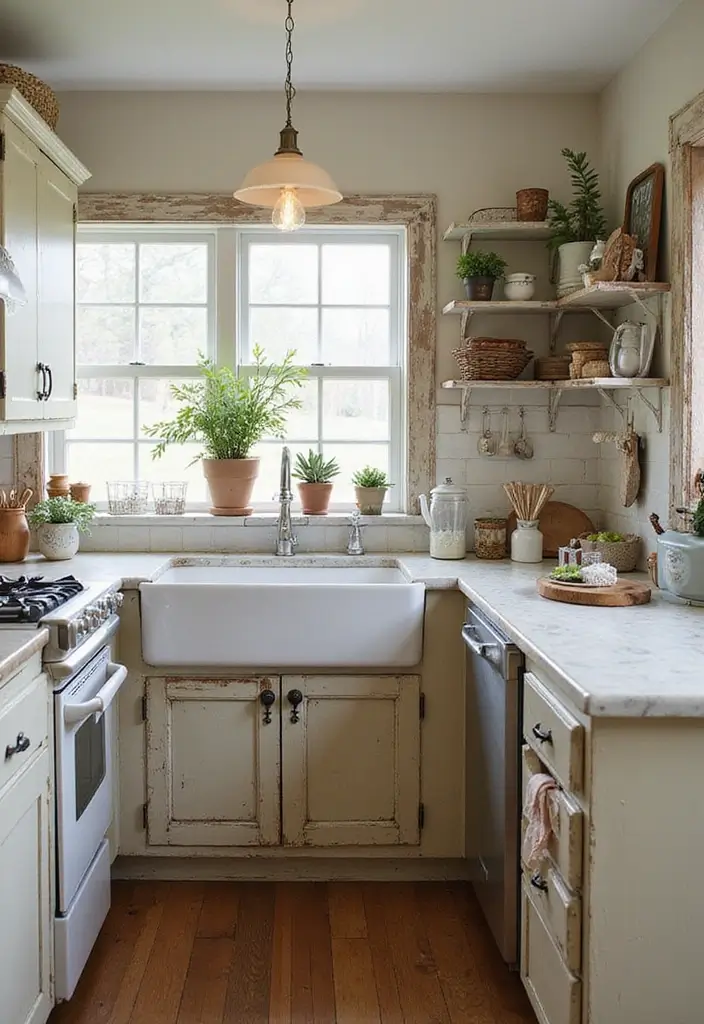
15. Refresh with Plants

You want a fresh look in your kitchen without spending a lot. Plants can do that in a simple, practical way. They add color, scent, and life to the room. You can also use some herbs while you cook. Here is why plants fit a budget kitchen.
Smart plant picks for your kitchen
– Basil and mint: Easy to grow near a sunny window. You can snip a few leaves for sauces and salads. Keep the soil moist but not soggy.
– Spider plant: A tough, forgiving plant. It handles partial light and helps brighten the space with its hanging leaves.
– Snake plant: A strong choice for busy days. It likes low light and needs little water. It keeps looking good with minimal care.
– Pothos: A trailing star for shelves or a rail. It fills empty corners and is hard to kill if you forget a watering day.
– Rosemary or thyme: Great for cooking, but they want brighter light. Put them on a sunny sill or near a bright window.
Where to place plants in your kitchen
– Window sill: A sunny spot for herbs and sun-loving greens.
– Small shelves: Add a slim shelf or two on a wall to hold several pots without taking up counter space.
– Counter edge: Place a few compact pots where you prep food so you can grab herbs quickly.
– Hanging planters: Use lightweight baskets or jars to free counter space and add vertical interest.
How to set up a neat plant display
– Use pots that match your kitchen style. A consistent color or material makes the display feel planned, not random.
– Vary heights. Put tall plants in back or on a higher shelf and shorter ones up front to create depth.
– Check drainage. Make sure each pot has a drainage hole or a tray to catch extra water.
– Create a weekly routine. Check moisture, prune dead leaves, and harvest herbs as needed.
Care basics you can count on
– Water small pots once the top inch of soil dries. Don’t wait until the soil is bone dry.
– Use good potting soil. It drains well and helps roots breathe.
– Light matters. Most kitchen plants prefer bright, indirect sun. If you lack windows, pick hardy options that tolerate lower light.
– Feed lightly. A small amount of fertilizer every month during growing season keeps herbs lush.
Budget-friendly ideas to get started
– Reuse jars, teacups, or tins as planters. Clean lines make the area look intentional.
– Start with cuttings. You can root herb stems in water and transplant them after they grow roots.
– Scout thrift shops for pots and shelves. You can find sturdy finds at low prices.
– Combine with decor. Pair plants with a backsplash color or a coordinating pot set to pull the room together.
Common pitfalls to avoid
– Overwatering. It is the most common mistake. Check soil moisture before you water.
– Too little light. Some plants stall in shade. Pick varieties that tolerate the space you have.
– Too big a plant on a busy counter. It can crowd work zones. Use narrow shelves or walls to keep space open.
Next steps to refresh your kitchen now
Choose two herbs you already use. Place them on a sunny sill. Add a small shelf for three more pots. Set a simple weekly check to water and trim. With a little care, your kitchen will feel brighter, smell nicer, and stay useful for cooking.
15. Refresh with Plants
Editor’s Choice

PERFNIQUE Indoor Herb Garden, Herb Planter for Indoor/Outdoor, Farmhouse…

Set of 2-10 Inch Hanging Planters for Indoor Plants with Self-Watering I…

Miracle-Gro Potting Mix, For Container Plants, Flowers, Vegetables, Shru…
You Might Also Like
16. Create a Coffee Corner

You want a simple way to enjoy coffee without a mess in your kitchen. A coffee corner can give you that. It creates a tidy spot, speeds up mornings, and adds a friendly touch to your home.
Here is why a coffee station helps you daily. You have everything you need in one place. You spend less time looking for cups or syrups. Your counter stays clear for other tasks. And you start each day with a small, cozy ritual.
Choose the best spot
– Put the station where you already stand to brew in the morning, near an outlet if you use an electric coffee maker.
– A sunny counter corner or a window ledge can make the ritual feel bright.
– If space is tight, consider a slim cart or a small shelf beside the fridge.
Stock the essentials
– Your coffee maker or French press is the anchor.
– Keep a set of mugs you love and a few spoons for mixing.
– Have syrups, cinnamon or cocoa, and a small jar of sugar within easy reach.
– Consider a grinder or a kettle if you use whole beans or tea for variety.
Organize with easy storage
– Use a tray to group items so everything sits neatly and moves as a unit.
– Add a mug rack or wall hooks to keep cups off the counter.
– A tiny shelf above the station holds syrups, cocoa, or a tiny plant for a personal touch.
Style it your way
– Pick materials that match your kitchen: wood and metal for a modern look, or ceramic and warm tones for a cozy feel.
– Choose a simple color palette so the space stays calm and easy to use.
– Add one small piece of art or a favorite photo to make it feel like you.
Keep it simple and practical
– Wipe spills quickly, and rotate the syrups so nothing goes to waste.
– Refill beans, grounds, and filters on a schedule that fits your mornings.
– If you share the kitchen, set a few quiet rules so the coffee corner stays clear.
Next steps. Decide on a spot today, grab a tray, and pull together your mugs and essentials. In one weekend you can turn a small corner into a real coffee station that makes every morning smile worthy. Your kitchen will feel calmer, and you will enjoy your daily ritual even more.
Start your day with a cozy coffee corner – where every cup is a moment of joy, and your kitchen stays mess-free. Because mornings deserve a little magic on a budget!
16. Create a Coffee Corner
Editor’s Choice
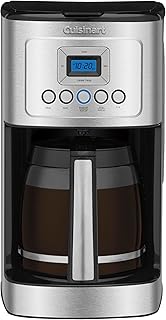
Cuisinart 14-Cup Coffee Maker, Programmable PerfecTemp Glass Carafe Coff…

Bamboo Mug Holder, 6 Hooks Coffee Mug Holders Tree, Decorative Mug Racks…

iDesign Clarity Plastic Drawer Organizer, Storage Container for Vanity, …
17. Install a New Sink
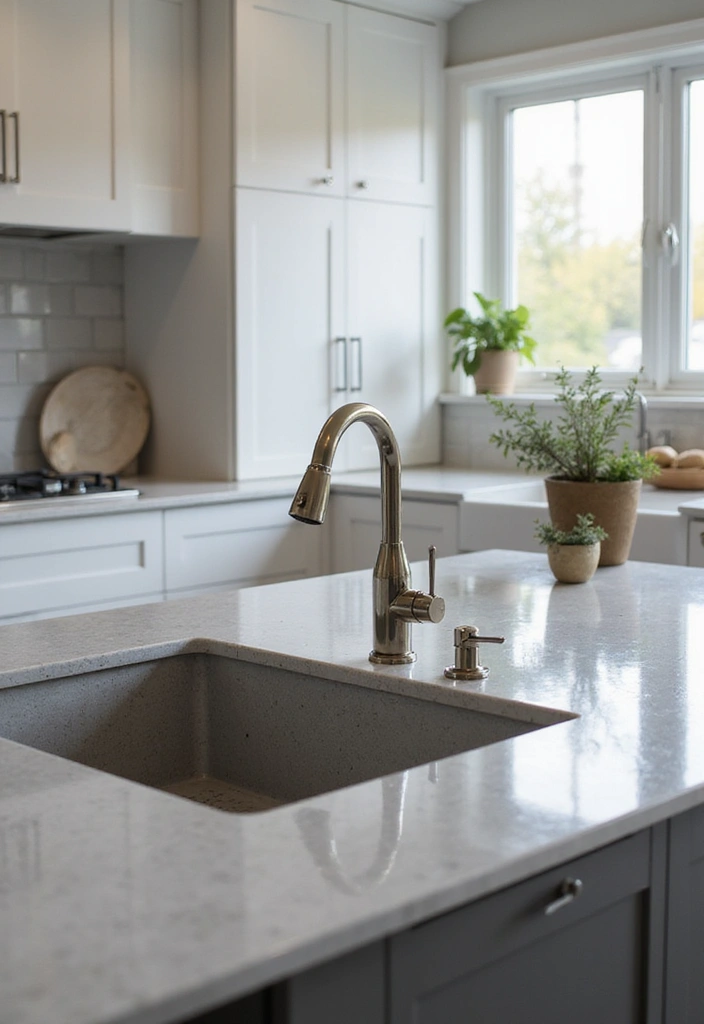
You want a sink that works better and looks fresh without blowing your budget. A good sink can speed up chores and brighten the kitchen mood.
Here is why a smart sink swap pays off.
– Choose your style: A farmhouse sink stands out with a wide front and a big basin. An undermount sink sits flush with the counter for a clean, modern feel. Pick what fits your cabinets and how you cook.
– Size and bowls: Decide on a single bowl or a double bowl. Deep bowls handle big pans and prevent splashes. If you cook often, a larger or deeper option helps a lot.
– Materials: Stainless steel lasts and cleans fast. Granite composite resists chips and stains. Porcelain looks classic but needs careful use. Think about the sound of water too.
– Budget tips: Watch for seasonal sales at local hardware stores. Check open-box deals or refurbished units with a warranty. Compare standard sizes to save on plumbing changes.
– Faucet pairing: Choose a faucet that matches the sink style. A pull-down sprayer makes cleaning easier. A brushed finish hides fingerprints and drips.
– Installation plan: You can swap a sink in a weekend with basic tools. If you see old pipes or odd gaps, call a pro. Have shutoff valves and plumber tape ready.
Next steps: measure your cabinet opening and the countertop cutout, then shop for models that fit. Bring home a sink with a durable finish and a deep basin for cooking nights and family dinners. Add sound-dampening pads and a good silicone seal to keep a tight, quiet fit.
Common questions you might have
– Will a new sink fit the cutout? Most kitchens use standard sizes, but you must measure the opening before you buy.
– Can I install it myself? If you can turn off water and lift a sink, you can try. Plan for extra hands if the sink is heavy.
– How long will it take? A typical swap takes a few hours to a weekend, depending on your plumbing.
– What about the faucet? A new sink pairs well with a matching faucet. If you keep your old faucet, check clearance and height so it still fits.
With these steps, you get a fresh look and better function without a full remodel.
Trending options for sinks give you long life and easy care. Stainless steel stays timeless and cleans easily. Granite composite offers a warm look and hides scratches. Pick a sink with built-in sound features or add a mat to quiet the wash noise.
17. Install a New Sink
Editor’s Choice
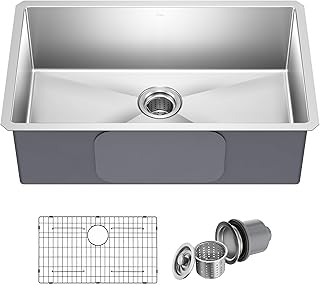
KRAUS Standart Pro 30 -inch Undermount Single Bowl 16 Gauge Stainless St…

KRAUS Quarza 31-inch Undermount Single Bowl Granite Kitchen Sink in Blac…

FORIOUS Kitchen Faucets with Pull Down Sprayer, Brushed Nickel, High Arc…
18. Repurpose Old Furniture
You want more kitchen storage without blowing your budget. Repurposing old furniture can do that. It adds a personal touch and keeps you from buying new.
Here is why this approach works. You reuse sturdy frames that are already built. A new top changes how the piece feels. You can tailor it to fit your space exactly.
Here is how to get it right in seven steps.
– Step 1: Inspect your space and plan. Measure width, depth, and the clearance you need for doors and drawers.
– Step 2: Pick pieces that fit. Dresser bases, sideboards, tables, and bookshelves can become kitchen helpers.
– Step 3: Decide the new job. Use a dresser as a kitchen island, a nightstand as a plant stand, or a bookshelf as open pantry storage.
– Step 4: Prep the furniture. Remove old hardware. Sand rough spots. Clean grime. Chalk paint is a good option for an easy, matte finish.
– Step 5: Add a solid top. Attach a butcher block, a wood slab, or a laminated panel to create a real counter feel.
– Step 6: Make it steady. Add brackets or legs, or mount wheels to keep it firm. Check it from all angles for wobble.
– Step 7: Finish with small style touches. Update knobs and pulls. Seal the surface with a clear coat. Place a tray, a plant, or baskets for quick storage.
Now try these ideas.
– Dresser turned island: remove the middle drawer front to create a true counter space, top with butcher block, and leave the sides open for storage.
– Nightstand plant stand: lower height makes a cozy spot for herbs or small plants near the sink.
– Bookcase pantry: a tall open shelf between walls holds canisters, jars, and dry foods.
– Bench seating with a small station: a bench for seating plus a slim shelf for spices makes a tiny work zone.
Tips to guide you.
– Chalk paint gives a friendly finish that is easy to apply.
– Mix vintage pieces with modern finishes to keep the kitchen warm.
– Measure twice before you cut or drill; plan the layout first.
What to watch out for.
– Heavy pieces near heat need careful placement and a sturdy top.
– Check weight limits and secure tall pieces so they won’t tip.
– If you feel unsure, ask a pro to help with mounts or top installs.
Next steps. Start with one piece you already own, test its fit, and go from there.
18. Repurpose Old Furniture
Editor’s Choice

Rust-Oleum 206540 Chalkboard Brush-On Paint, 30 oz, Black
Bme Hevea Solid Wood Butcher Block Countertop, Unfinished Butcher Block …

Blingstar L Bracket Stainless Steel Corner Brace 16 Pcs 1.57×1.57 Inch J…
19. Consider DIY Art Projects
If your kitchen feels like it needs a personal touch but your budget is tight, DIY art can be your best friend. Art that you make yourself adds warmth and a story to the room without costing a lot. You get to choose colors, textures, and themes that speak to you.
Here is why DIY art fits a small budget and a busy life. It uses simple materials. It shows your taste with no big price tag. It also makes your space feel unique instead of cookie-cutter. Best of all, you can create and hang art in a weekend.
– Framed recipe gallery
Gather 3 to 5 favorite recipes or printouts. Use lightweight frames from a thrift shop or dollar store. Mount the pages on thin foam board so they sit cleanly inside the frames. Arrange the frames in a tidy grid on a kitchen wall. This creates a warm, personal wall that celebrates your cooking.
– Typography art on canvas
Pick a short cooking quote or your family motto. Print it in a bold, easy-to-read font. Tape the print to a plain canvas or a cheap pre-stretched canvas. Paint a simple background if you like. Tie the colors to your cabinets or countertops for a cohesive look.
– Chalkboard wall art
Paint a small panel with chalkboard paint or hang a tiny chalkboard. Use it for weekly menus, notes, or doodles. This is practical and playful. Your family can add ideas and share how a dish tasted.
– Herb and botanical art
Press small herb leaves or flowers between parchment and a heavy book. Once dry, mount the pieces in a shallow frame or on a wood panel. A few natural greens bring life to the kitchen, and they smell nice too.
– Upcycled kitchen panels
Repurpose old cutting boards or wooden scraps into wall art. Sand them smooth, then stencil a simple design or paint a color block. Seal with a clear spray to keep moisture at bay. The result is rugged, warm, and affordable.
What supplies make these ideas doable for beginners? Look for affordable frames, canvas packs, lightweight boards, chalkboard paint, and a few basic art tools. You can mix and match ideas to fit your space and style. If you prefer a quick start, try the framed recipe gallery first. It has a strong impact and is easy to update as you collect new favorites.
Next steps: pick one project that matches your mood this week. Gather the cheap frames or boards, art supplies, and a few favorite recipes. Set aside a couple of hours, and start creating. Your kitchen will feel new, and you will own the look you see every day.
DIY art isn’t just affordable; it’s a personal expression! Infuse your kitchen with warmth and uniqueness, because the best stories are those you create yourself.
19. Consider DIY Art Projects
Editor’s Choice

Fixwal Picture Frames Set, 15 Pack Black Picture Frames Collage Wall Dec…

Stretched Canvas for Painting – 8×10 Inch/20 Canvas Value Pack – Triple …
Rust-Oleum 206540 Chalkboard Brush-On Paint, 30 oz, Black
20. Make a Statement with a Feature Wall

Want a standout kitchen without tearing things apart? A feature wall can do the job. It adds drama and personality on one wall, not the whole room. It keeps costs low and effort simple. You get a strong focal point you can enjoy every day.
– Pick the right wall. Start with the wall you see first when you enter. This wall becomes the kitchen’s main stage. Keep the other walls calm so the space doesn’t feel crowded.
– Choose paint or wallpaper. A bold color gives instant impact. Pick a shade that fits your cabinets, counters, and hardware. If you love pattern, try a kitchen-friendly wallpaper with a washable finish. A small repeat or geometric works well in busy spaces.
– Get clean lines. Use painter’s tape to mark edges. Press the tape down to seal the edge. Apply thin coats and let them dry fully. Peel the tape while the edge is still just a bit tacky for a sharp line.
– Add a practical twist. Think magnetic walls or a chalkboard panel. A magnetic setup can hold notes, utensils, and magnets. A chalkboard wall gives you space for menus, grocery lists, and kid helpers. Both options add daily use without extra furniture.
– Boost storage with style. Mount a couple of floating shelves for spices, jars, or a small plant. Add hooks for aprons, mugs, or pots. This extra storage helps keep counters clear and the look tidy.
20. Make a Statement with a Feature Wall
Editor’s Choice

HAOKHOME Peel and Stick Wallpaper Boho Green/White Eucalyptus Leaf Flora…

4 Rolls Premium Painters Tape, Blue Tape, Masking Tape, Paint Tape for M…

BAYKA Floating Shelves for Wall, Wall Mounted Rustic Wood Shelves for Ba…
Conclusion
Renovating your kitchen on a budget is not only feasible but can also be incredibly rewarding.
These 20 ideas prove that with a little creativity and elbow grease, you can achieve amazing results without spending a fortune. Whether you opt for small changes or larger projects, remember that your kitchen should be a reflection of your personality and style.
So roll up your sleeves, let your creativity flow, and start transforming your kitchen today!
Note: We aim to provide accurate product links, but some may occasionally expire or become unavailable. If this happens, please search directly on Amazon for the product or a suitable alternative.
This post contains Amazon affiliate links, meaning I may earn a small commission if you purchase through my links, at no extra cost to you.
Frequently Asked Questions
What are some cost-effective ways to remodel my kitchen without spending a fortune?
You can transform your kitchen on a budget with several affordable ideas! Start by painting your cabinets for a fresh look, or consider installing open shelving to create an airy feel. Updating fixtures and revamping your backsplash are also great ways to make a big impact without a big price tag. Embrace creativity and think outside the box!
How can I make my small kitchen feel larger on a budget?
Making a small kitchen feel larger is all about smart design choices. Consider installing open shelving to free up wall space and create an illusion of openness. Light colors on walls and cabinets can also brighten the space. You might also want to incorporate smart storage solutions to declutter and maximize every inch!
What inexpensive materials can I use for kitchen countertops?
For a budget-friendly kitchen remodel, look into materials like laminate, butcher block, or even concrete. These options can achieve a stylish look without breaking the bank. Each material has its own charm, so pick one that suits your style while keeping costs down. Don’t forget to explore DIY options for even greater savings!
Are there any quick DIY projects to enhance my kitchen’s appeal?
Absolutely! Quick DIY projects can dramatically enhance your kitchen’s appeal. Consider creating a coffee corner or a cozy breakfast nook to make the space more inviting. You can also try DIY art projects or refreshing your kitchen with plants to add life and color without much effort or expense!
How do I choose budget-friendly decor for my kitchen remodel?
Choosing budget-friendly decor is all about creativity and resourcefulness. Start by selecting colorful dishware or stylish wall art that reflects your personality. Look for second-hand furniture that you can repurpose or give a fresh coat of paint. Remember, small touches can make a huge difference, so have fun mixing and matching!
Related Topics
kitchen remodel
budget friendly
affordable decor
DIY projects
small spaces
eco-friendly options
smart storage
quick updates
home improvement
modern design
easy renovations
stylish accents
")


These kitchen remodel ideas are amazing! I love how you can transform a space without breaking the bank. What’s your favorite budget tip for a DIY project?
I tried a budget kitchen makeover last year and ended up painting my cabinets bright yellow. Let’s just say my friends now call it ‘the banana kitchen!’ 😂
Did you know that the average kitchen remodel costs around $25,000? It’s crazy how much you can save with these budget-friendly ideas!
I once tried to install a backsplash myself, and let’s just say it turned into a bonding experience with my neighbor who had to come rescue me! Have you ever had a DIY project go hilariously wrong?